4 Color Process Paperboard with Production at Sonoco

The Overview
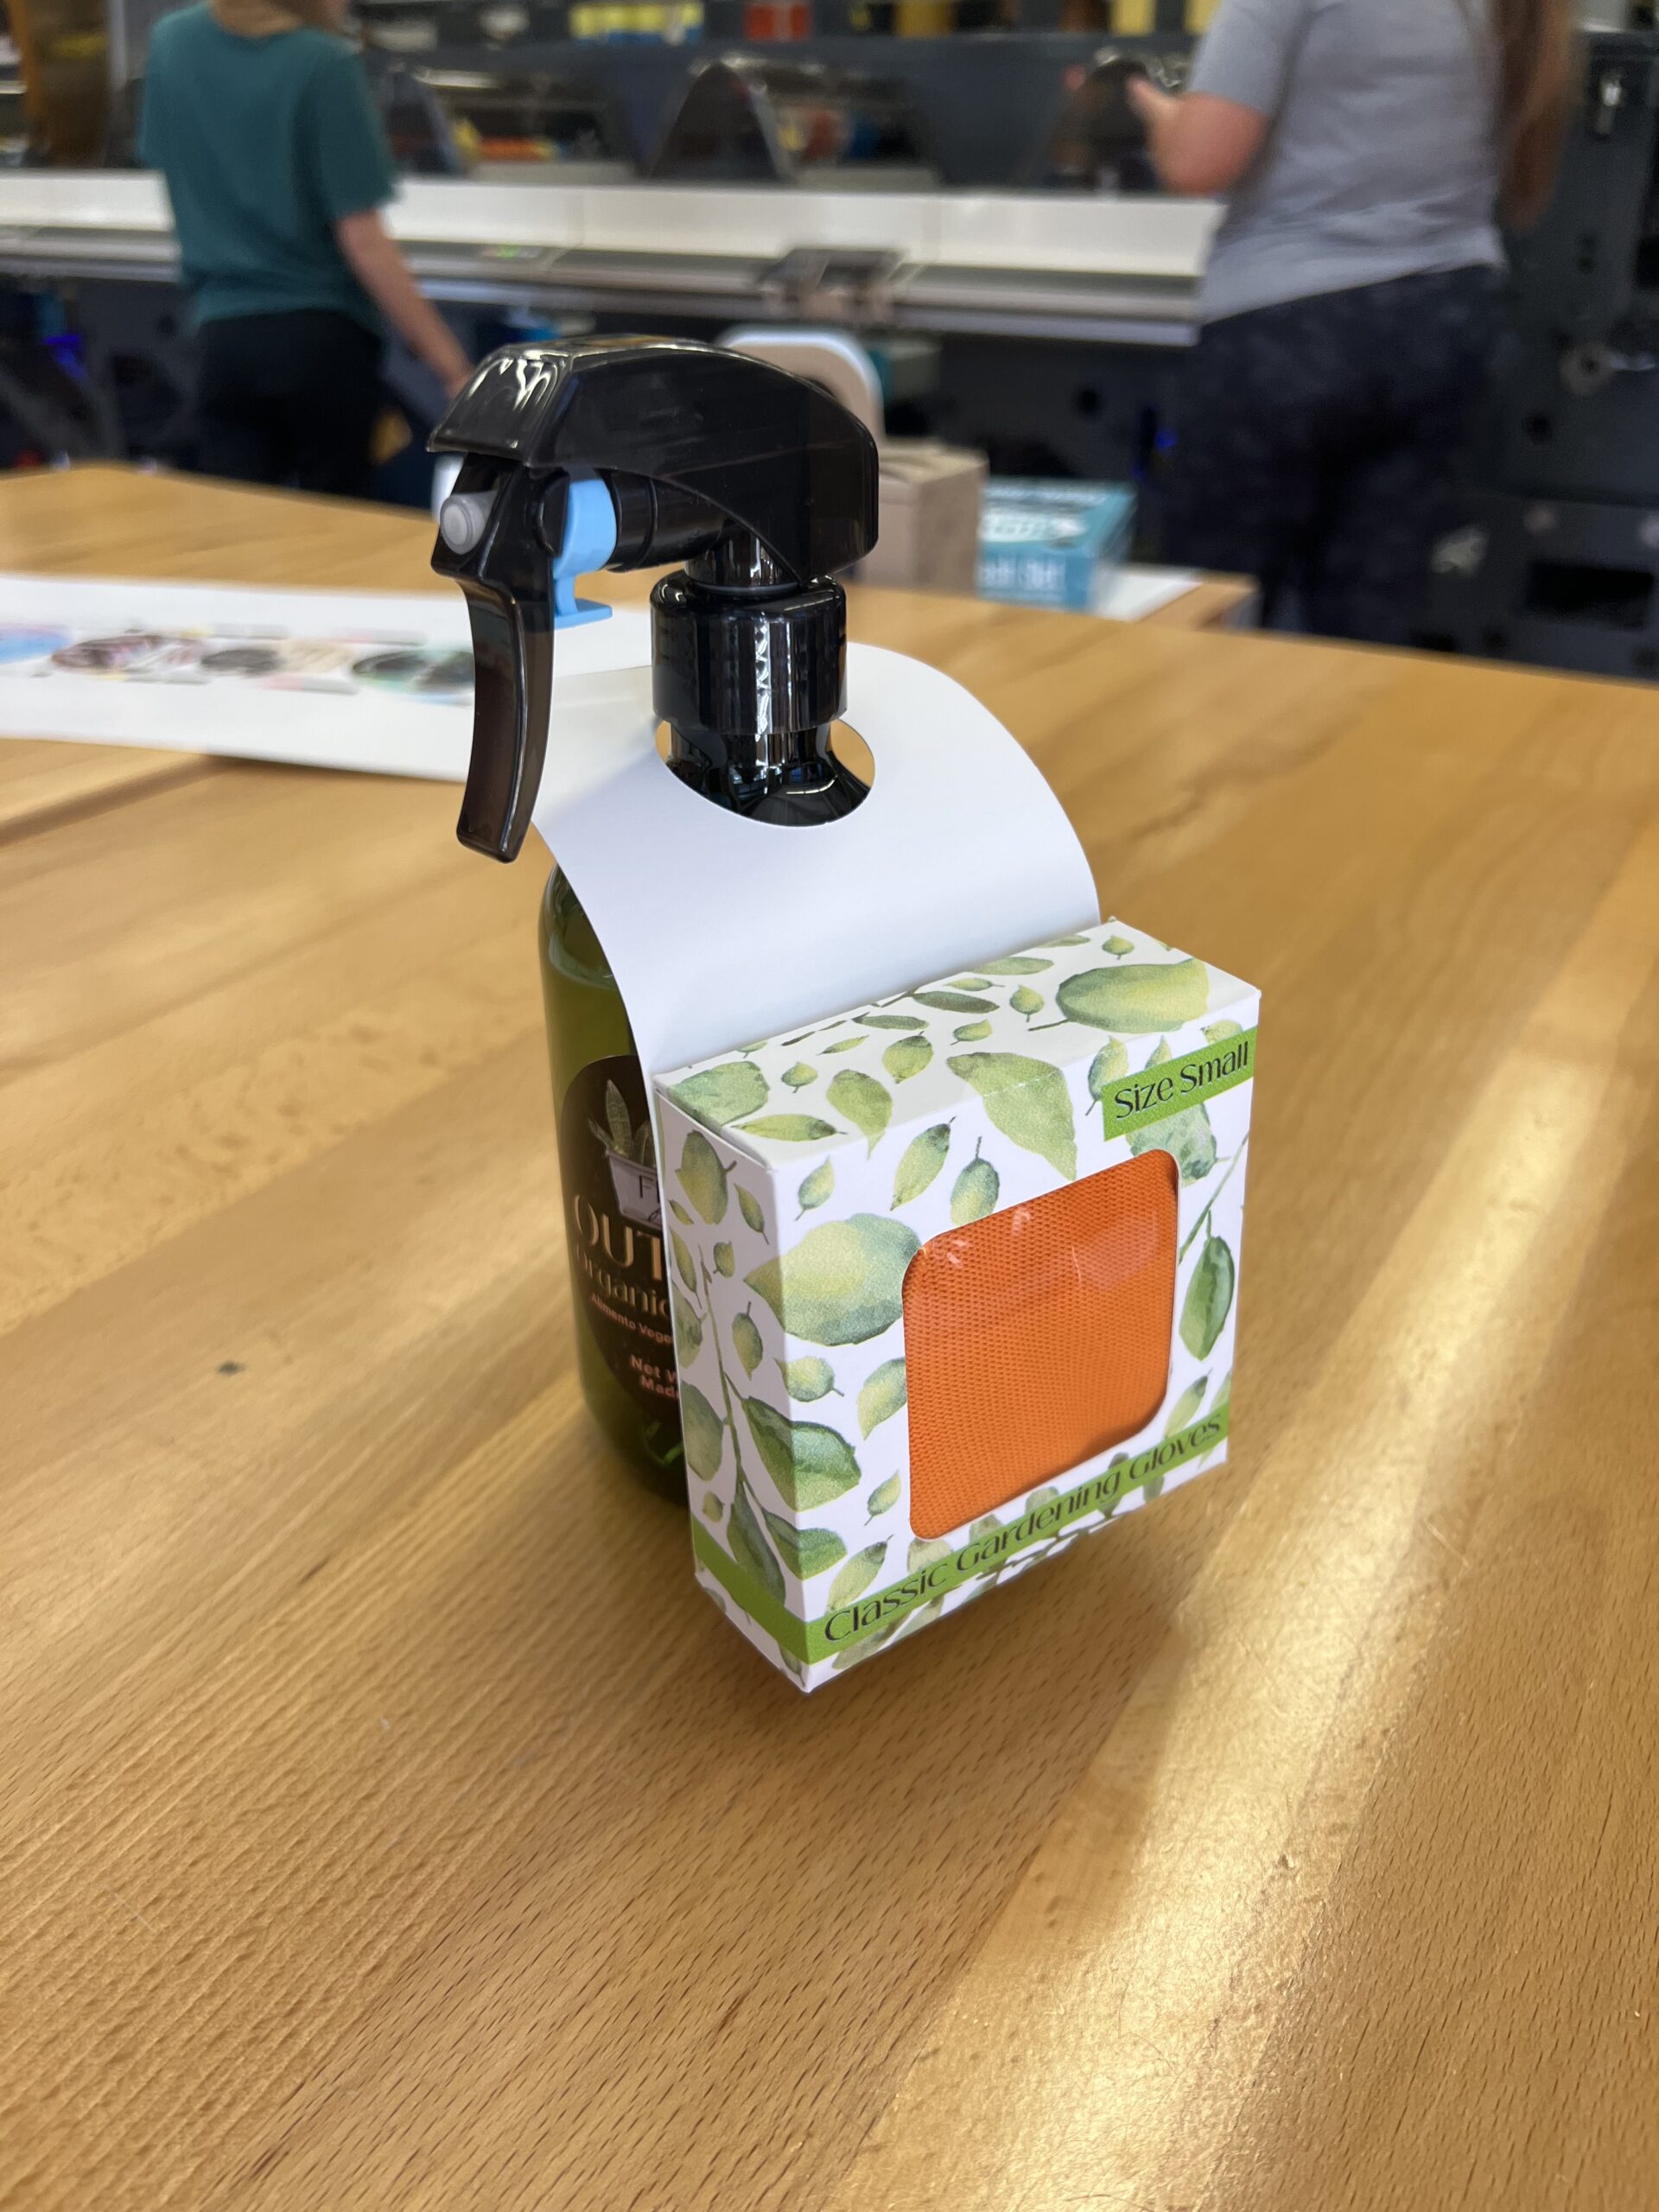
The third project of the course was a 4 color paperboard project that was assigned with the objective of creating and developing a successful package design to hold your product or a product related to your assigned item incorporating your assigned colors. After creation, design, and proofing, the actual final paperboard box will be printed and cut at the Sonoco Institute in the Prototyping lab on Clemson’s campus. We were instructed at the beginning of the semester to decide what our paperboard would look like as well as how it would be executed. I decided to create a small paperboard box that would house gardening gloves. The gloves would also double as my specialty print which is another project of the course. The paperboard box will include an opening that would allow the box to be attached to the actual Flourish Fertilizer bottle. The bottle, with paperboard box and specialty print gloves inside were intended to be sold as a bundle on the shelf of a gardening supply store as a marketing device to attract customers to the product.
Design, Proofing, & Preflighting
The design of the paperboard began not necessarily with the visual elements of the aesthetic part of the box, but rather with the actual box itself. We were tasked with creating our own template of the box as well as the visual appeal of the box. I began with a sketch on my iPad of what I was envisioning, the overall picture so I could have my thoughts written down.
After that rough sketch, I began designing the box in Adobe Illustrator using shapes with strokes to piece the box together for what I was envisioning. After I was happy with the box design, I printed it out on the Konica Minolta in the lab and cut it out roughly with scissors. I did this step in order to visualize the box all together and to see if there needed to be any corrections. The overall box looked great, the folds were where they needed to be and the box fit together perfectly. The adjustments I made at this point in the process were to decrease the size of the opening on the front of the box to make it stronger and make the entire width of the box larger in order to better fit a pair of garden gloves. After those adjustments, I again printed and cut out the box to make sure everything went together nicely.


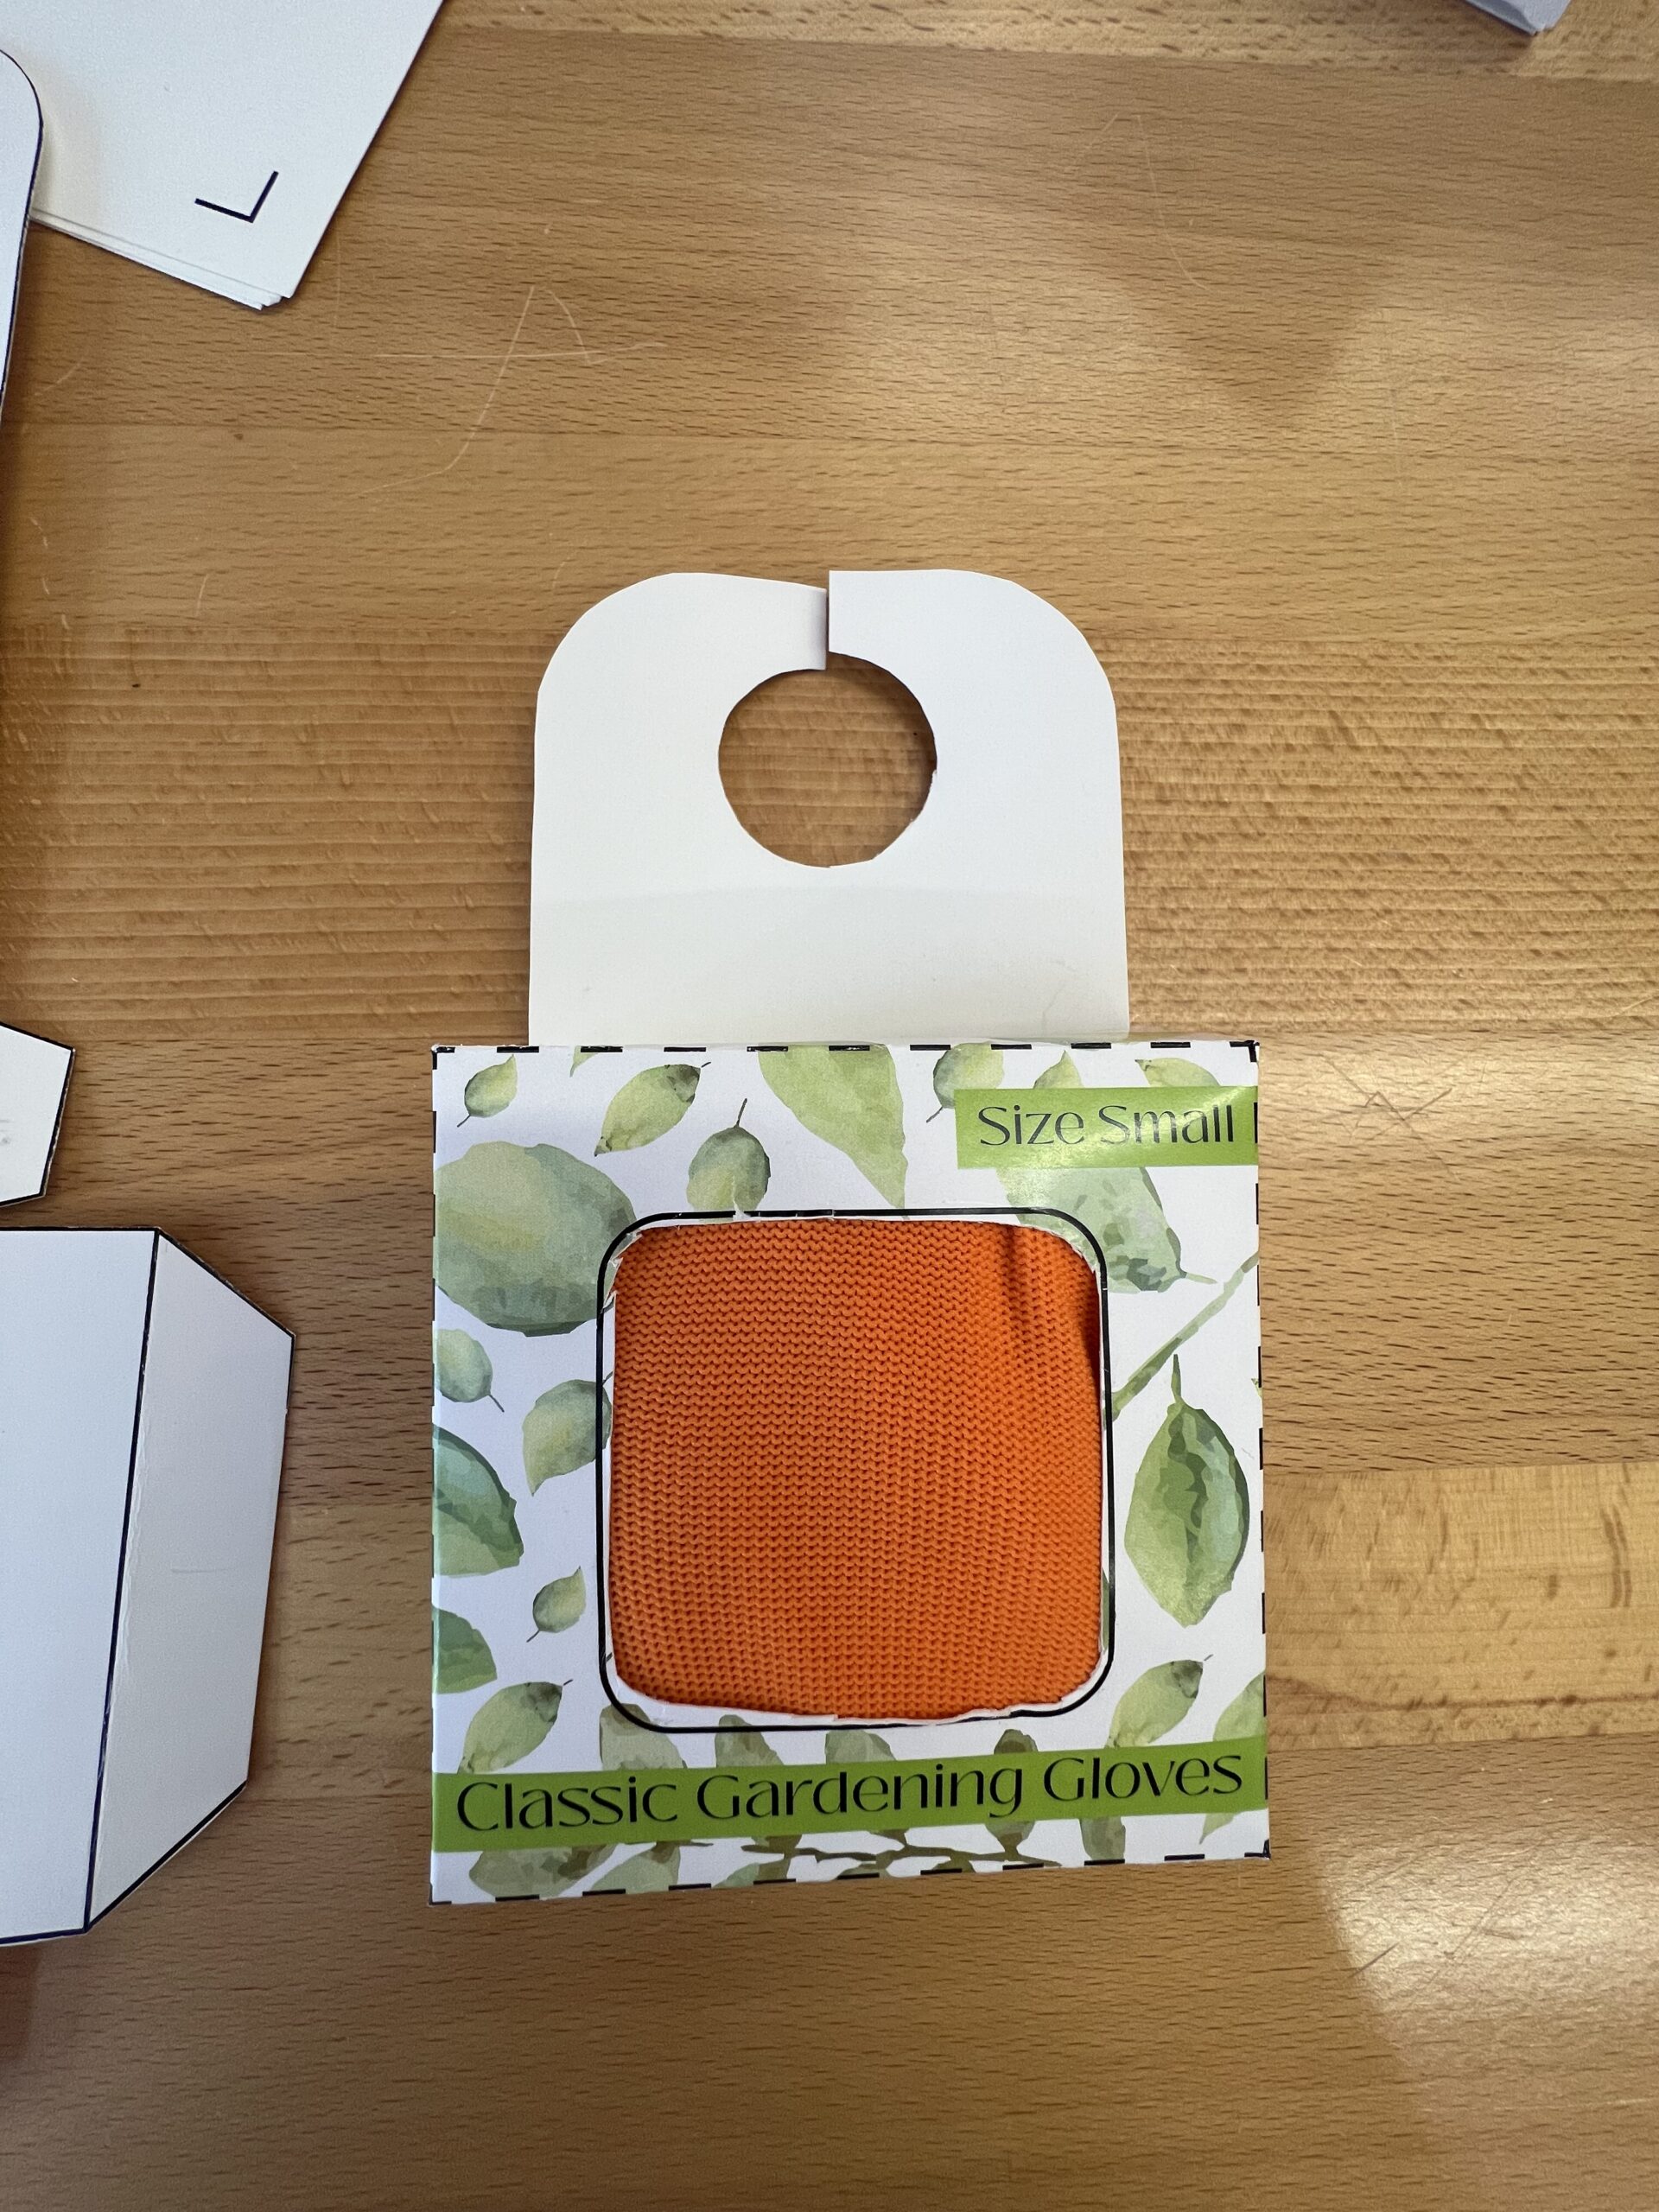
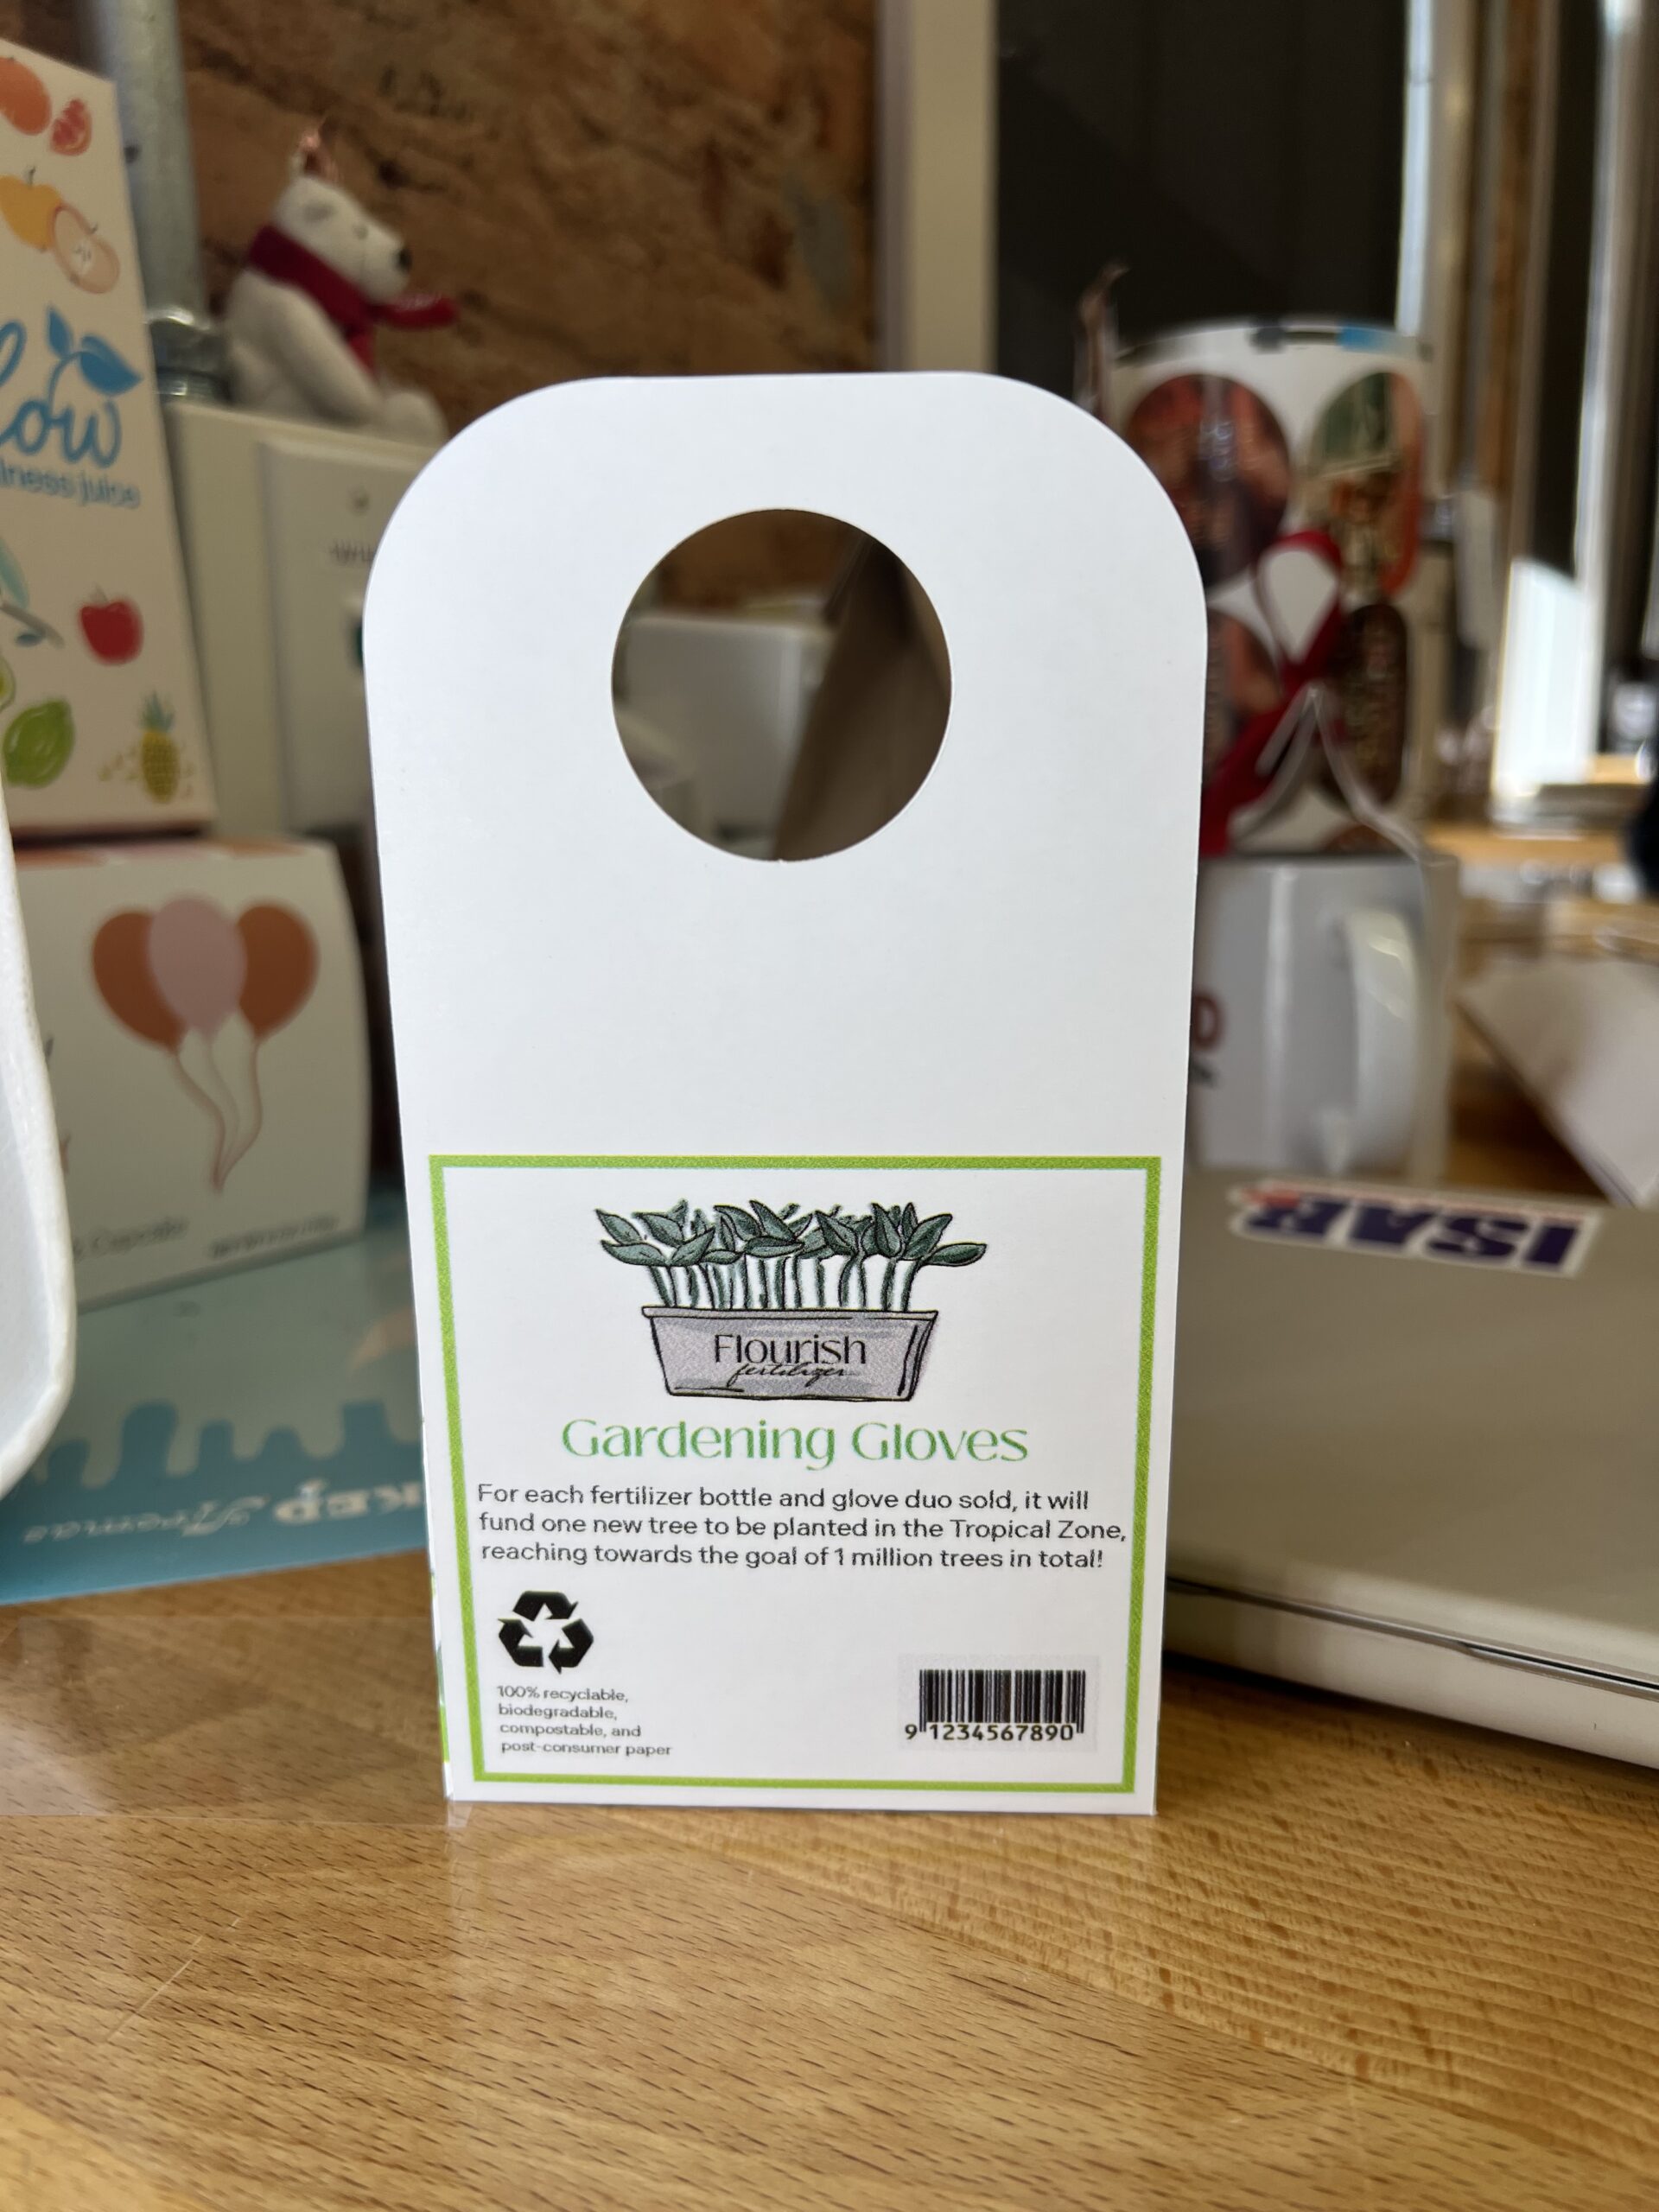
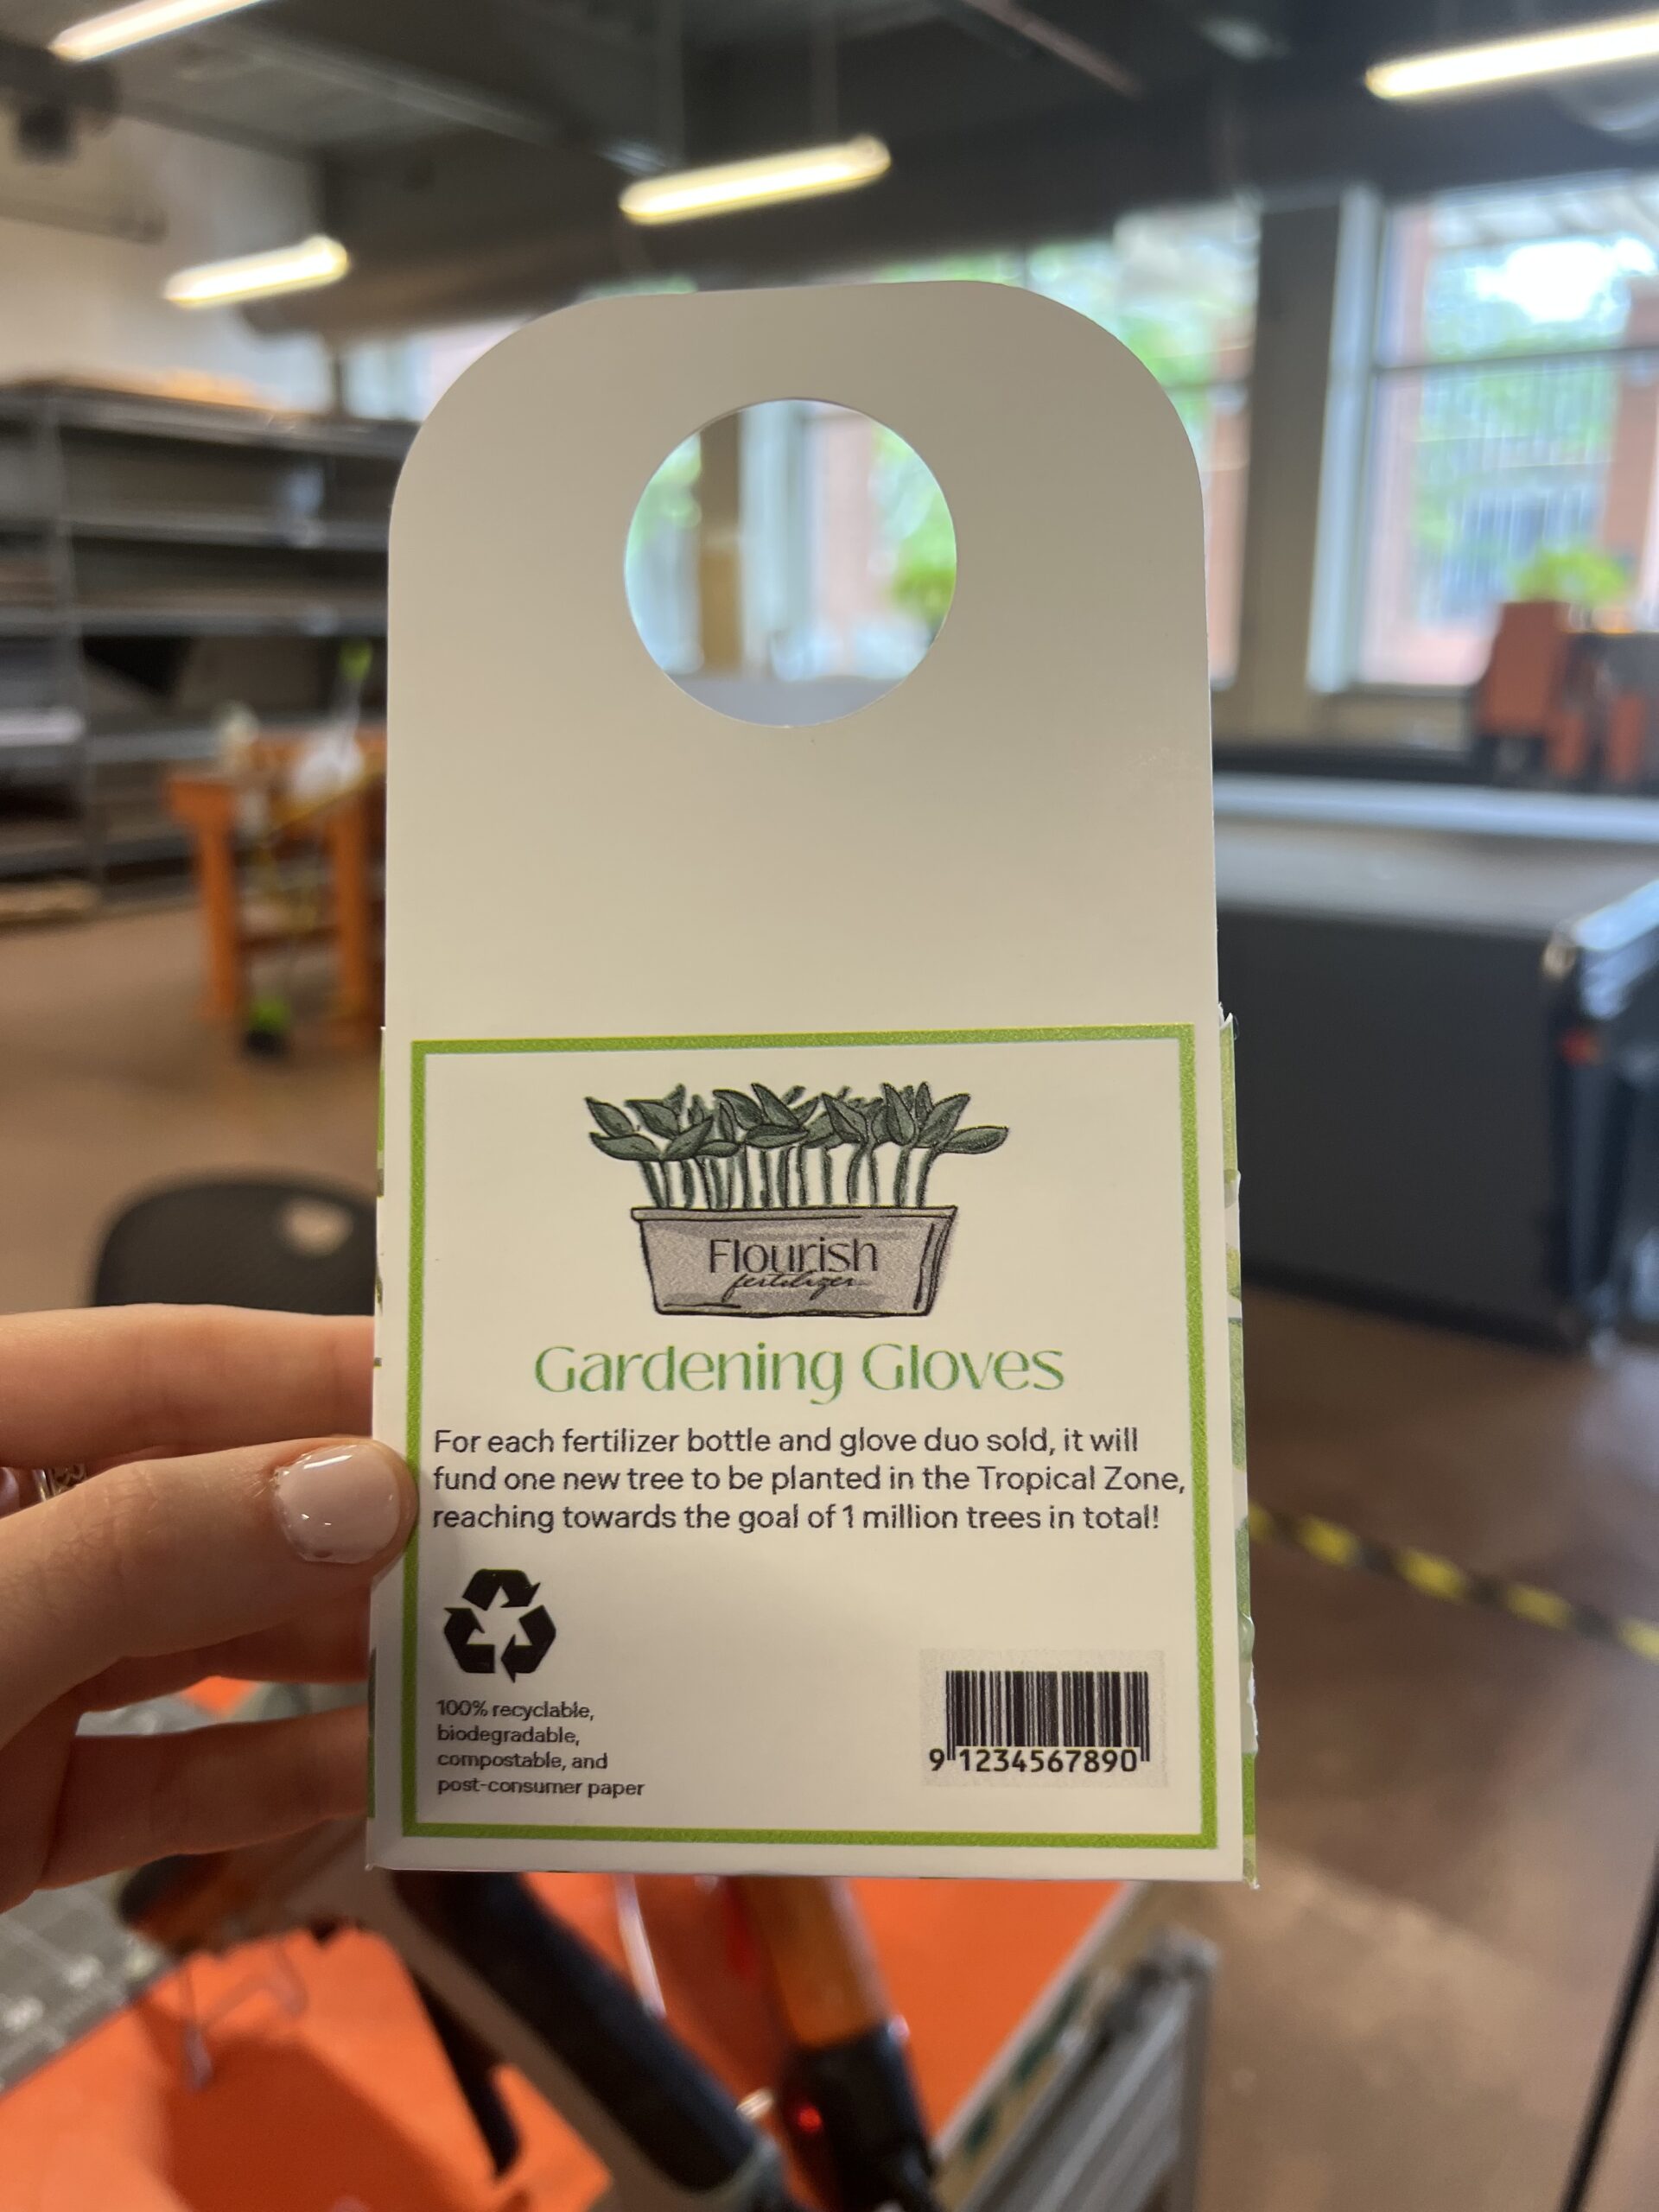
After I knew the box proportions were correct and everything fit together, it was time to create the actual design of the box visually. I wanted the box to be simple so that the labels of the actual fertilizer bottle would still be noticed while on the shelf. I decided to create a pattern from a few different green leaves I created in illustrator. I basically just copy and pasted several of each leaf and then put them all together arranging them in different angels and sizes until I was happy with the pattern I created. After that I just created a clipping mask to make the pattern just the size of the box I had created. After that I began designing the back of the box from the sketch I drew. I knew the bad was where the majority of information would go since the front was smaller and there was a cut out there too. The back was adorned with a barcode as well as the Flourish Fertilizer logo and an incentive to buying this particular fertilizer. The incentive was that if this bottle and glove set was purchased there would be a tree planted in the Tropical Zone to honor the purchase. The box is also recyclable and biodegradable which is another important factor I made sure to incorporate on the box itself. The finishing touch was adding the title of the product “Classic Gardening Gloves” and the size of the gloves to the front of the paperboard. After the design was complete, I again printed out a paper proof and constructed the box together.

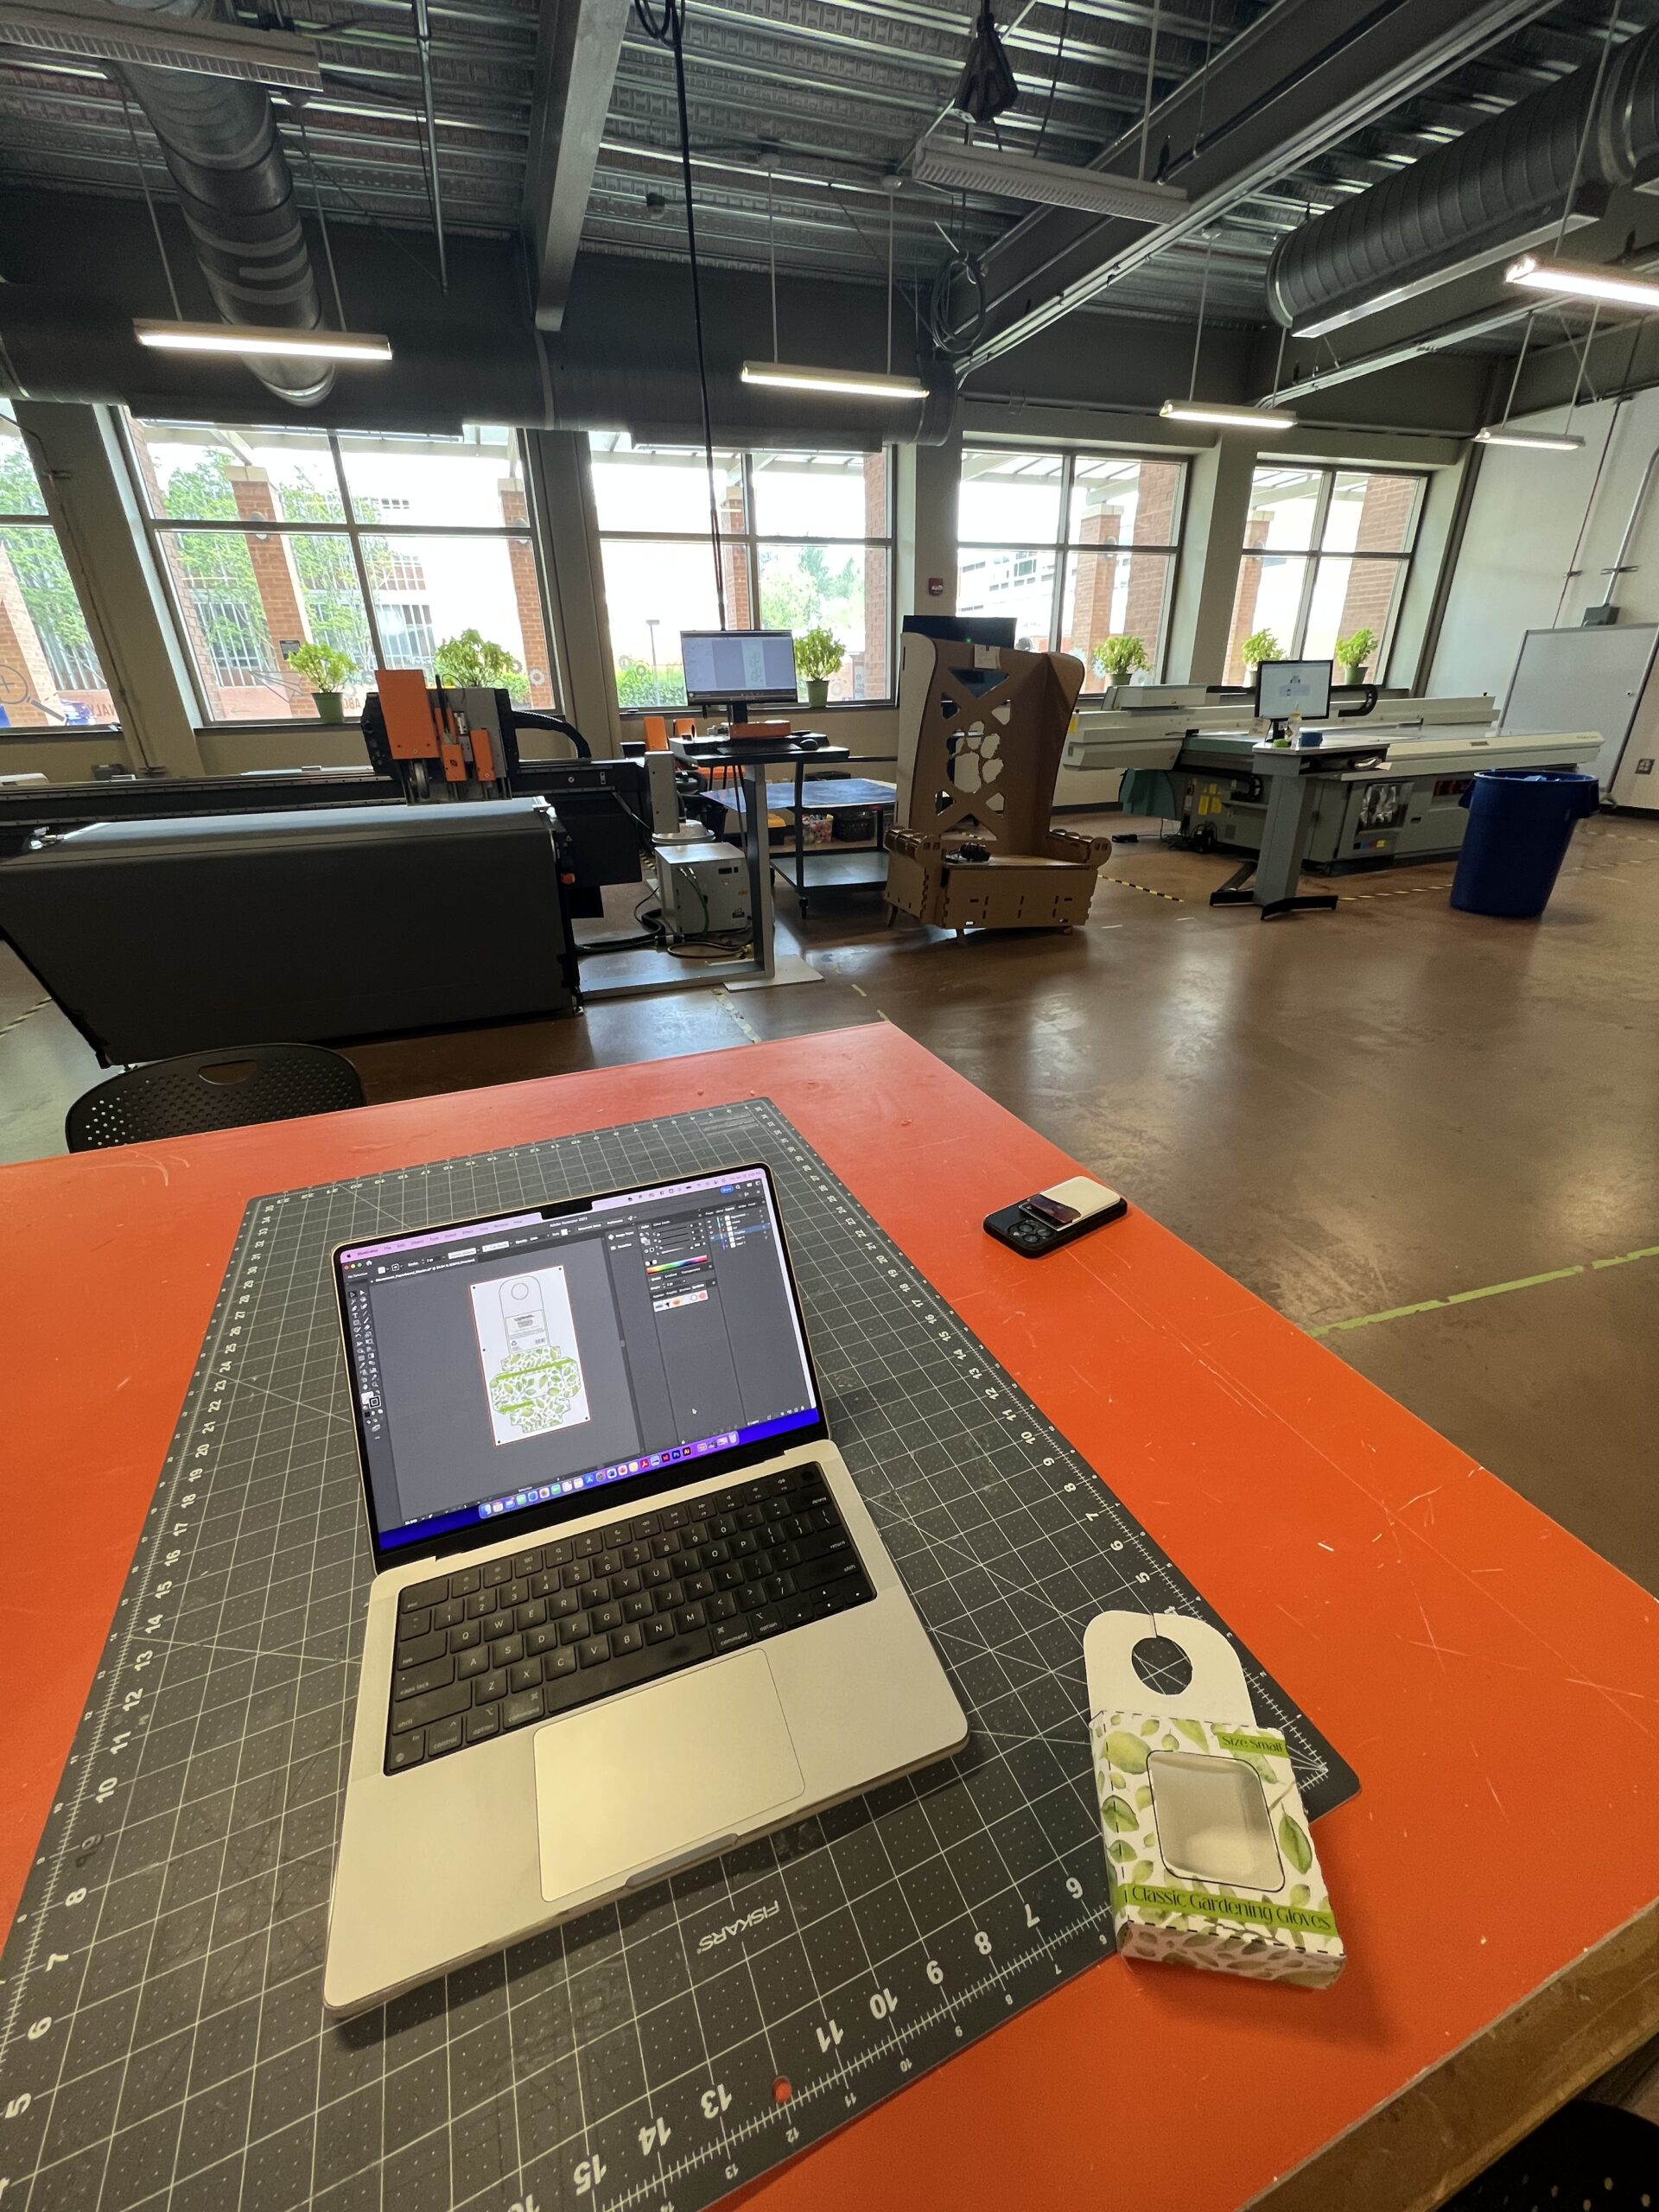
At this point in the process, it was time to make an appointment at the Sonoco Institute at Clemson for the Prototyping Lab. For this, I made an appointment for a one-sided print and cut paperboard project. After my appointment was approved, I began to prep my illustrator file for production.
The Prototyping lab gives instructions for preparing your file and they are very simple. All you have to do is add five 0.24-inch black circles to your artwork as registration marks. Four of the circles go in each corner with the fifth going anywhere you desire. After that, make sure that you create separate layers for each element: registration marks, artwork, cut marks, and crease marks. There should be 4 layers total. Then save a copy of the file that is known as the master file. Next, delete the artwork layer completely and save a copy of the file known as the cut and crease file. After that undo the deletion of the artwork and delete the cut and crease layers of the file. Save a copy of this version as the artwork file or the print file. After that un do the deletion of the cut and crease marks and save the master file just how it was originally. After this, you are ready to attend the Prototyping lab in person for your appointment.

Sonoco Prototyping Lab Appointment Printing and Cutting
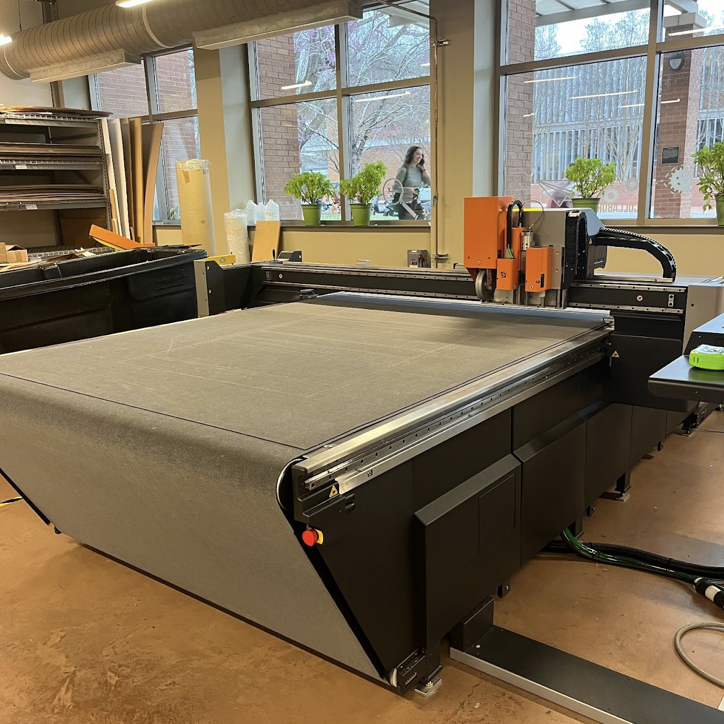
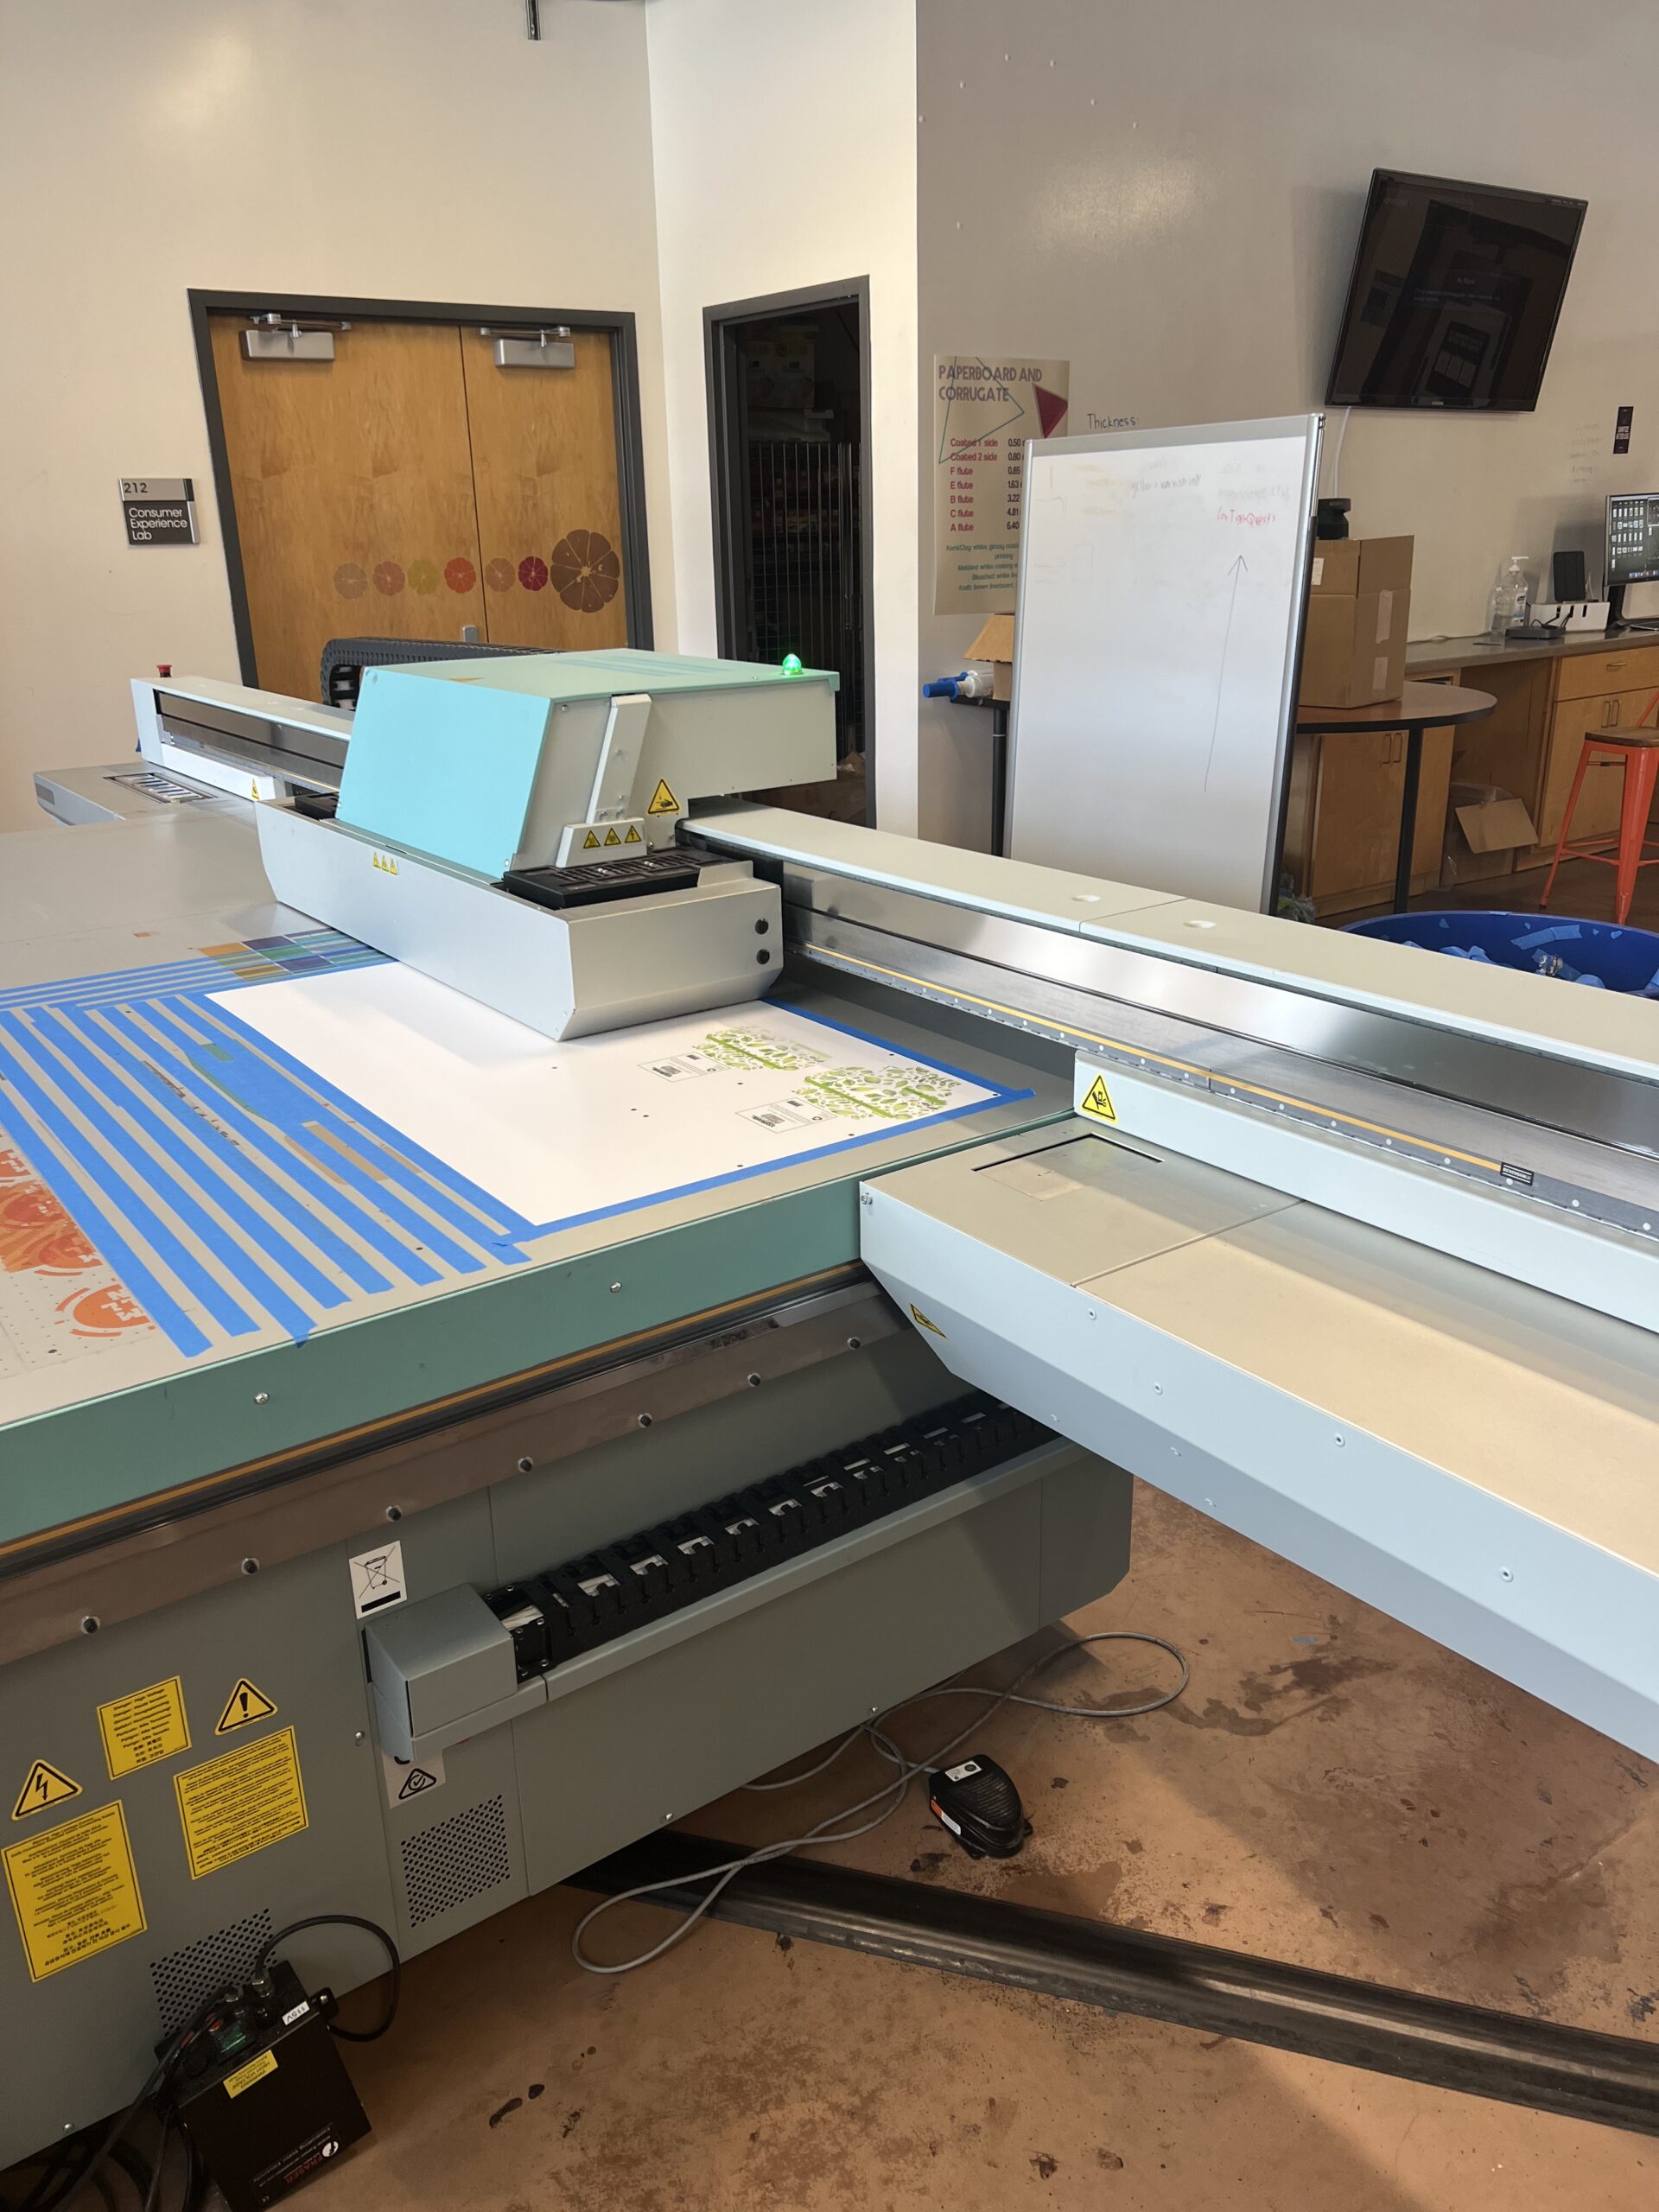
My appointment at the lab went very smooth. Upon arrival I was greeted by an intern working at the lab and I emailed my master, cut, and print files all to the lab computer. After that, it was time to print the artwork file on the Fujifilm Acuity Select 20 printer. This is a digital printer that has a zoned vacuum flatbed, new pin registration system, and up to 8 color channels.


The Fujifilm Acuity utilized the uniquely formulated UVijet inks to print vibrant colors. I taped down a piece of blank paperboard substrate and turned on the vacuum. On the lab computer I opened the print file of my paperboard and told it to print three copies. Once that was complete, we let the Fujifilm complete the printing fully.

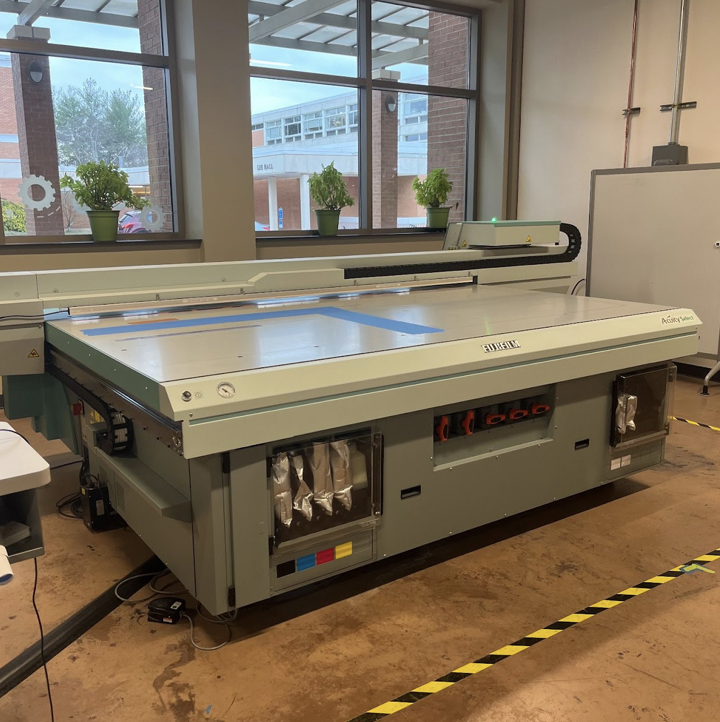
After the printing of the artwork was complete, I removed the paper from the printer and then placed it on the bed of the Esko Kongsberg C cutting table. This table is designed to be very fast and widely versatile. It is the first multifunction super wide digital finisher for display, paperboard, and packaging applications and we are lucky enough to have one on campus!
Once the printed piece of substrate was laid down, we opened the cut and crease file and told the machine to begin. This machine creases each paper board and then cuts it out. After each one is finished, I reprogramed the Esko to crease and cut the second box, and then the third box. This is where the registration dots come in handy, as the Esko located those dots before creasing or cutting in order to know exactly where to make the crease and cut marks. The Esko successfully cut out each of my boxes and now it was time to assemble them together.

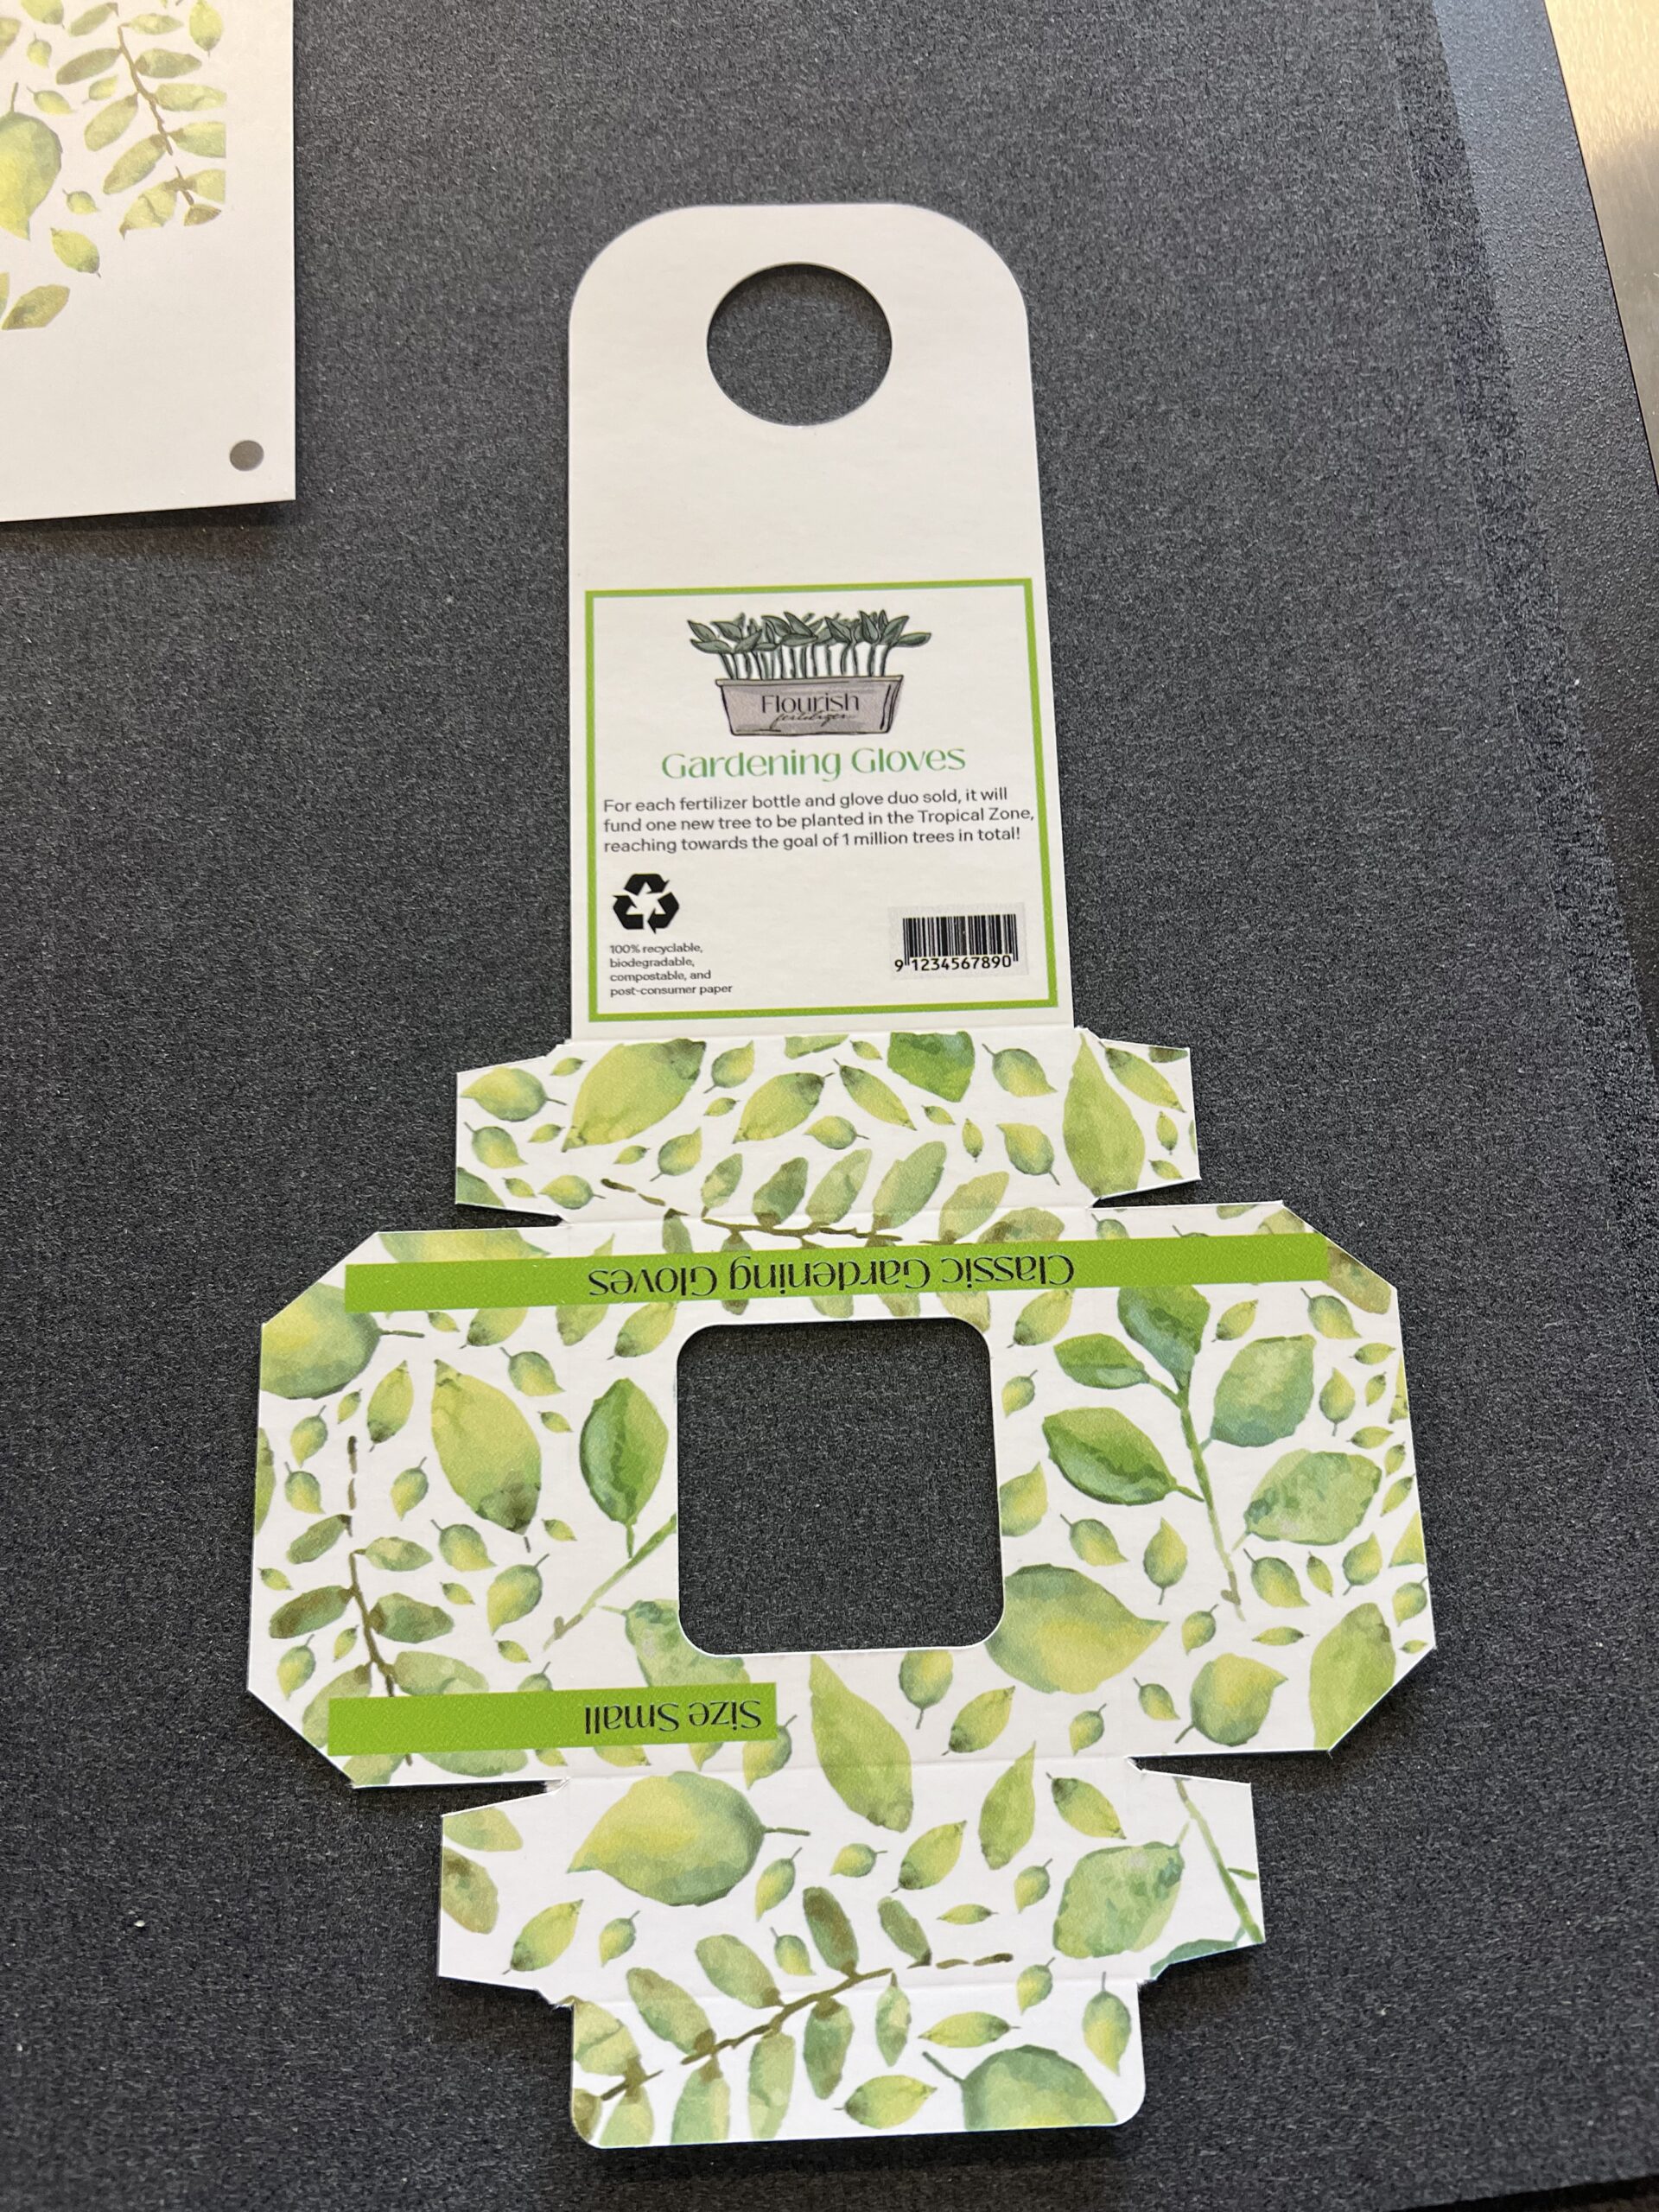
This is one of the printed and cut paperboards before being glued together.
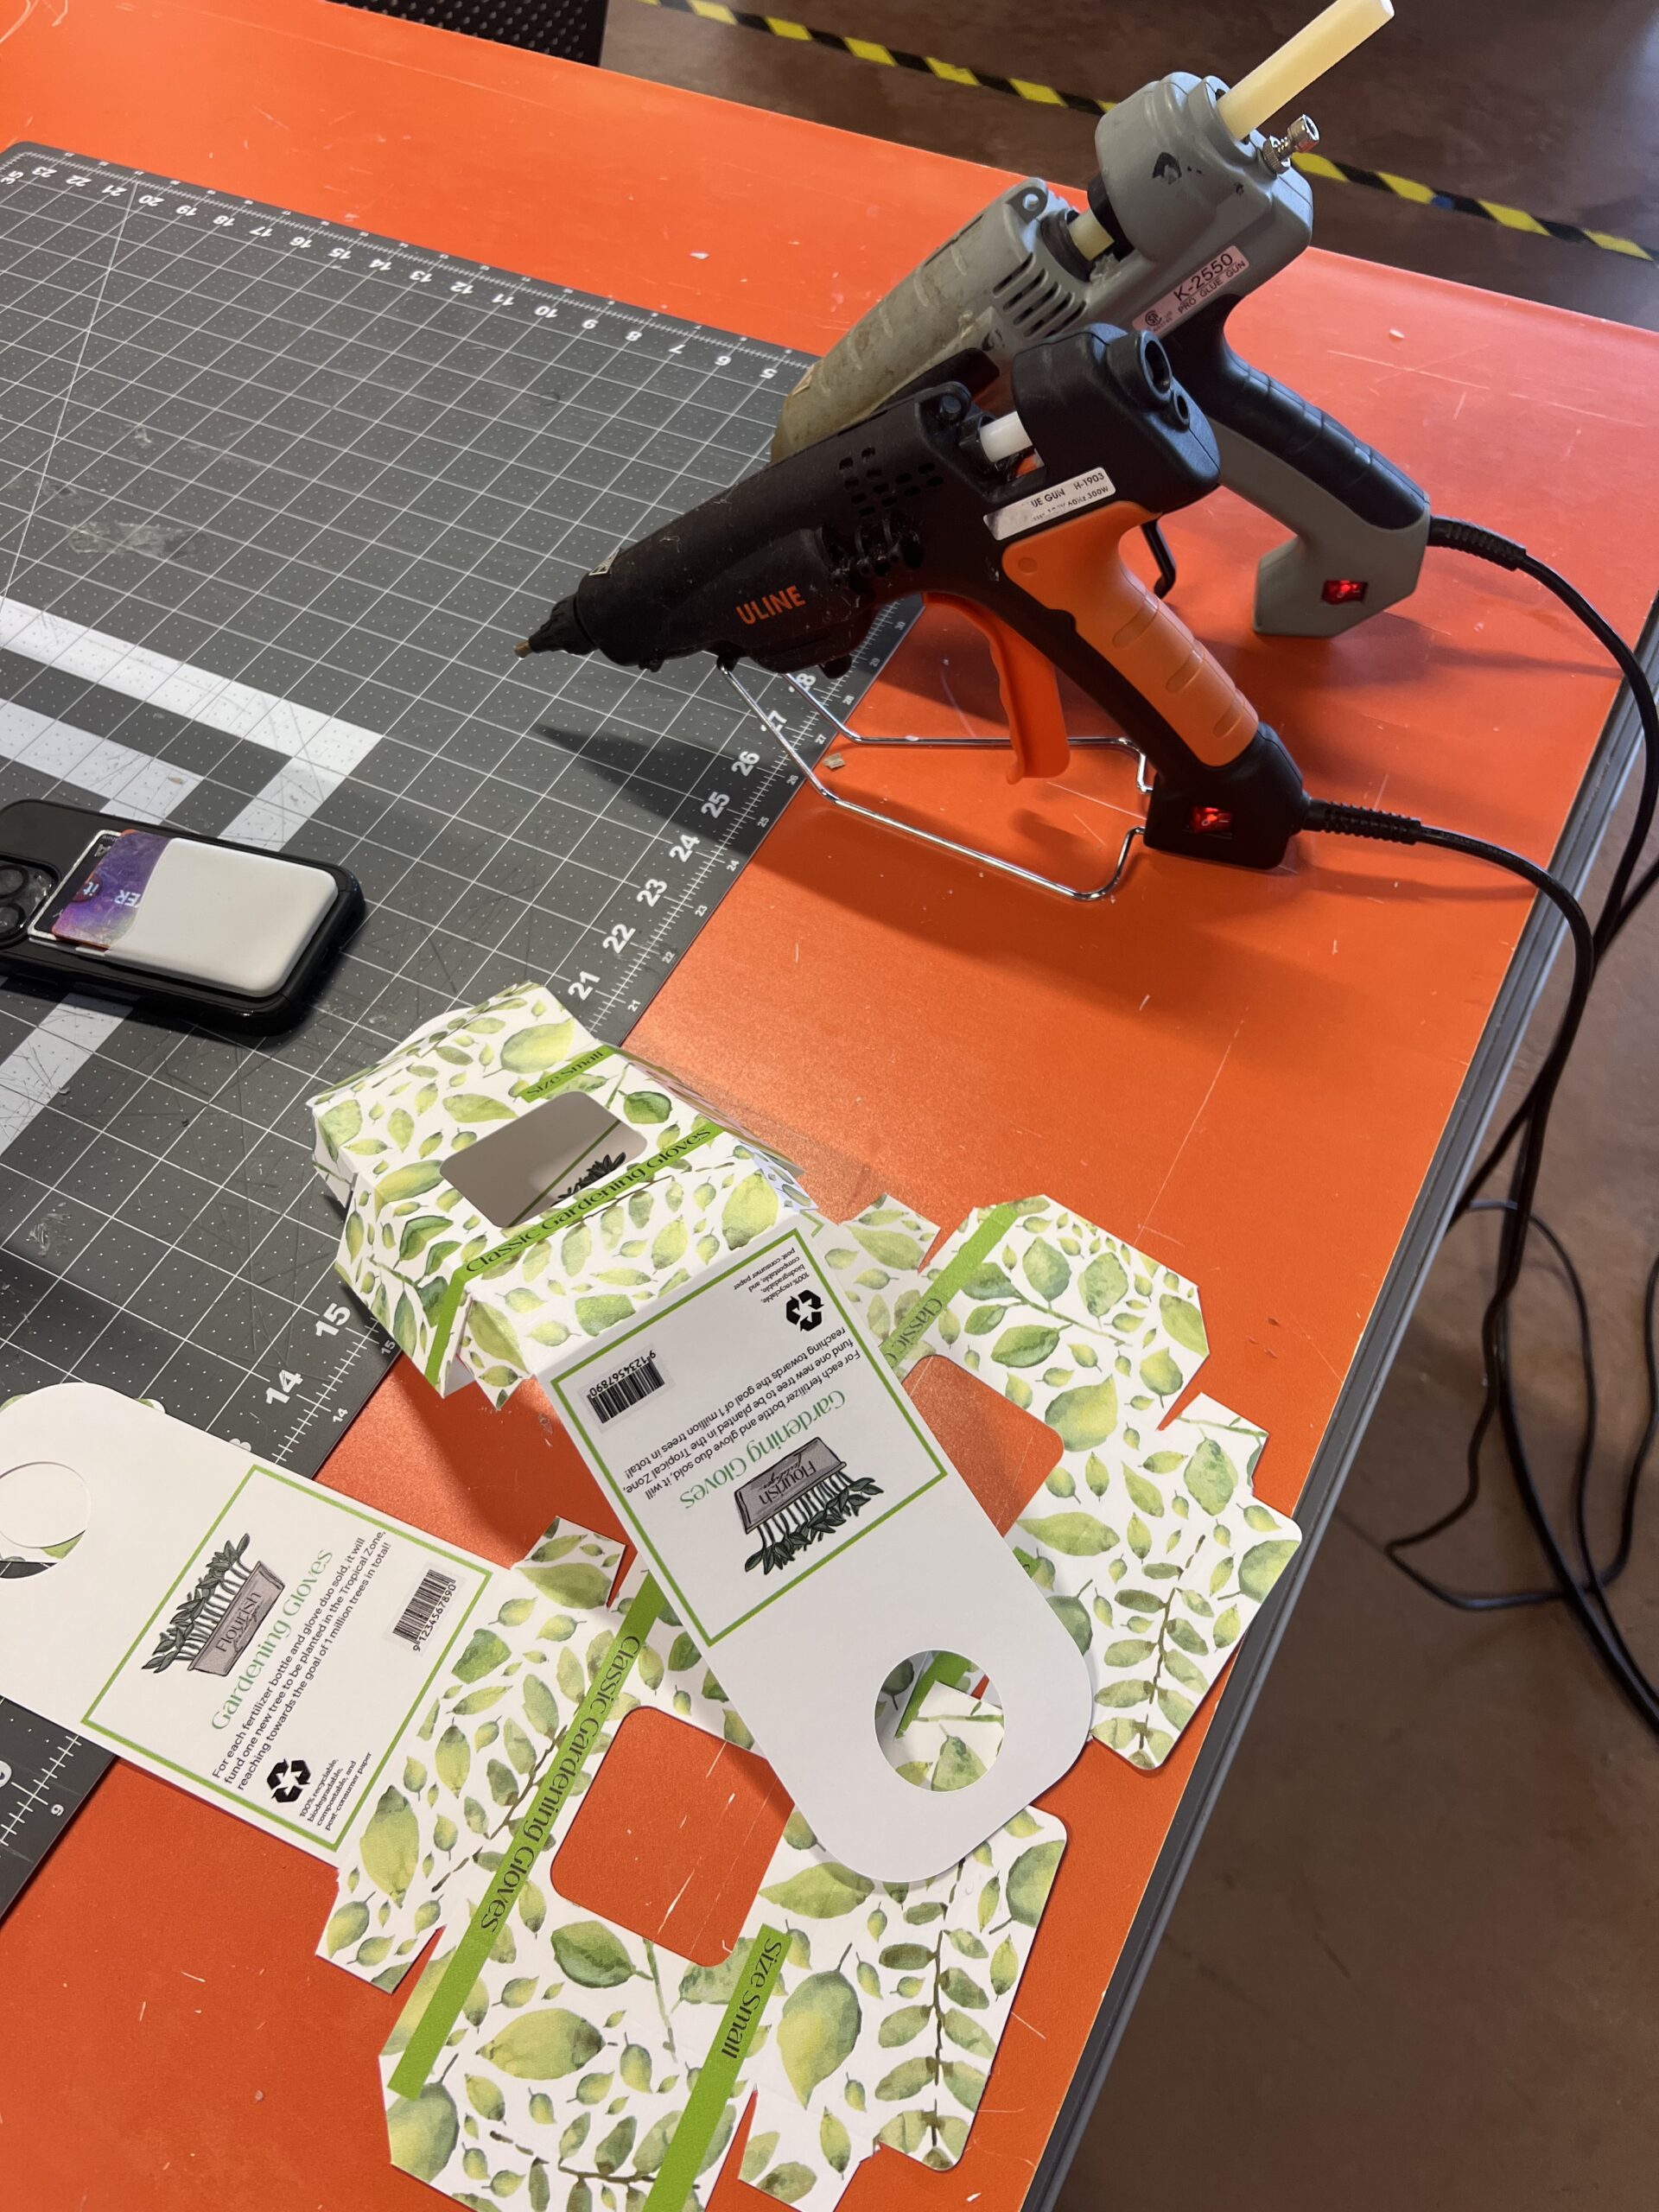
For each box, I creased the marks that the Esko had made again on the edge of the lab table and then used the lab hot glue gun to adhere them together. The hot glue gun didn’t seem to be working to adhere my box together, it was drying too quick before I could get the positioning correct and really just too thick. Trying to use the glue gun ruined a box I had made, but it wasn’t a problem since I have two more left.

I later went to Michael’s and bought a roll of double sided adhesive permanent tape and a sheet of clear plastic. I cut the clear plastic to the size of the opening on the front of my paperboard and then used the double-sided tape to adhere it on the inside. After that, I also used the tape to adhere the box together completely. At this point I had my final 4 color paperboard product!
The Final Product
I am so excited with how my final 4 color paperboard came out! I truly love the pattern of bright green water-colored leaves that I was able to create in Illustrator and I think the clear opening to showcase the specialty print gloves is just so cute! I would for sure be drawn to purchase this bottle and box combo of fertilizer in the store which was my main goal with this project!

Hit “play” on the videos below to see the final paperboard box!

Use the left and right arrows to scroll through some images of the process!