4 Color Process Labels

The Overview
The second project in this course was to create two different designs of labels to be printed as 4 color process labels on the Nilpeter machine we have in the lab. The difference in the three color to four color labels that we are creating in lab is that the 3 color labels were printed on a Comco machine which only allows those specific 3 colors of orange, green, and black to be used. The Comco also requires full set up of each inking station each time you change a color, which leads to a lengthy print process. The 4 color stickers were to be printed on the Nilpeter which uses all four CMYK inks that allows for any colors to be printed which means that we could use images in these designs!
I began designing two stickers in Adobe Illustrator utilizing my key orange and green colors, but also incorporating images and a special foiled layer. The stickers were limited to a round circle shape as that is the only die-cut the lab currently has available for the Nilpeter printer.
Design, Proofing, & Preflighting
I began creating these labels by sketching out ideas, as well as looking for images online that matched the feel of Flourish Fertilizers. I knew one of my labels needed to be the front of my fertilizer bottle and then the other one could be a fun just branding sticker for the company. I brainstormed and played around in Illustrator for a while until I landed on four solid designs I took to my professor.
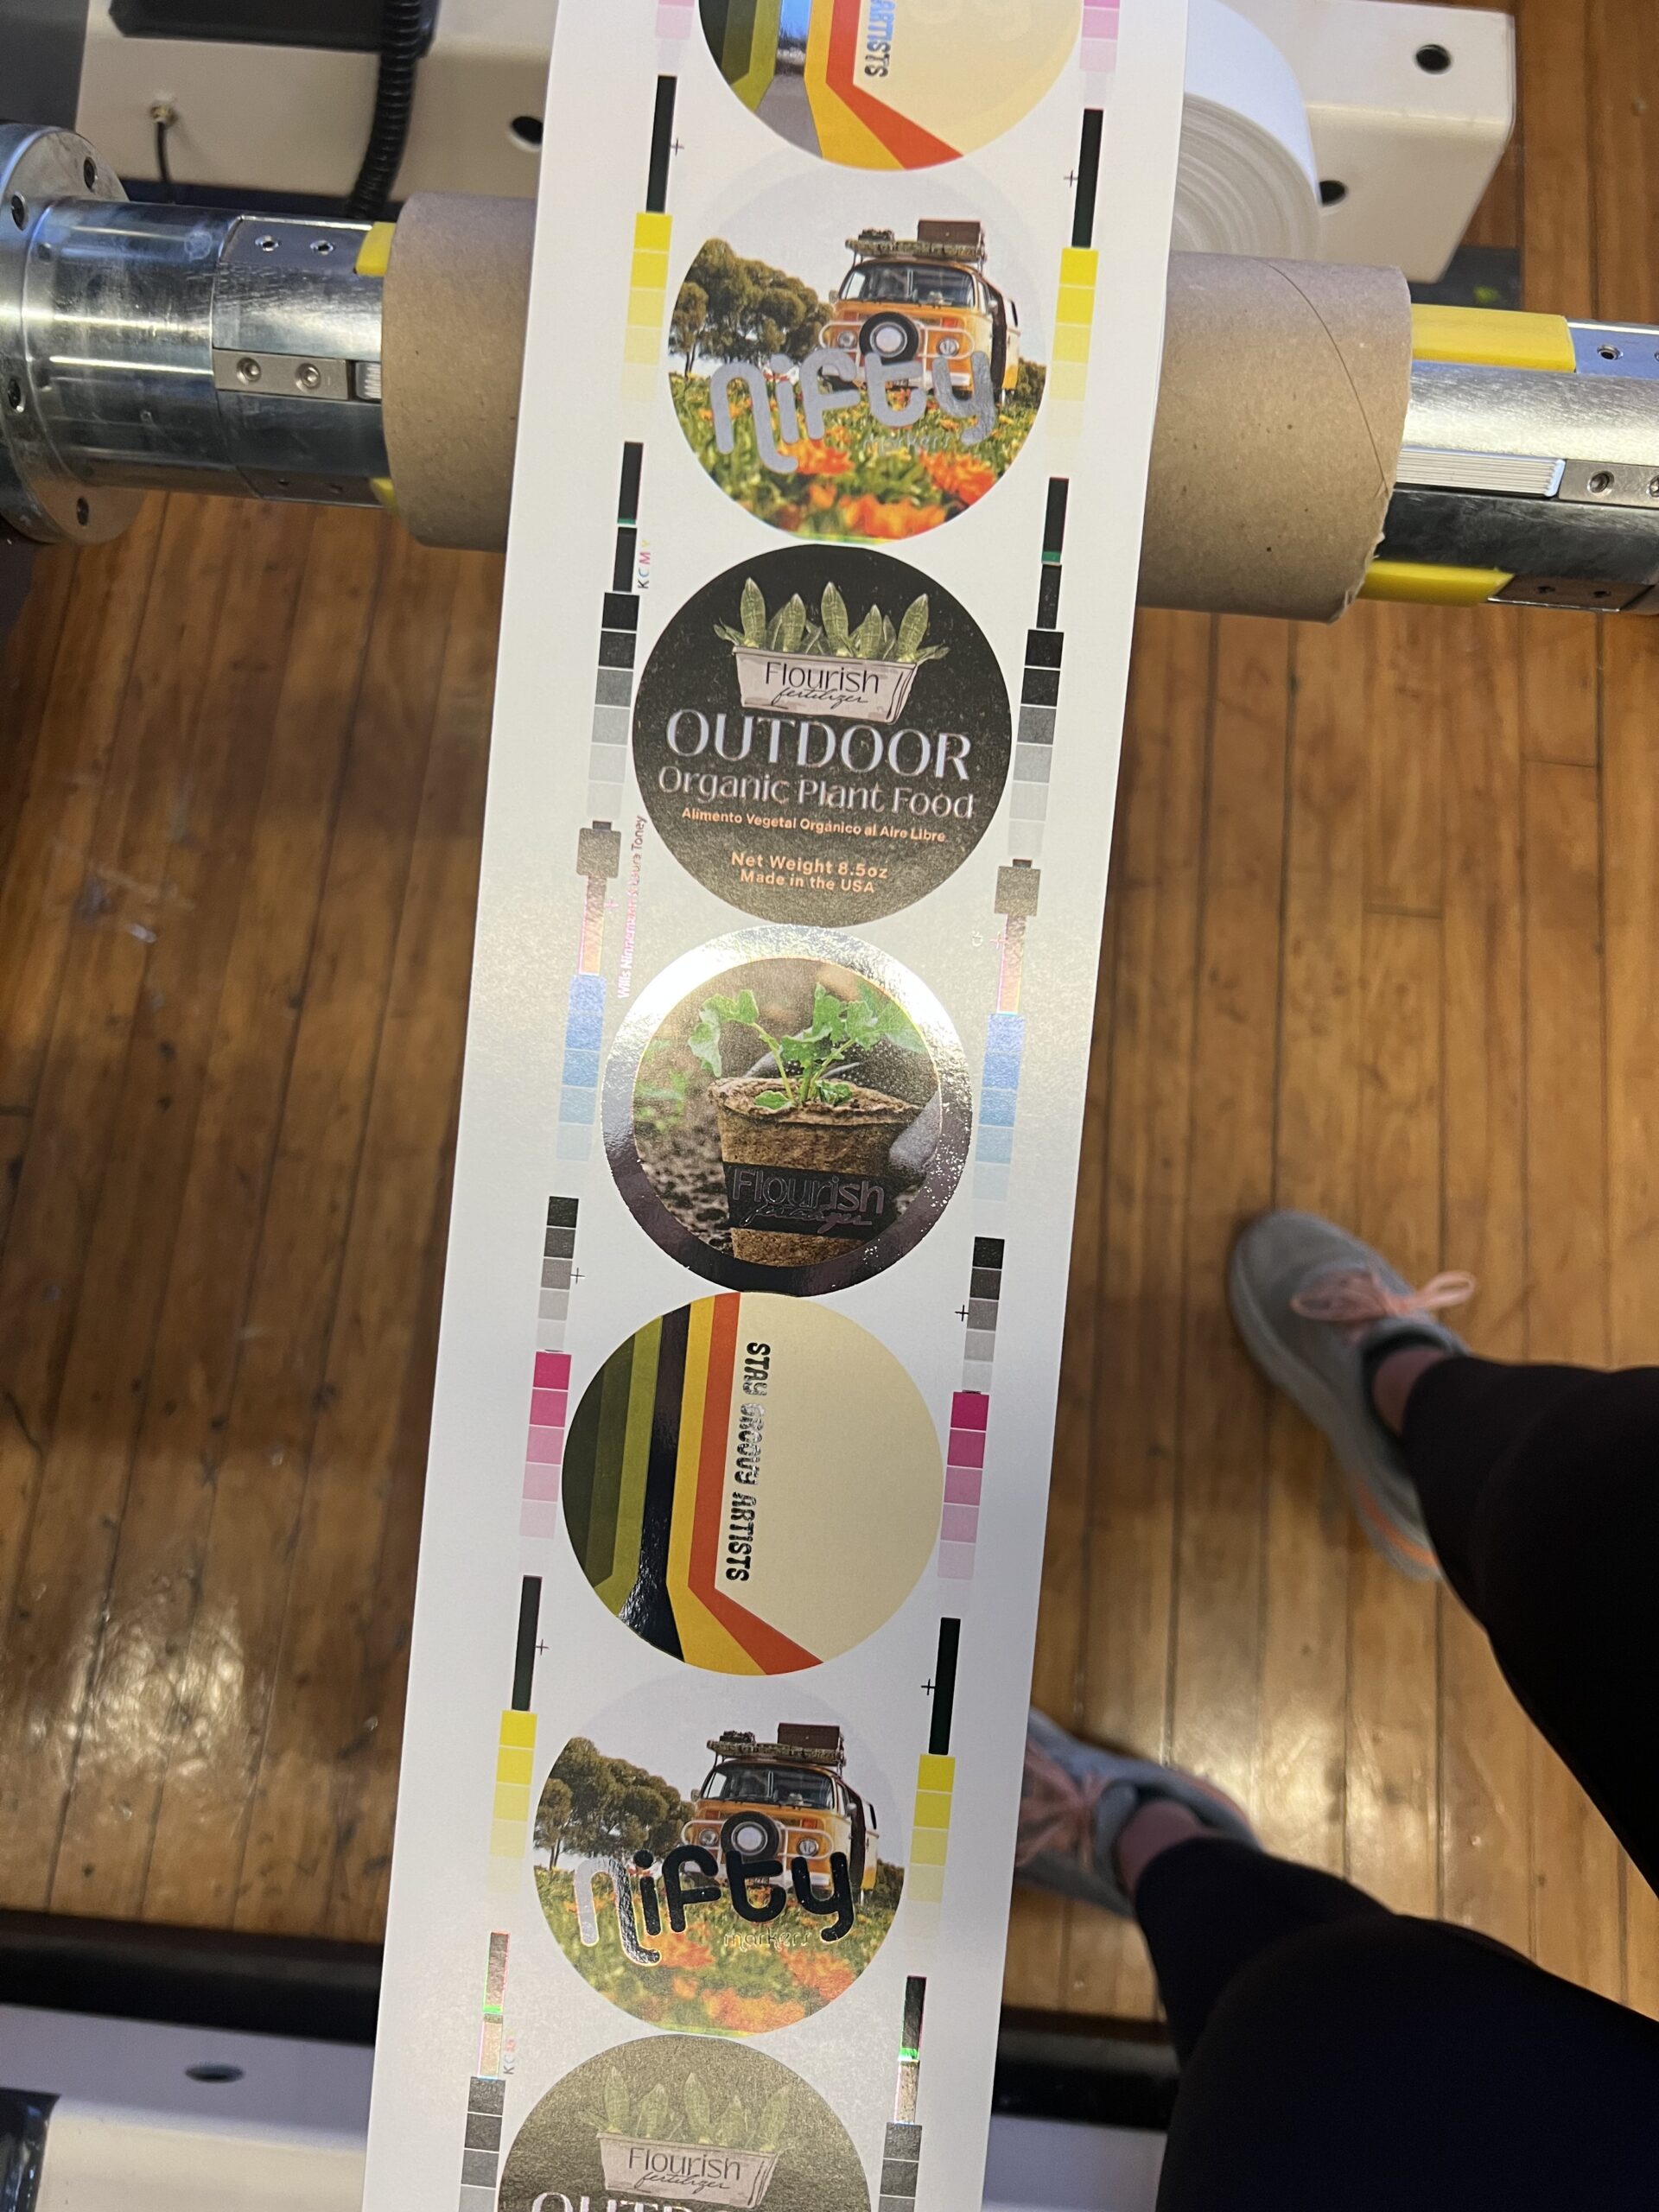
After reviewing my design with my professor, we eliminated two of the four of them and kept the two designs that would logically be printed on the Nilpeter. The label of the fertilizer bottle needed to include some generic information like weight as well as the logo I previously designed and a background image that aligned with the brand’s feel. Another unique aspect of the 4 color process labels was that we were instructed to add a foil layer to the labels. I chose to use the silver foil as accents on both of the stickers that would make them stand out just slightly more. After several revisions, I settled on the two final stickers that would be printed on the Nilpeter seen here.


After the design was final, I downloaded the bearer bars template that was provided to us and placed it on my illustrator file. These bearer bars were in CMYK colors in order to register each individual color later on when actually printing on the Nilpeter. At this point in the design process, it was important to move each design element that I wanted to be foiled on a separate layer from the other design elements that will be printed in CMYK. Once I was ready to actually proof the labels, I made sure I had a layer with my CMYK artwork, a foil layer, and a bearer bar layer. At this point, I also placed my partner’s two stickers in the illustrator file so we could proof and print the labels together.

I exported the file to be a PDF and then printed it to the Konica Minolta in the lab. After the CMYK color was printed, I sleeked the proof with silver foil in order to see how the labels would look later on. I took this proof to my professor, and she was able to give advice on things to change. At this point, I needed to make some of my fonts larger, but other than that my designs were approved and very solid.


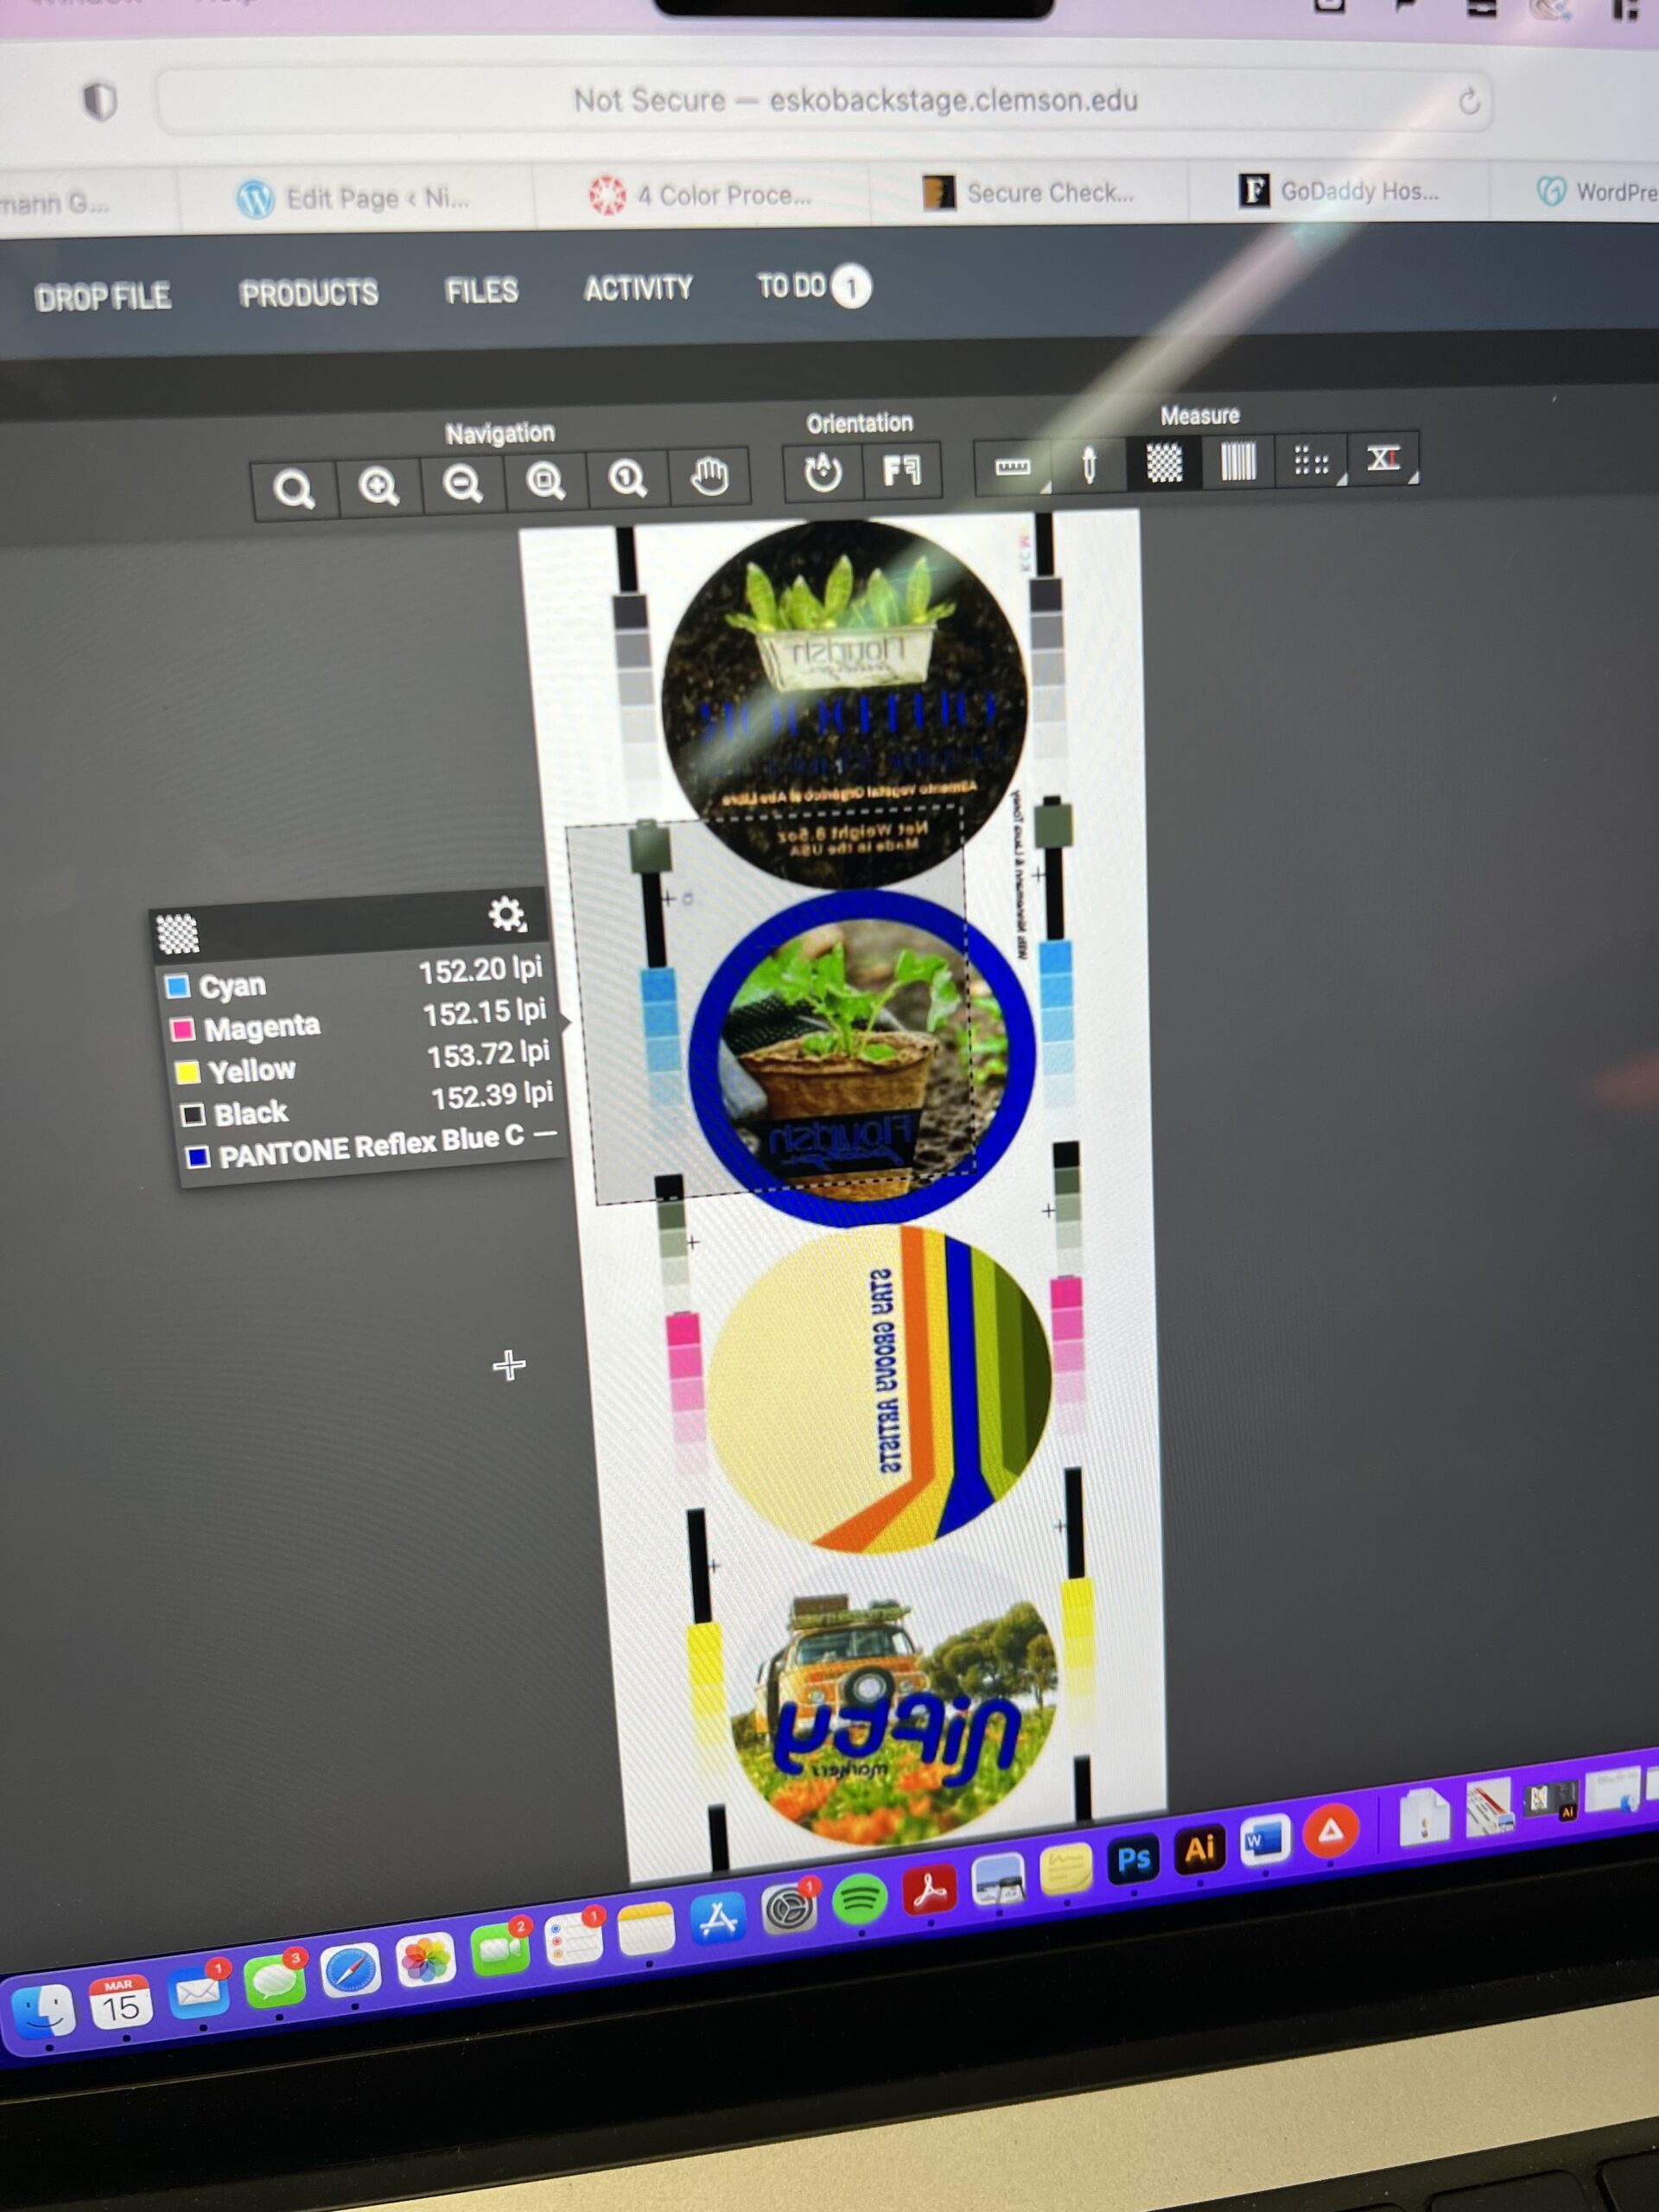
After the design was perfected, it was time to send it to ArtPro+ to incorporate some aspects that were necessary for a successful print job. In ArtPro+ I changed the lines per inch (lpi) for each color to 150lpi, set each angle specifically for each color, and then chose circular as the dot shape. After adjusting elements in ArtPro+ it was time to launch the file which sends it to the lab server computers which we will retrieve the file from later on when making plates.

After all of the design, proofing, and work in ArtPro+ was complete, it was time to begin making the photopolymer plates that would later be mounted onto the Nilpeter press to print the labels.
Photopolymer Plate Making
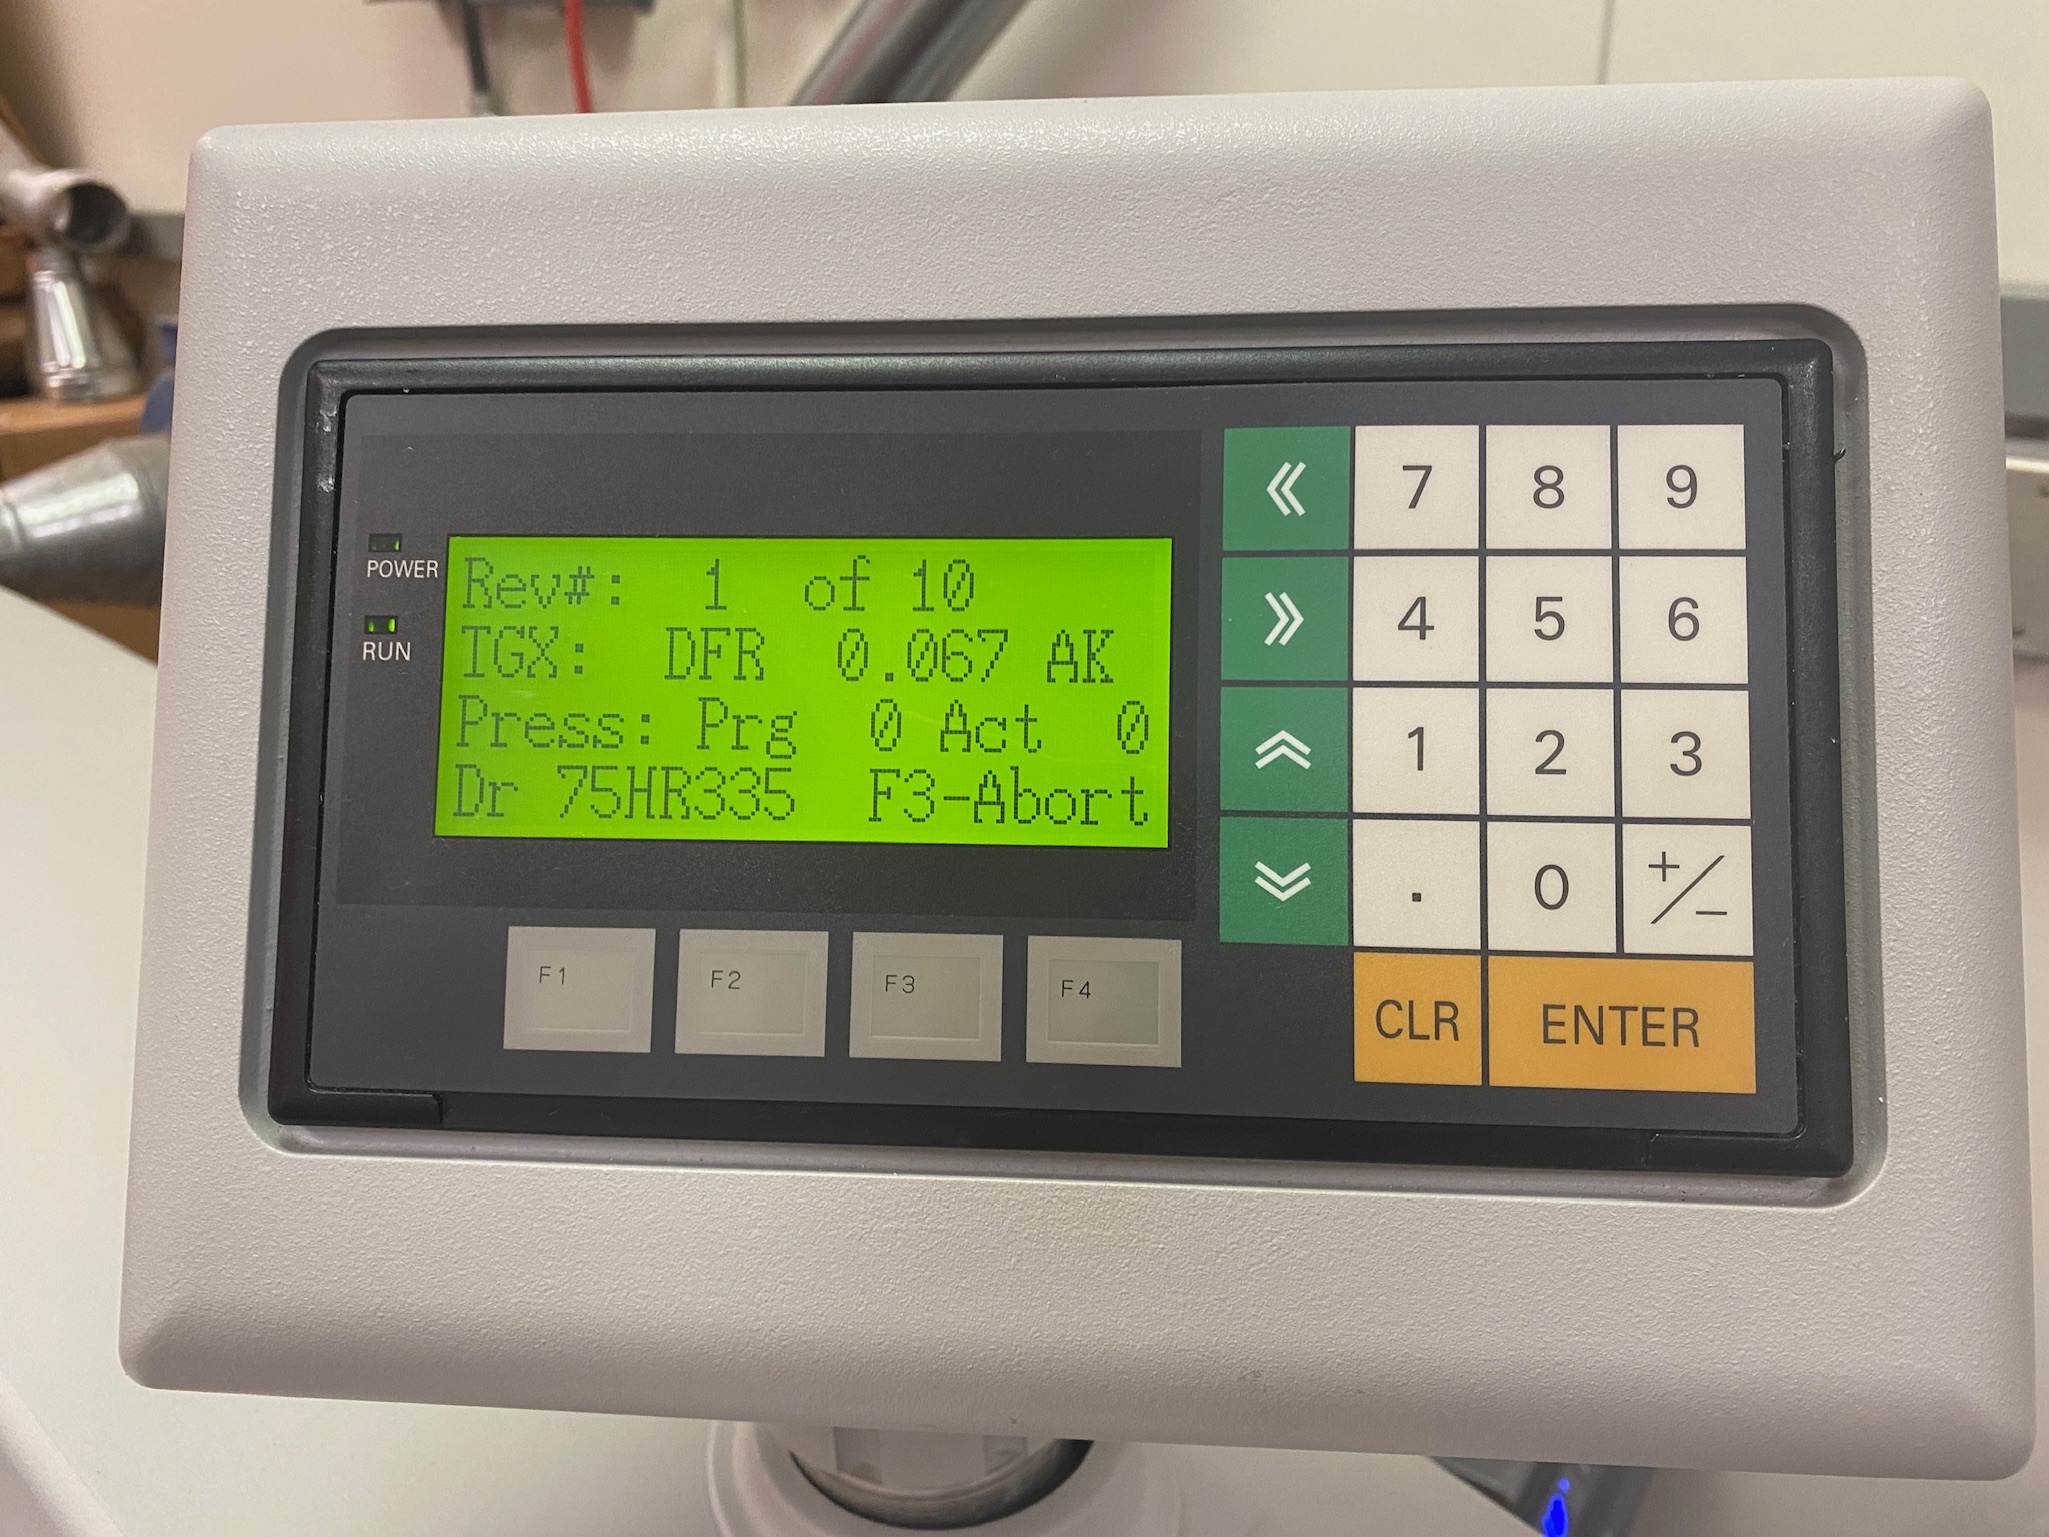
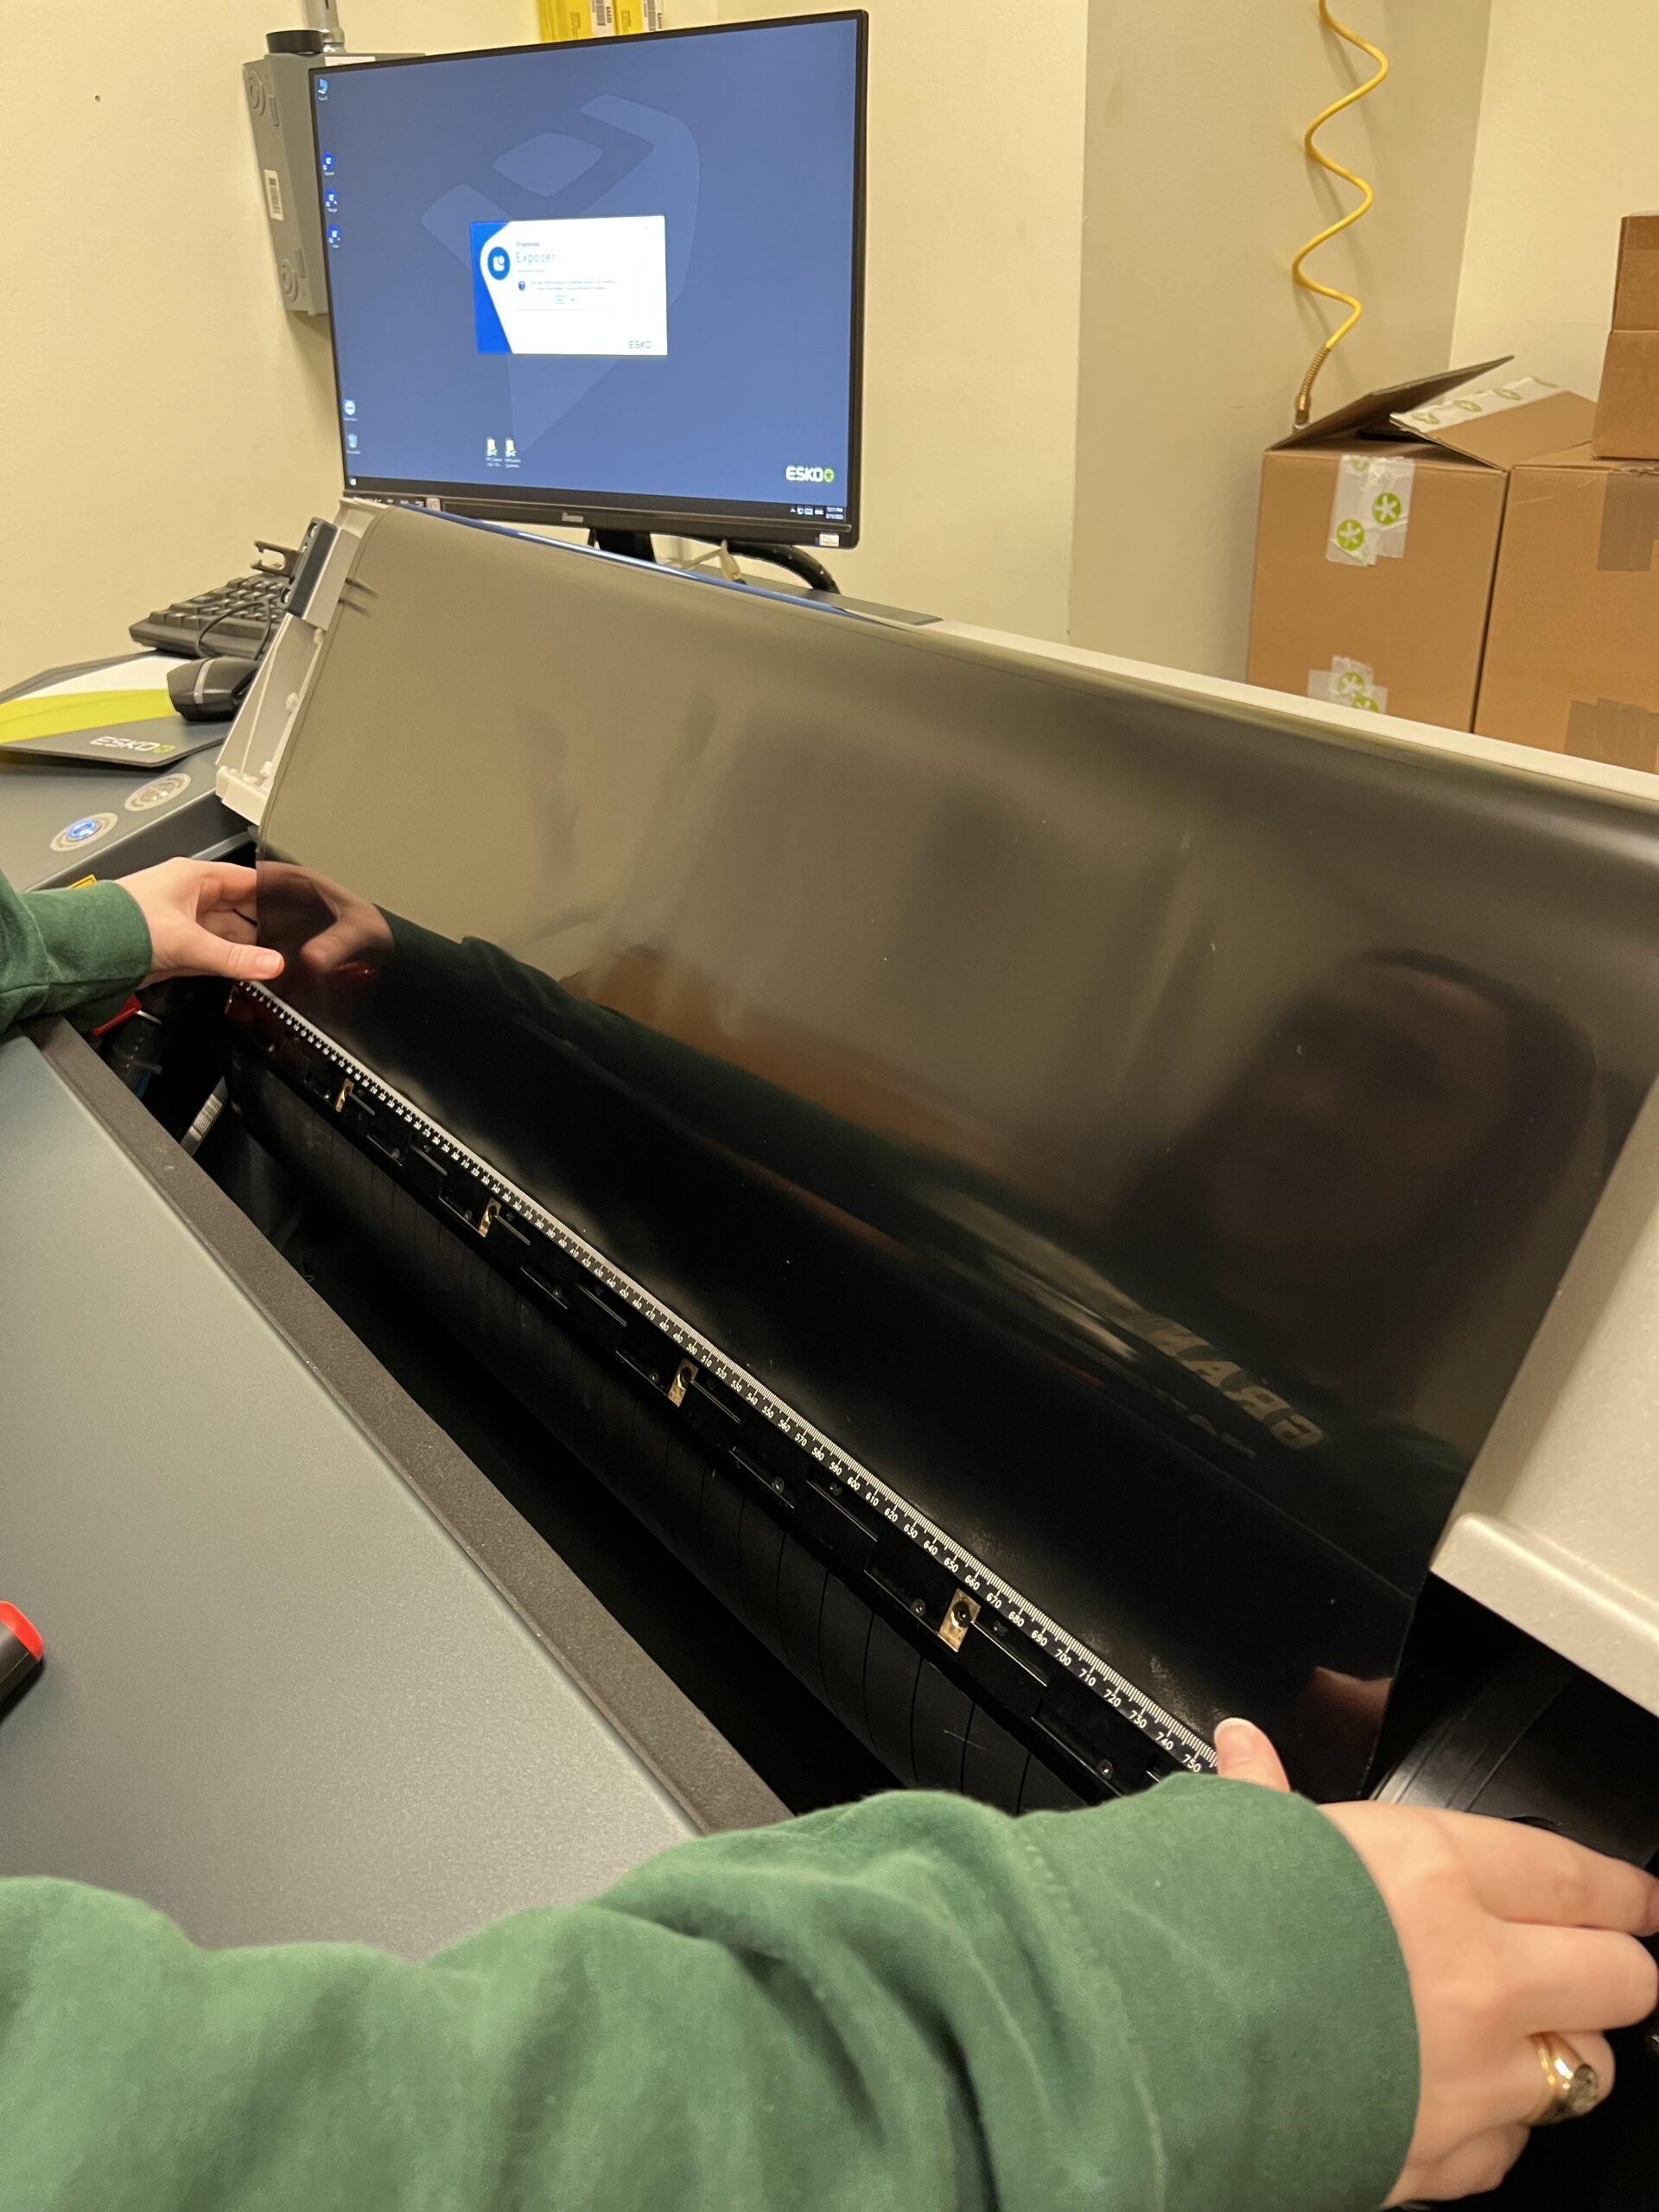
The photopolymer platemaking begins by retrieving a piece of DFR .067 mil photopolymer (30 inches) from the platemaking room. The plates are stored in cardboard boxes which are very important to close properly after getting your plate. After the retrieval of the photopolymer, it is time to back expose it. The exposure unit used is the Cyrel Unit which can be seen here. When back exposing we placed the glossy side of the plate face up in the Cyrel Exposure unit. The plate gets exposed for 85 seconds and then once it finishes, flip over the plate and place it on top of the imager as a flat surface. After that, it is important to quickly rip off the film layer all at once in one fluid motion.


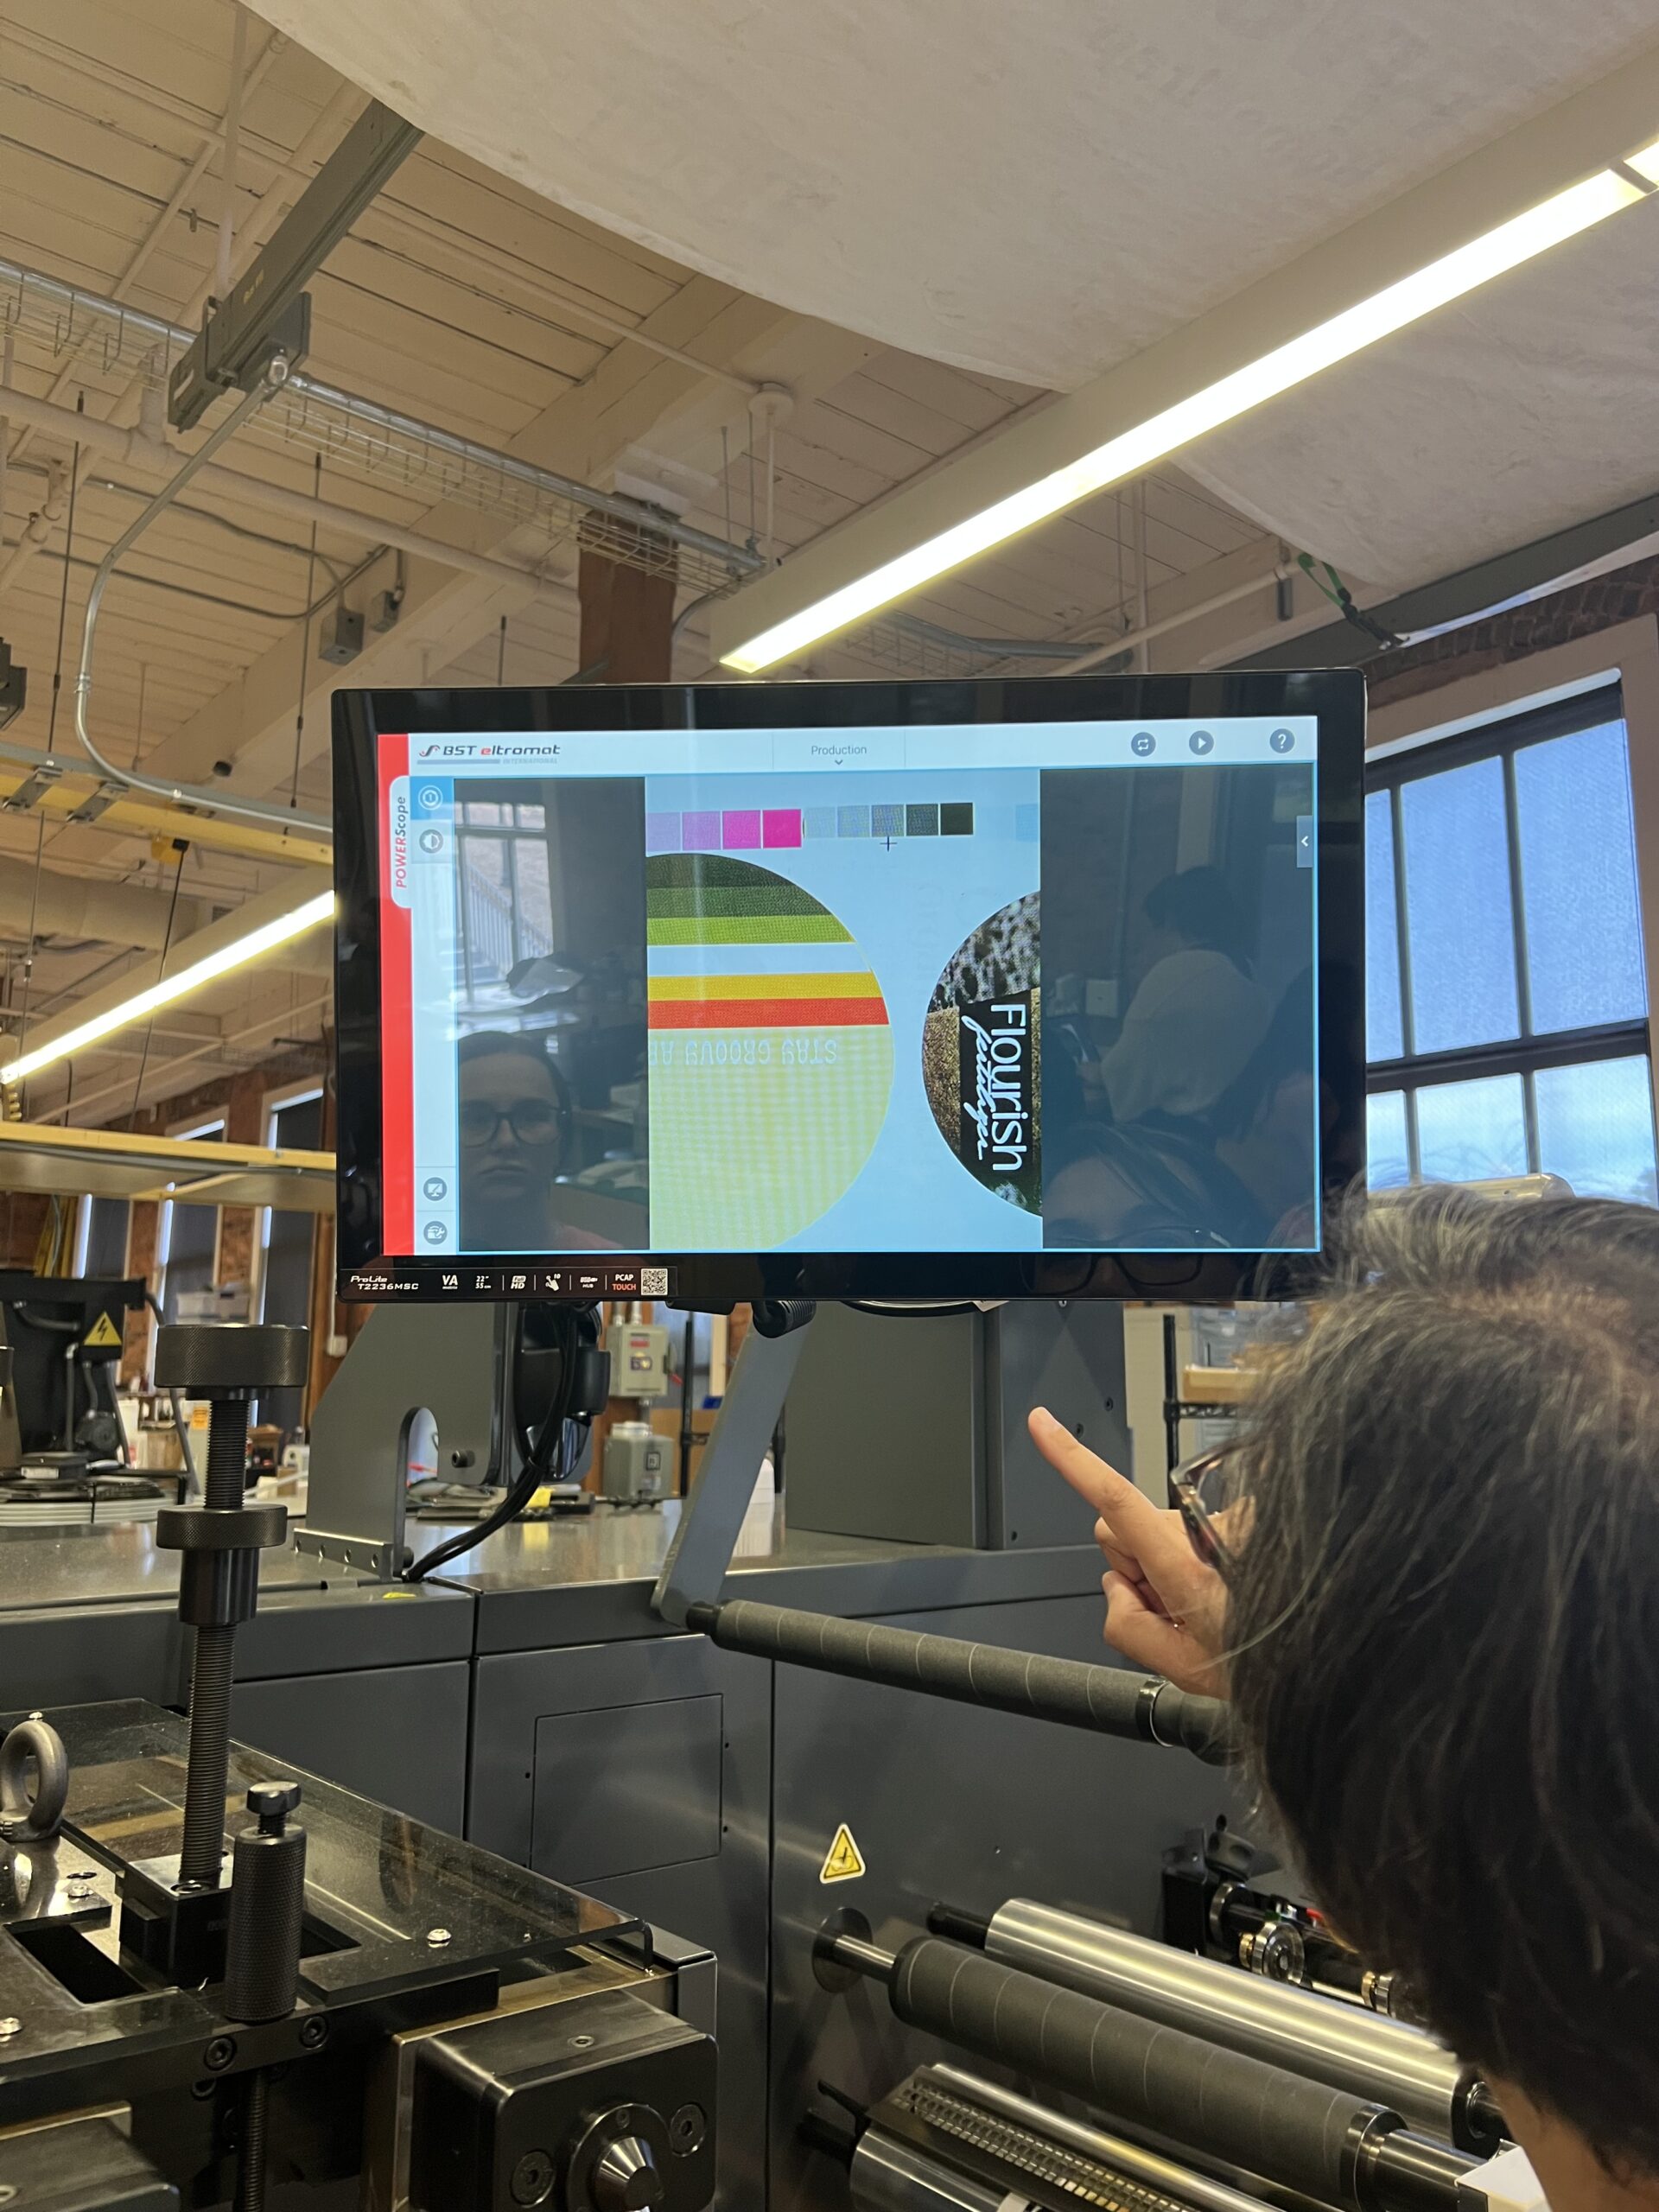
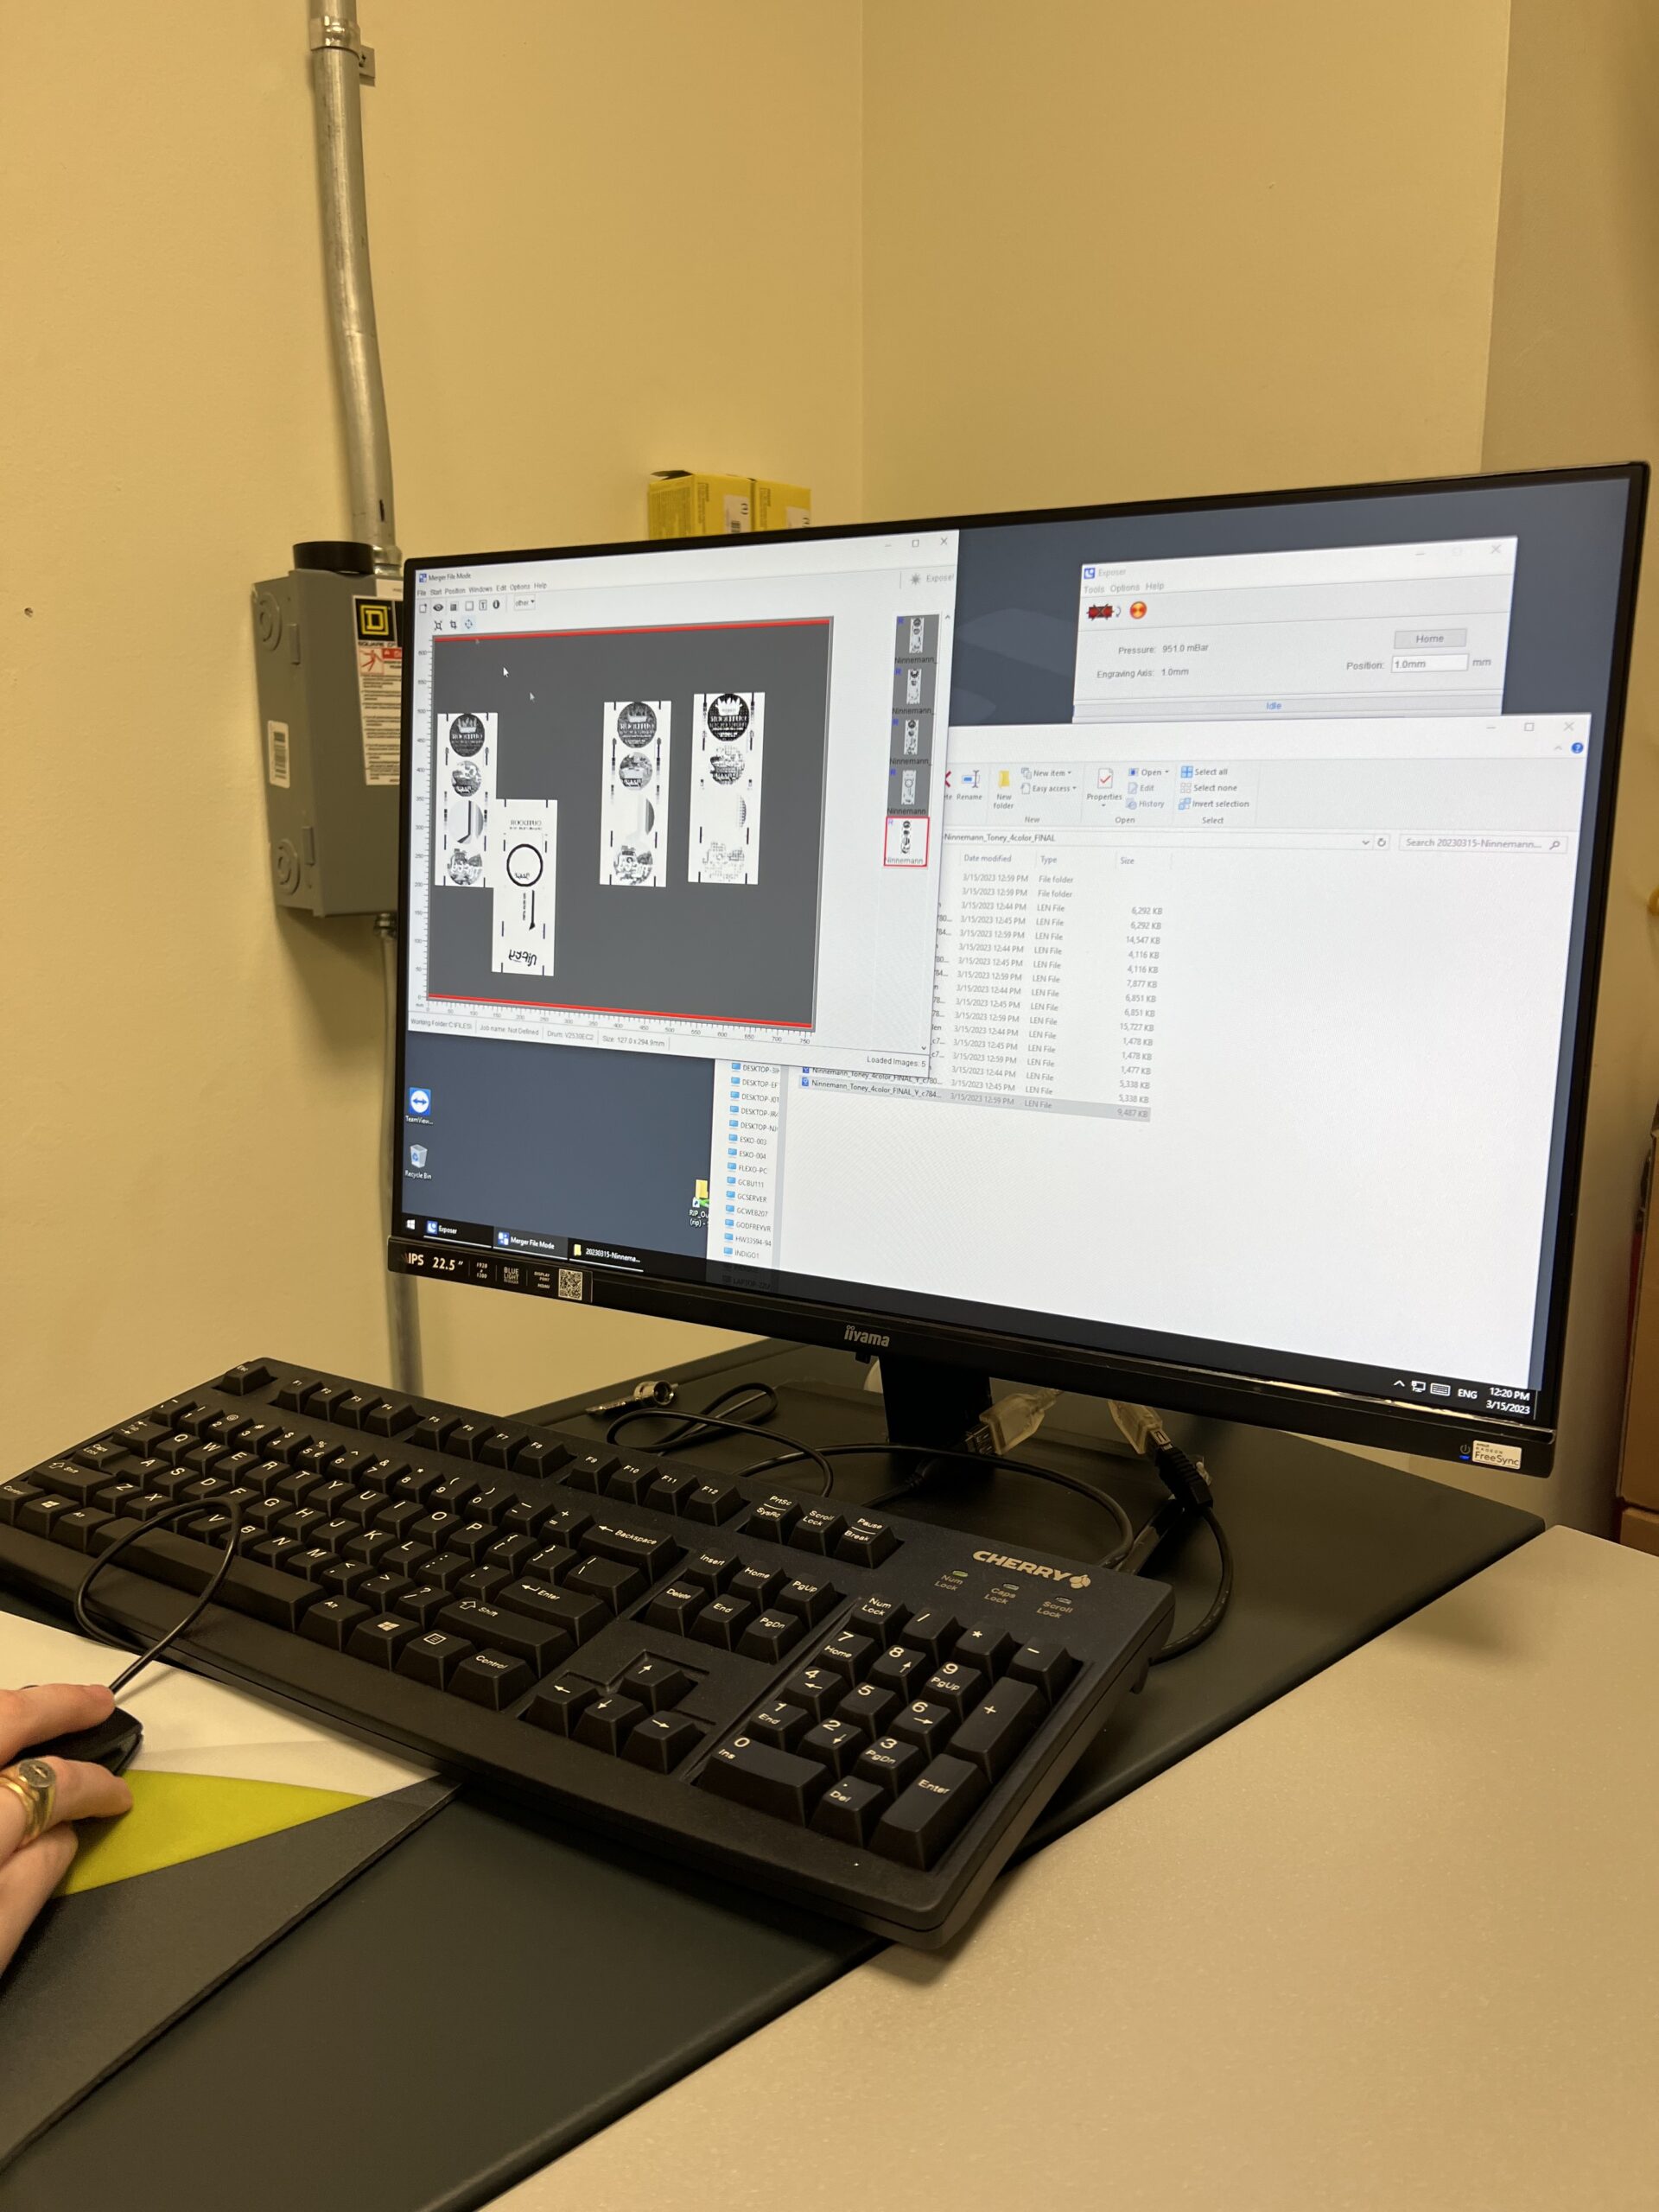
After that it is time to insert the plate into the Esko Part 2350 Carbon Copy Laser Engraving “Imager” Unit. On the computer attached, we chose the files we launched to the server and placed them in the merge folder. The size to select is DFR067 which corresponds to the plate material we are using. There will be a file to drag onto the live are for each color you are printing (I had three) and it is important to check the LPIs of each. This can be seen by the image on the right. These LPIs matched what I set in ArtPro+ therefore I could proceed. Next we loaded the plate into the imager, hit the open cover button and then position the plate at the ruler of the drum on the bottom at 30 mm. Use the wrench to loosen and tighten the plate in place. Then turn the vacuum and wrap the plate around the drum. Once all the way around use the wrench to lock it on the other side, this part of the process can be seen in the left image. Next, close the cover all the way. After the plate is securely on the drum double check to make sure all of the plates are lined up in-between the red bars or live area on the computer software. If everything is secure at this point, hit start, hit ok, and then a green light appears which lets you know the process has begun. This takes about 30 minutes to image.

After the imager, the plate goes back into the exposure unit for a basis exposure. The plate is laid on the exposure unit face up as the top feels rubbery. Basis exposure is 6 minutes long to harden the face, this exposure makes the carbon copy hard so it will not wash away later on in the process.

After that it is time to move to the processor. The processor we use is the 1,000 TD Thermal Developer, which is known as the thermal washout. Place the plate face up into the processor, open the clamps, and slide the plate under them. Make sure the plate corners are under a clamp! After the plate is secure, use the screen of the processor to select DFR067, the kind of plate, 10 revolutions, the amount of times it will spin around, and a width of 30 inches, the size of the plate. Once you review all of the choices made on the screen, hit enter. This thermal processing takes about 12 minutes.

After this, take the plate back into the exposure unit for one final time. The plate is placed in the first drawer of the machine this time rather than the top of the machine. Make sure to hit the #2 and #3 buttons at once. This final exposure make the plate not tacky anymore.

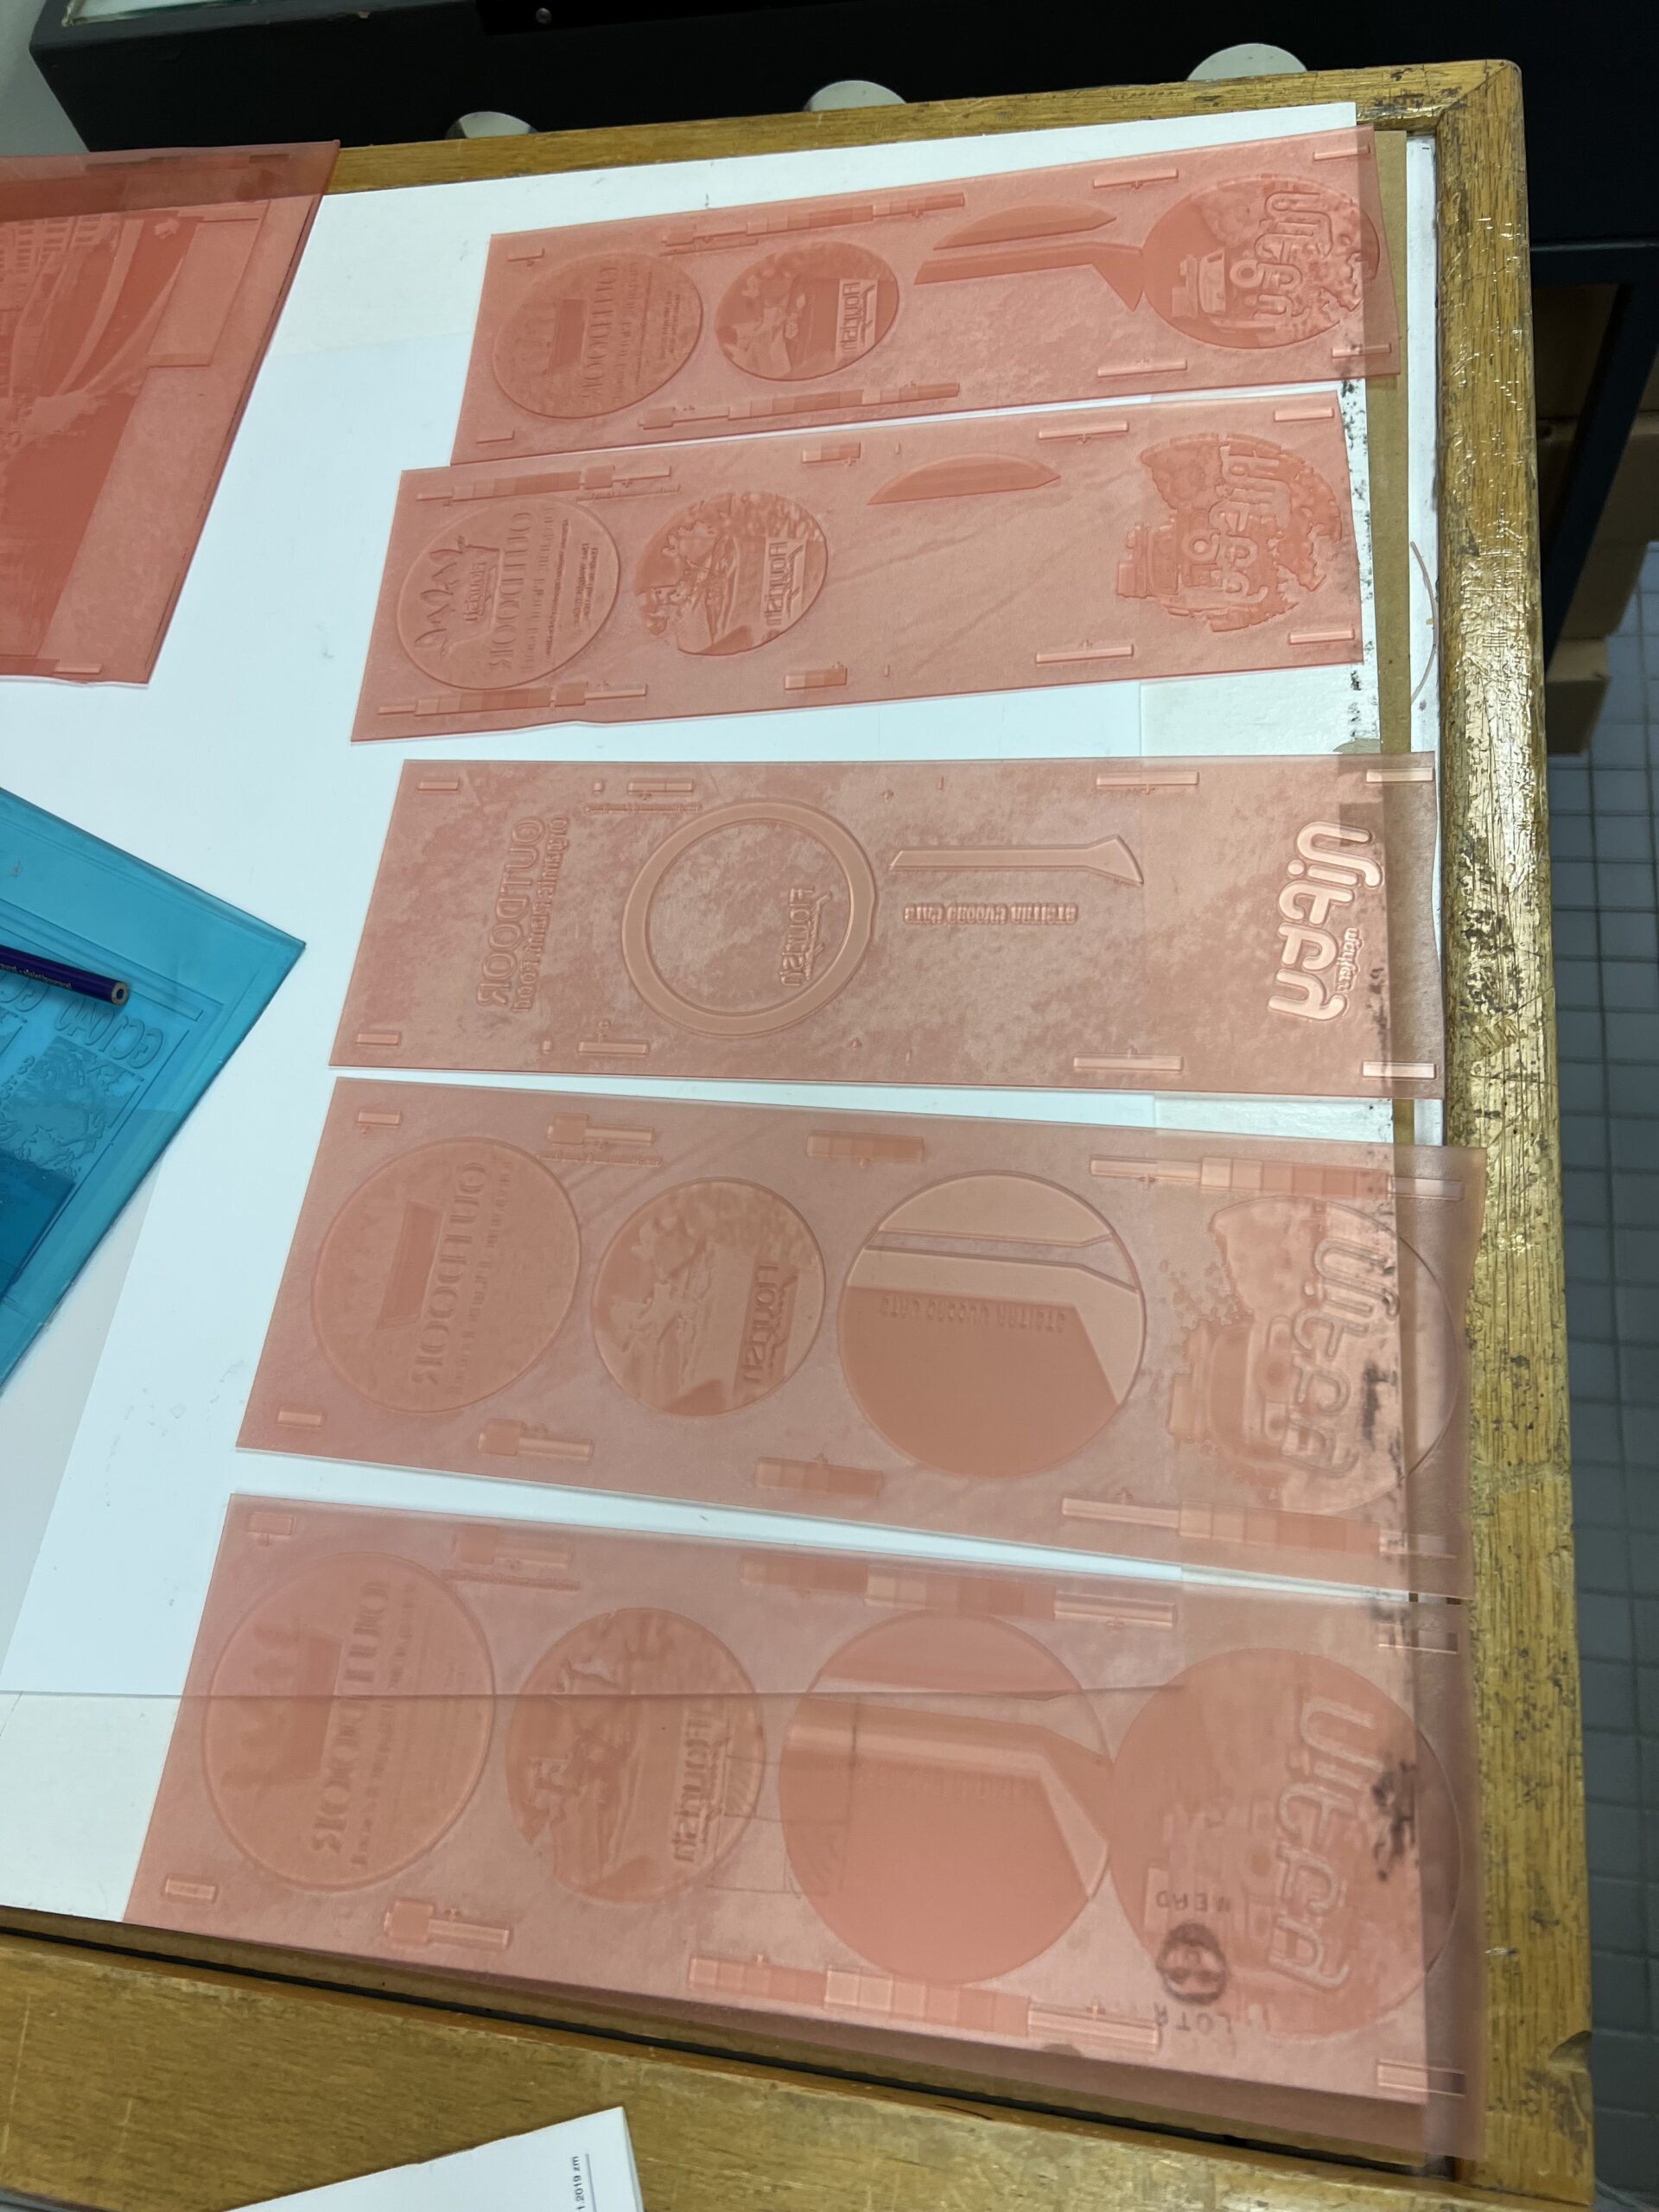
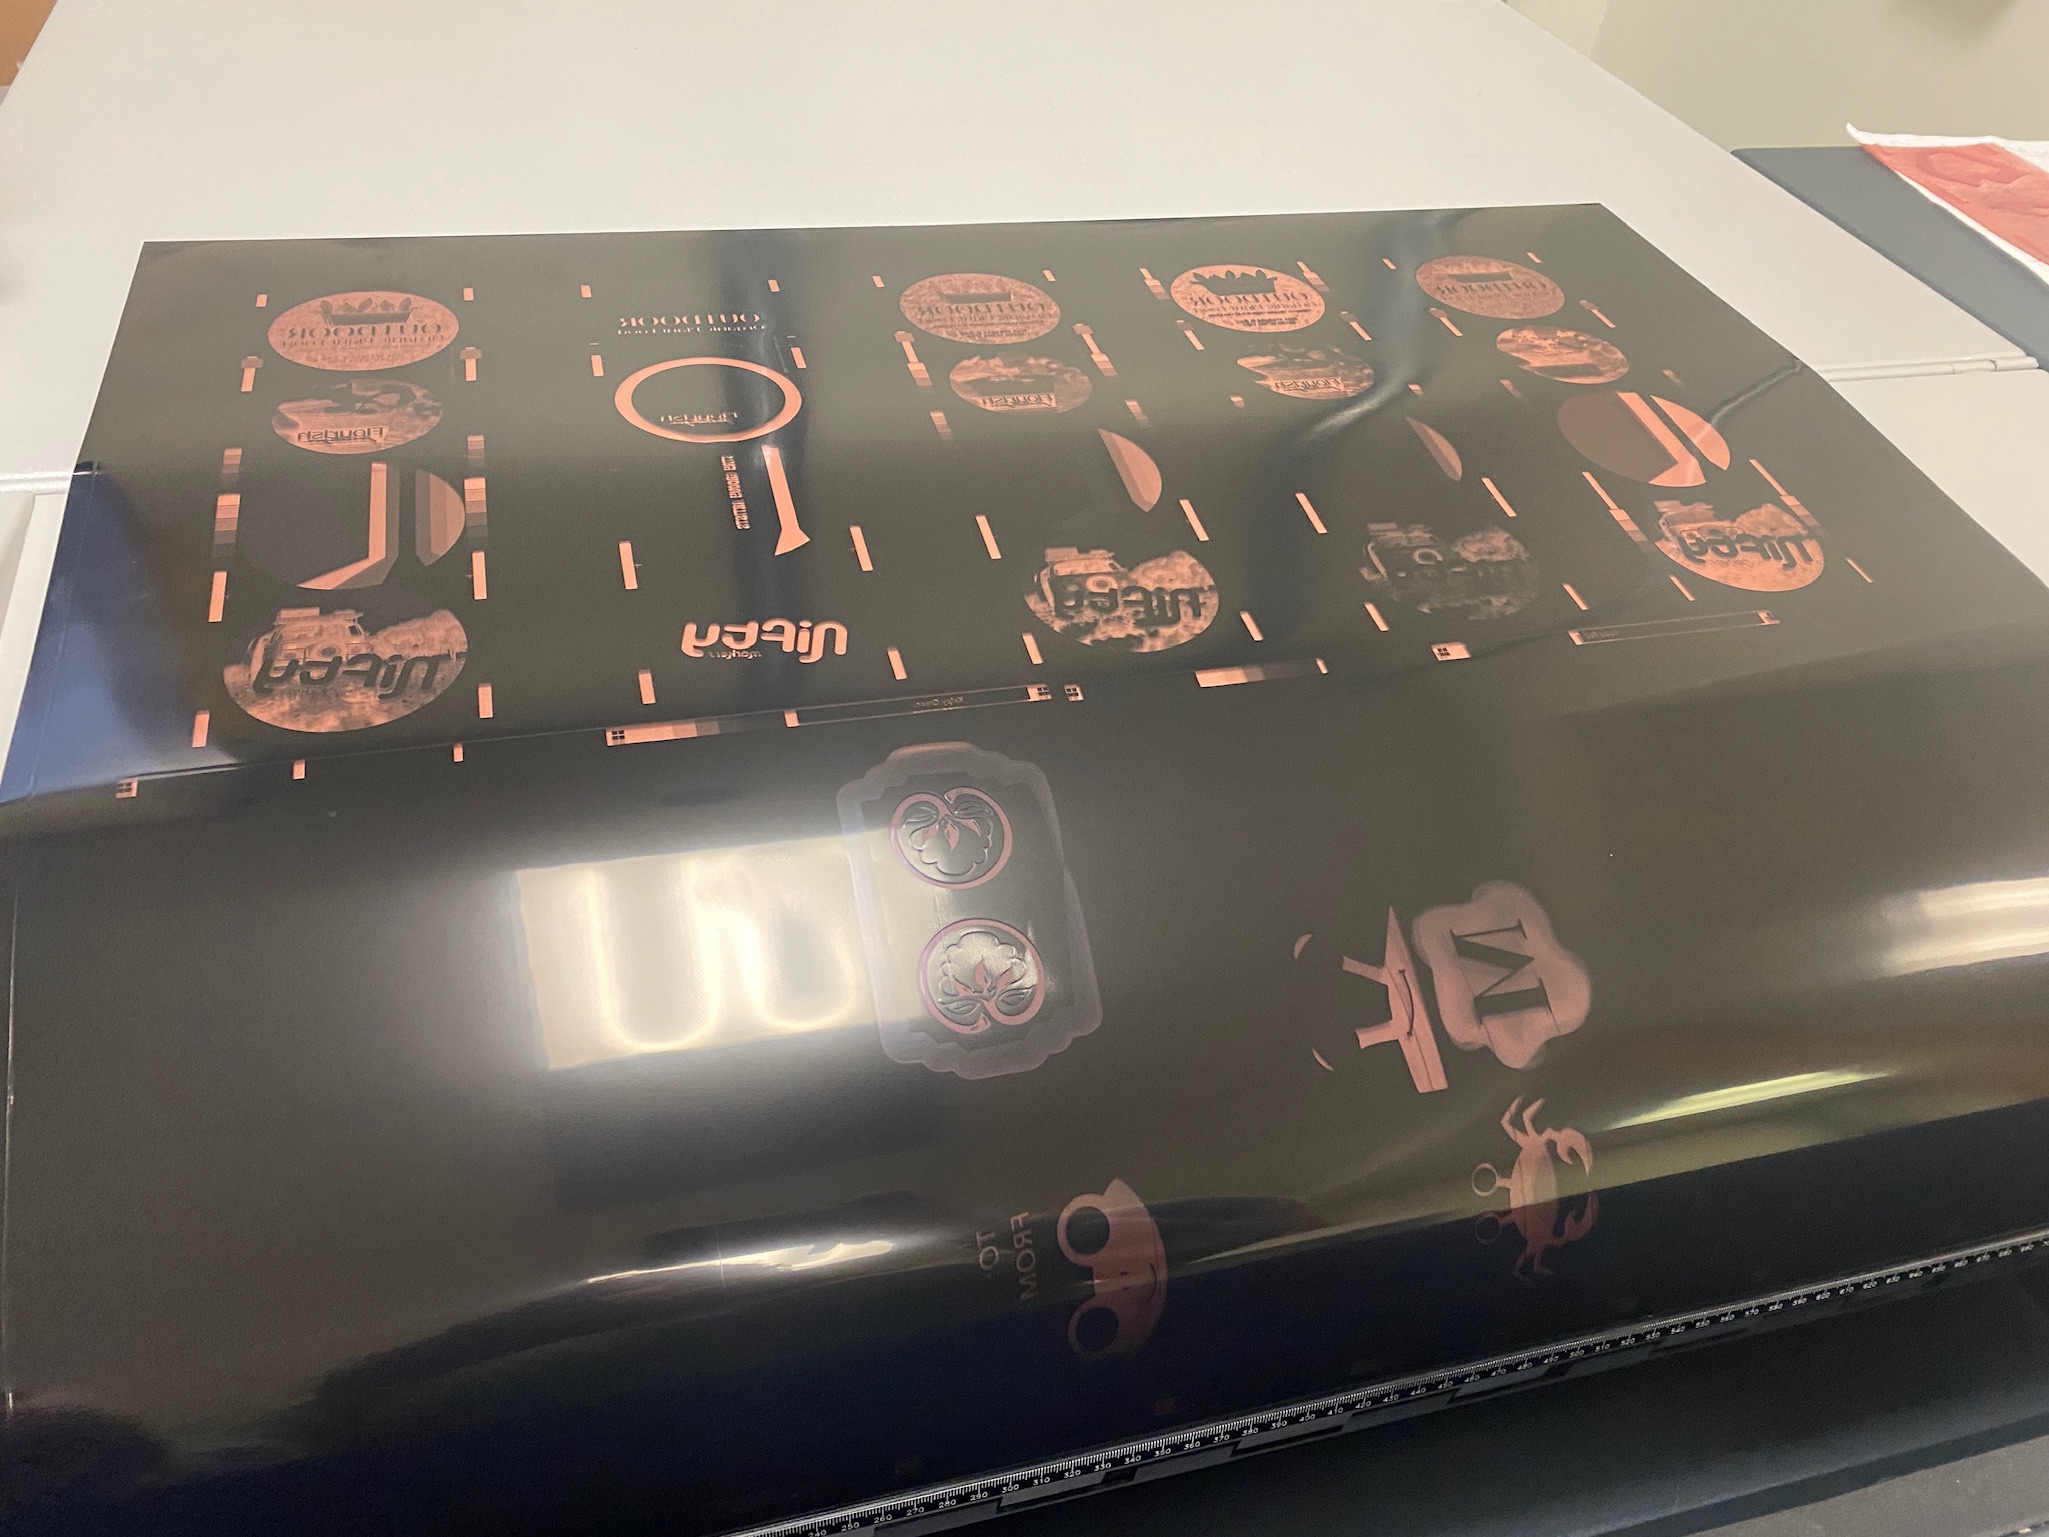
After the actual plate making is complete, it is time to slice the plates apart from each other. It is important to use the slicing tool rather than scissors. Make sure you do a rough cut, and then use the guillotine cutter to slice even closer to the bear bars vertically on the plate. The last cut will be off of the horizontal end of each plate. Make a slight chop off of the horizontal edge of the bear bars in order to allow for ease of mounting later on. Taking off a slight bit of the actual bear bar allows for the plate to match up perfectly rather than overlapping slightly when wrapped around the cylinder.


Plate Mounting
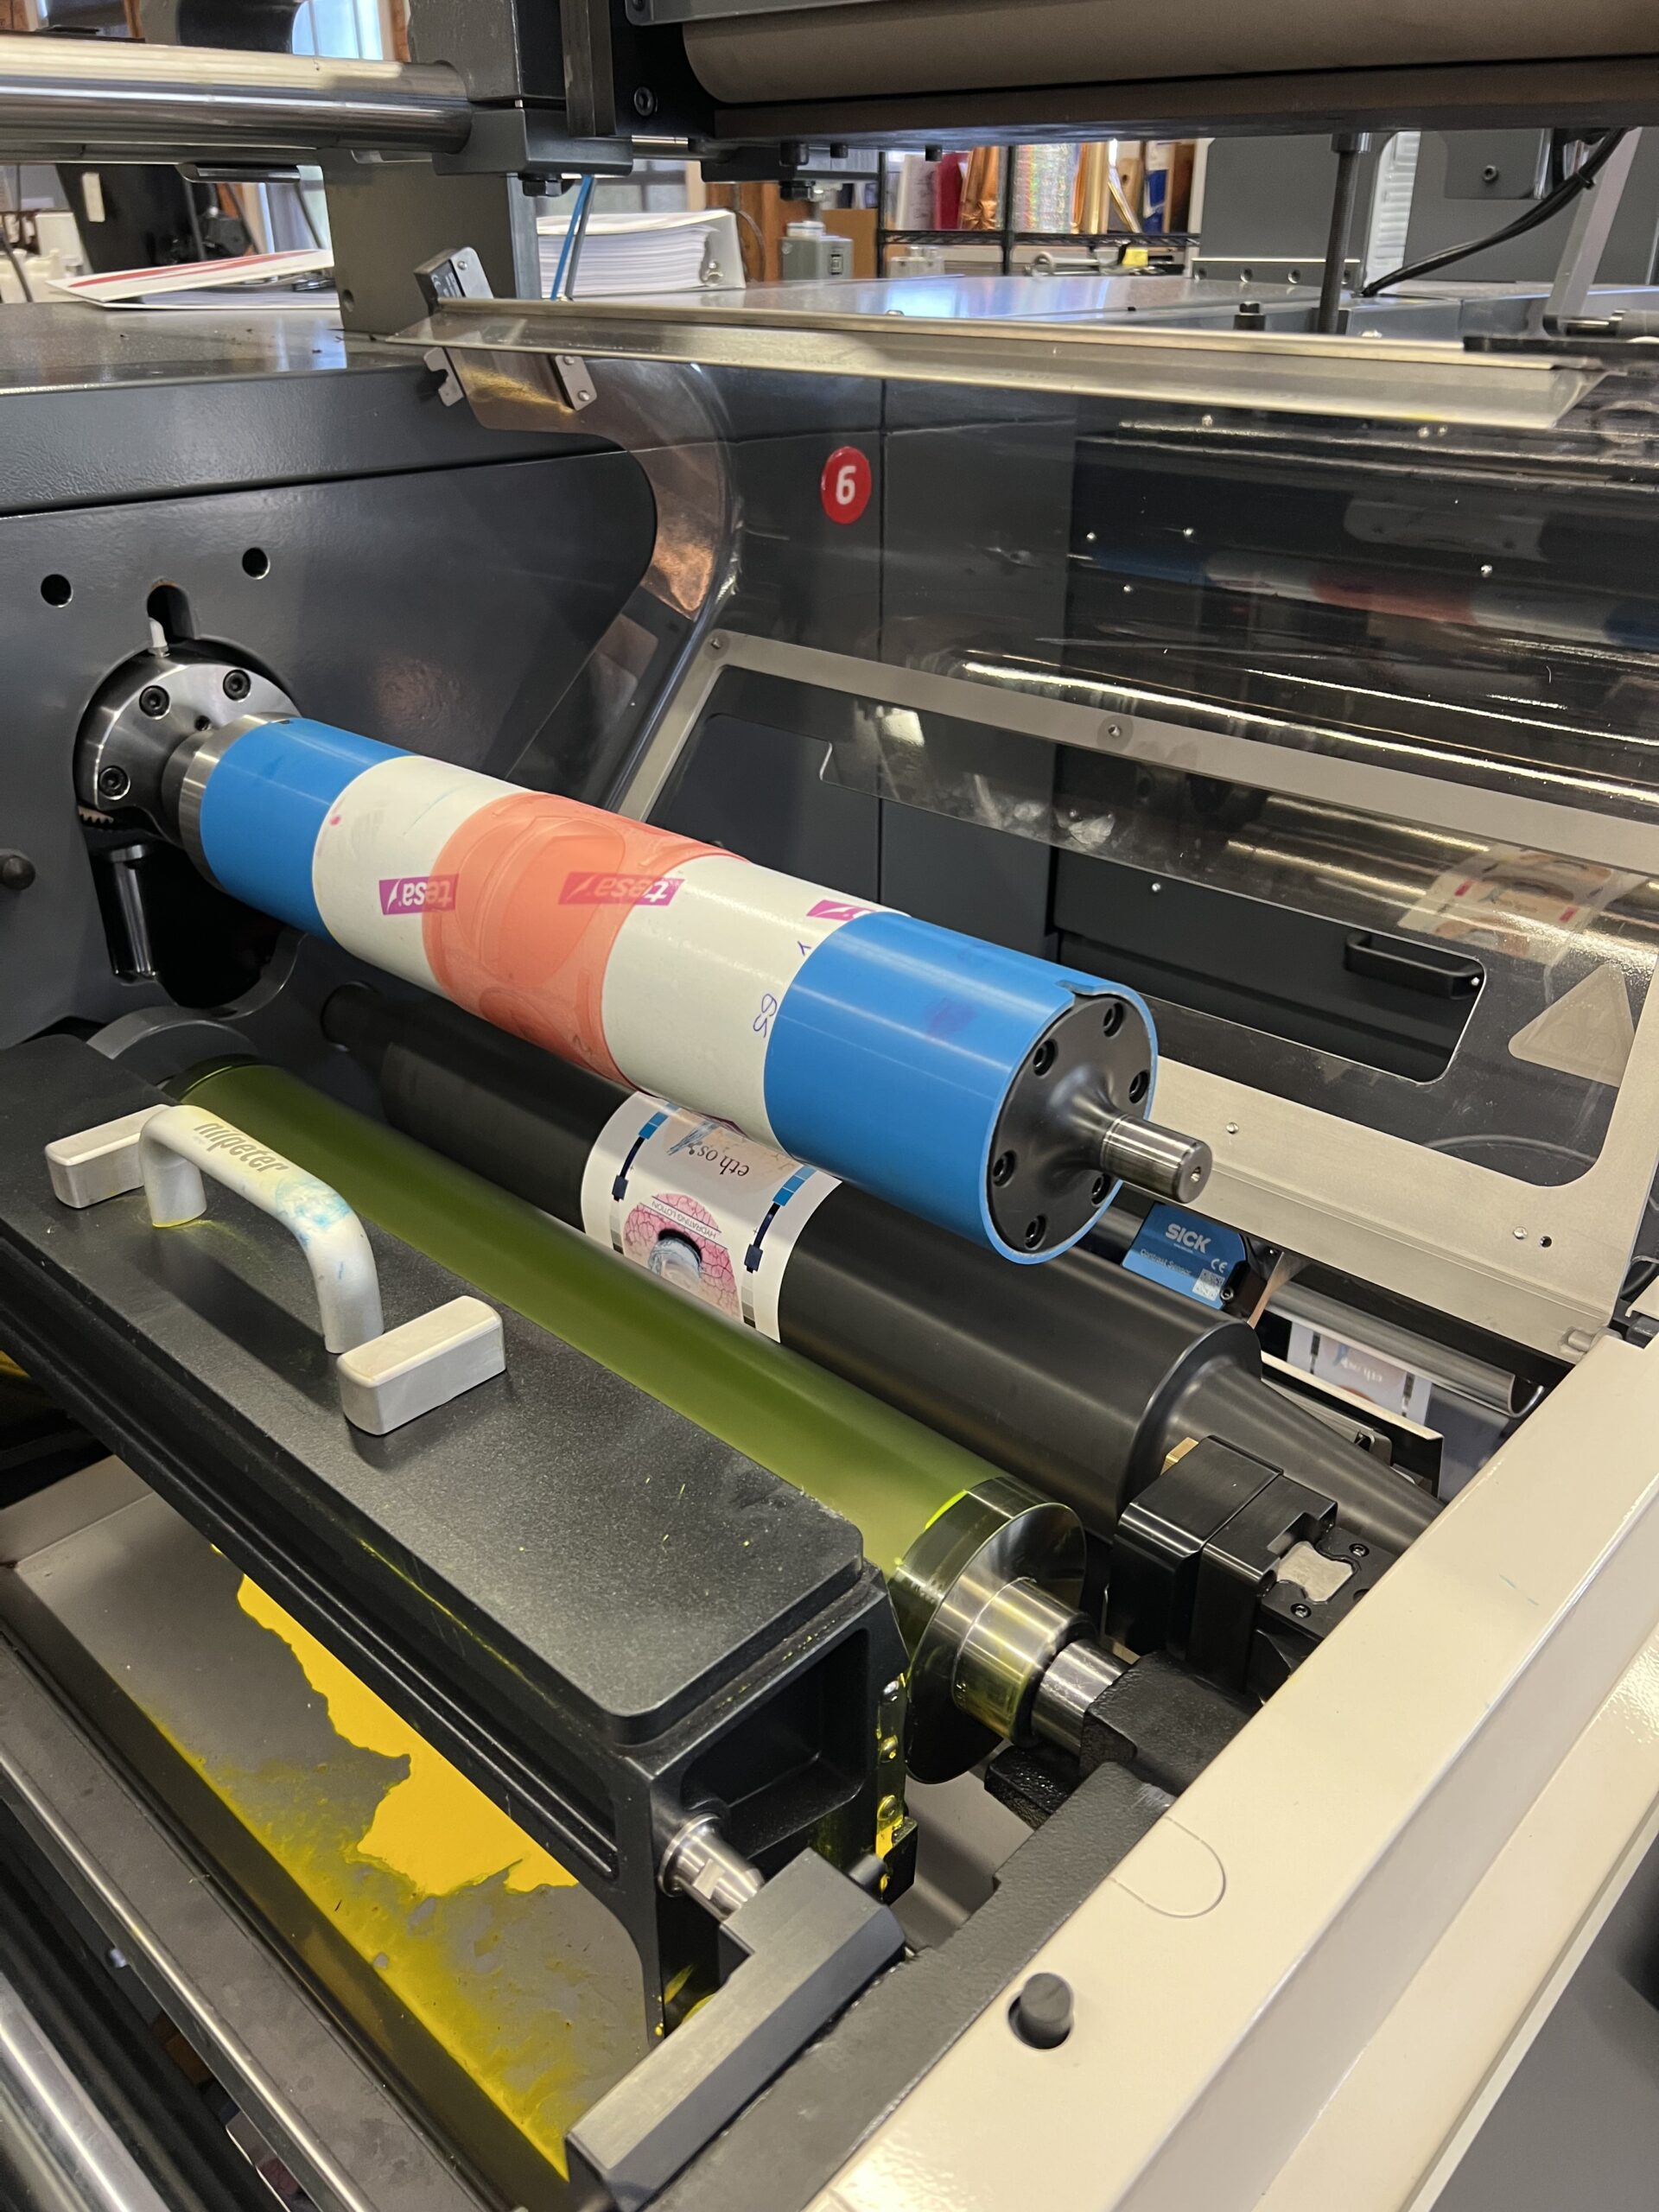
Once the plates were cut apart, the mounting process was next. JM Heaford Mounting and Proofing Solutions machine. Mounting plates is a very critical step in the process as it controls how your layers of color can be stacked on top of each other once printing. The key is to have tight and even plate mounting in this step to be able to achieve a tightly registered final image. We mounted the plates in the order they would be printed which is black, foil, cyan, magenta, and yellow.


To mount a plate, begin by grabbing a blue plate cylinder that has sticky back already mounted onto it. Next, mount the blue cylinder onto the silver plate cylinder by using the air compressed machine which pumps air out to allow the blue piece to slide onto the silver. After that is mounted, remove the entire piece and place it into the JM Heaford machine.


Now make sure the mobile shelf of the JM machine is locked into place, do this by looking to the left side of the shelf and feeling the shelf lock into place. Next, take one plate and place it face down on the black foam piece. Using the cameras and the monitor, line up the registration marks on the plate to the registration marks on the monitor.

After the marks are lined up as close as possible, lower the plate cylinder onto the plate. Next pull and push the shelf holding the plate in order to wrap the plate around the cylinder using the sticky back to adhere everything together.

After each plate was mounted, I checked them with my professor making sure that they were up to her standard and would produce successful prints in the end. I did have to remount quite a few plates during this process as I wanted things to be very precise. Then remove the cylinder from the machine and set it to the side. Repeat this process of plate mounting for each plate.
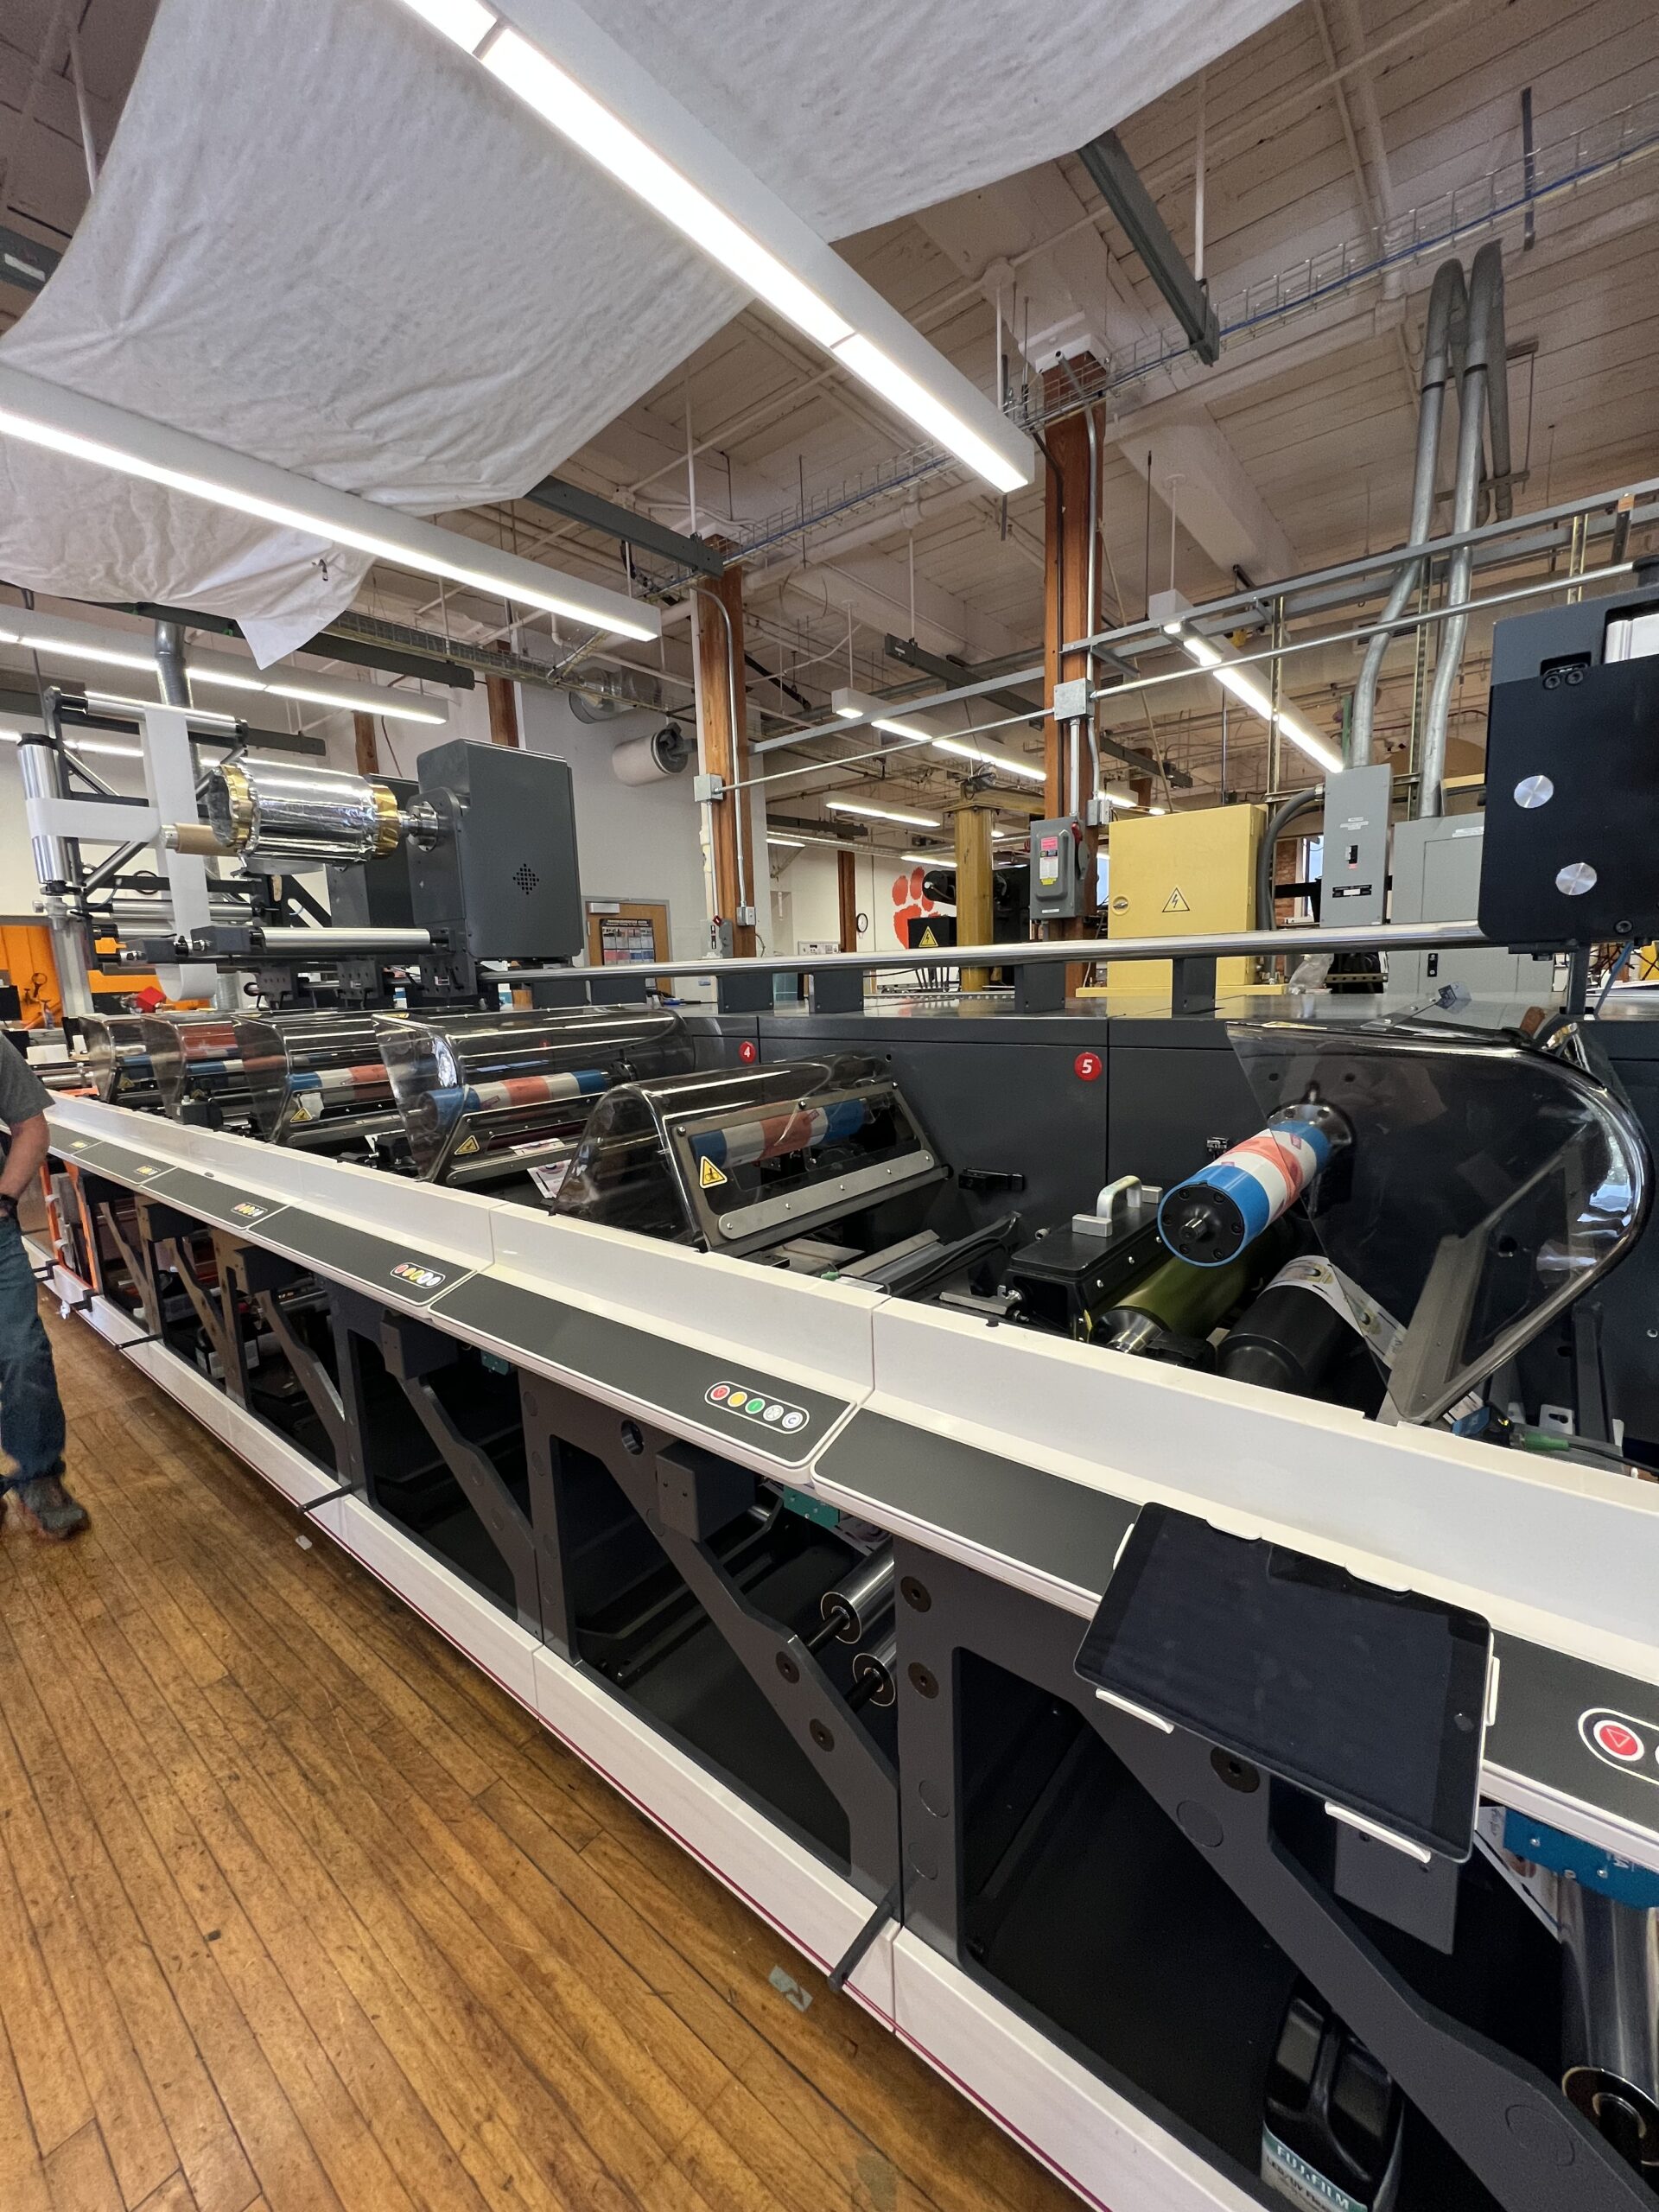
Nilpeter Press Set Up & Run
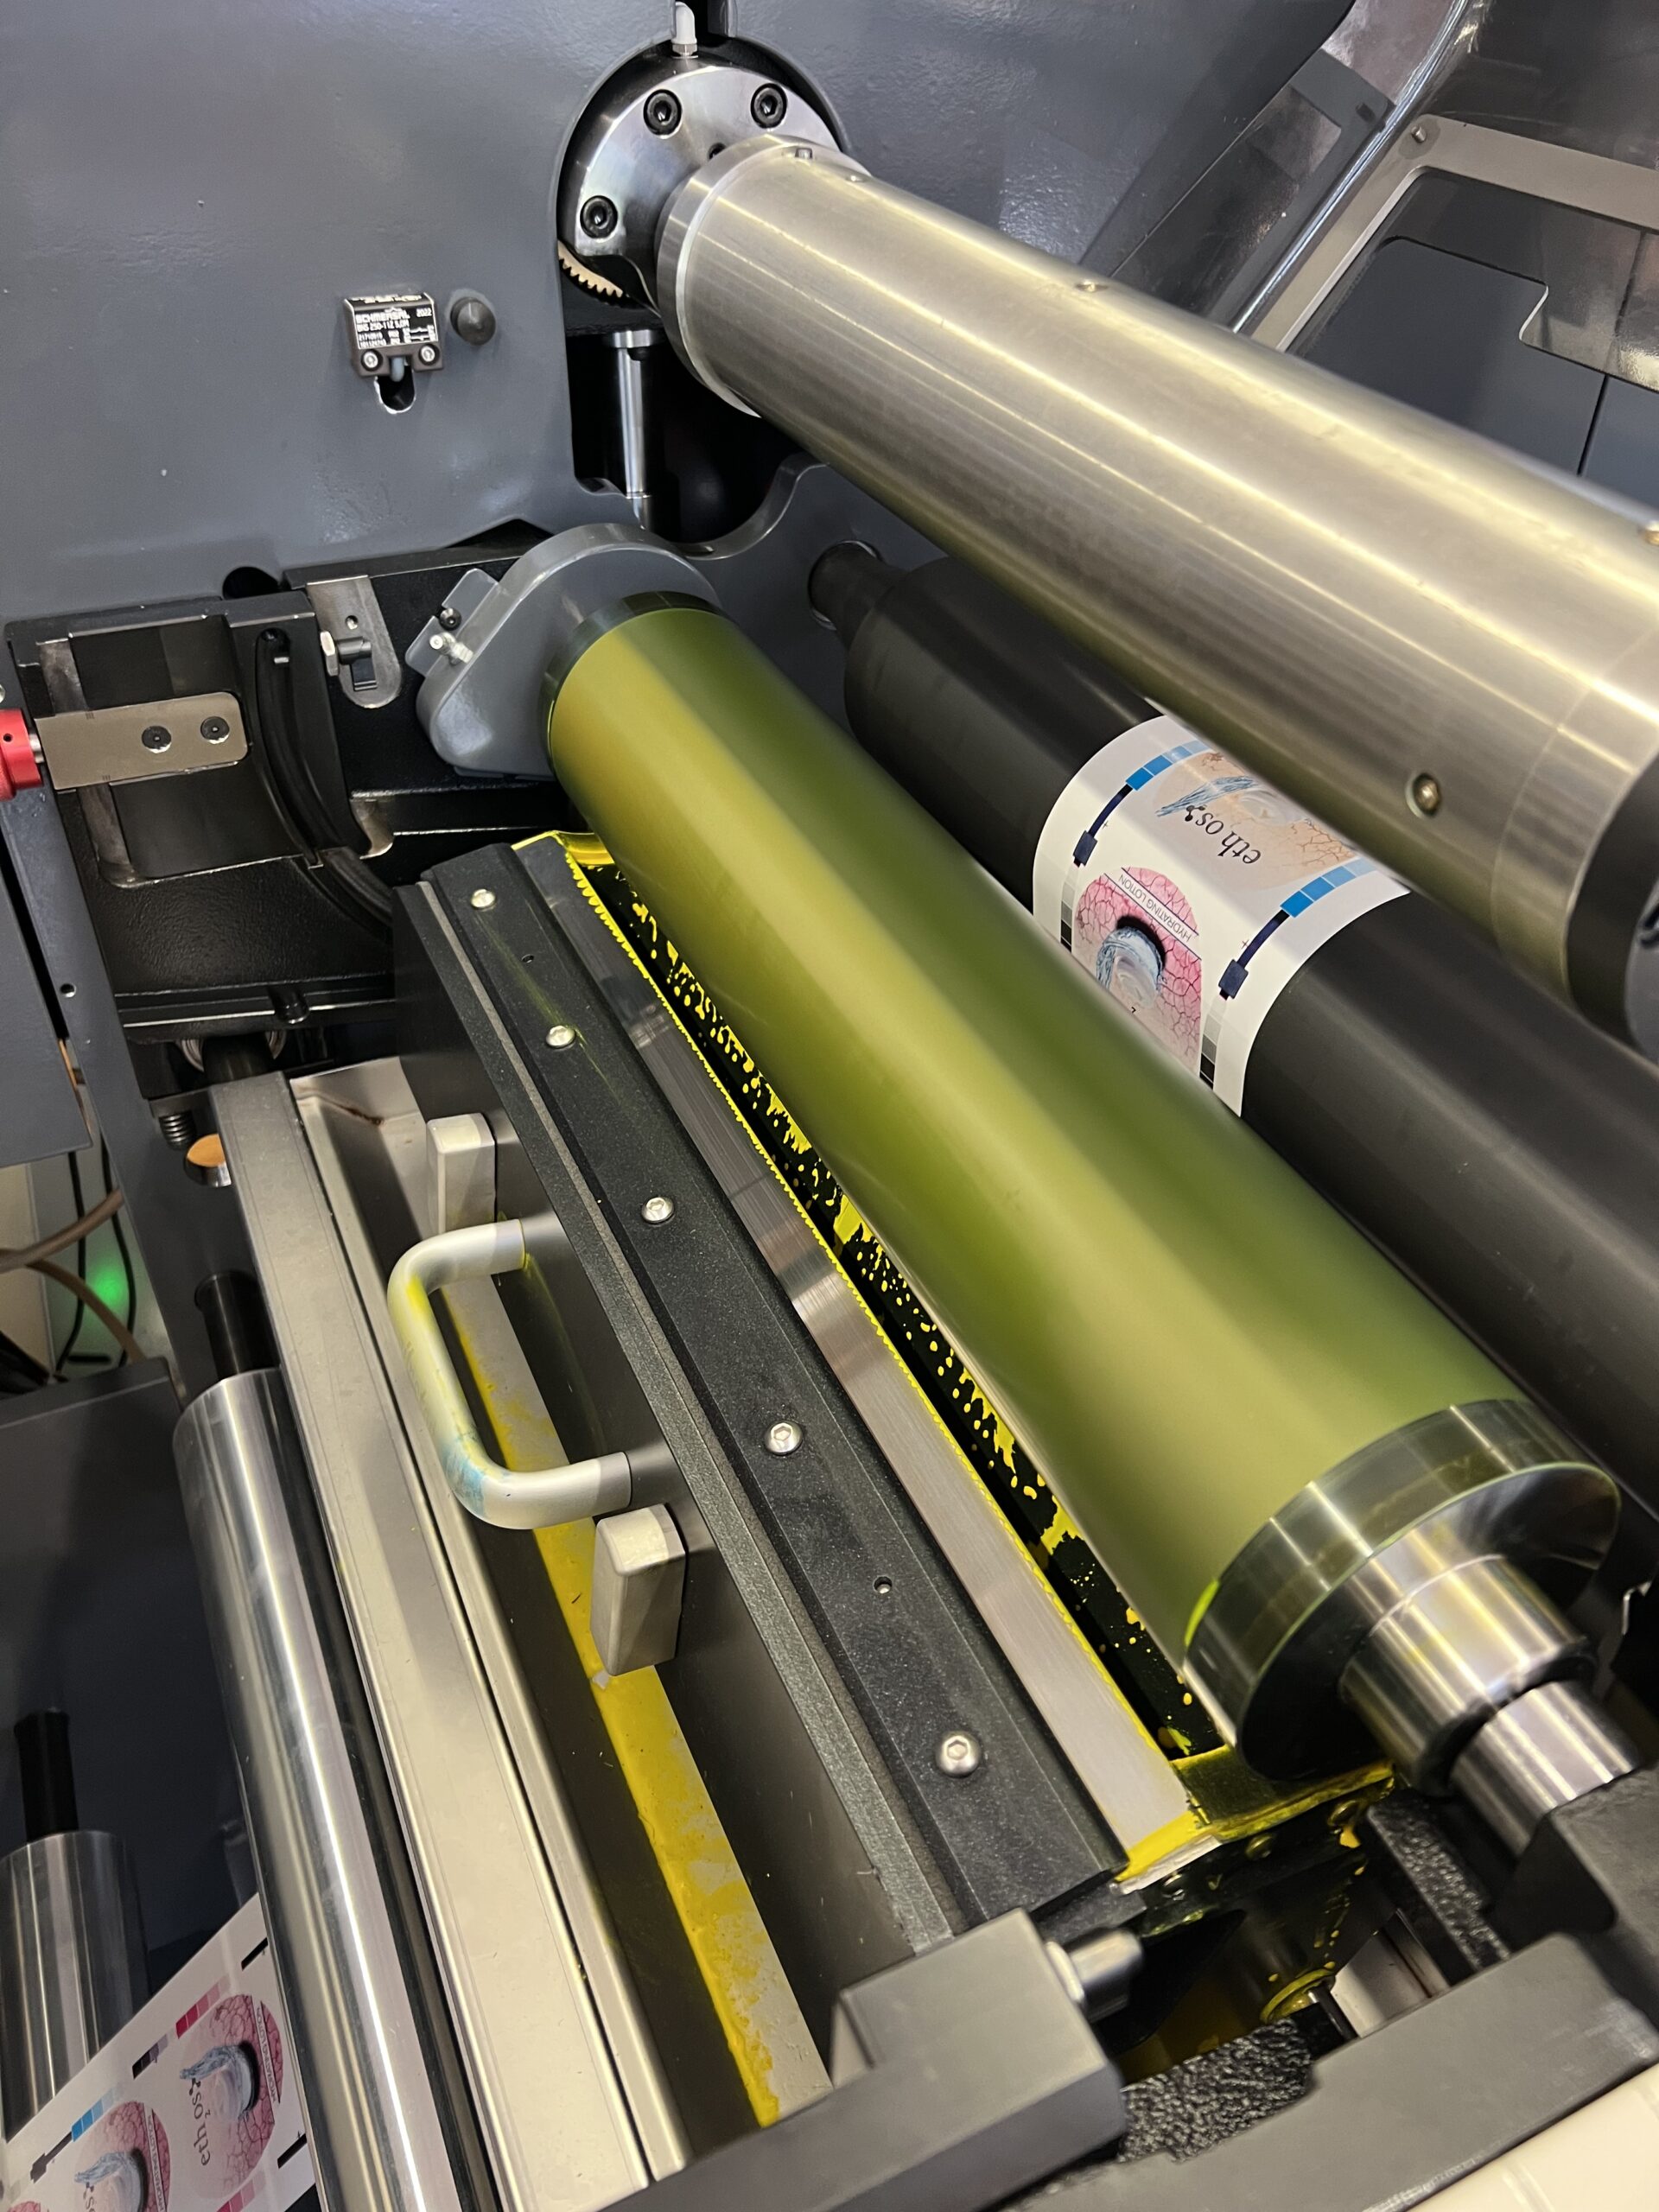
The press requires a substrate as well as ink to be installed in the press. The substrate that was chosen for us was called Mactac Permanent RDT 21153-5 5 inch by 5000 feet 60 pound FSC substrate. The substrate would later be die cut into circles, this was the only option available at the time to select, therefore I designed my sticker appropriately. The inks that were used in the Nilpeter were all LED/UV Flexography inks such as process yellow, process black, process cyan, and process magenta. We also used LED/UV Flexo laminating adhesive as the adhesive for the silver foil being sleeked to the sticker. Because of the different inks and adhesives used, we used different anilox rolls. The process color anilox rolls (CMY) is 1.9 BCM xcat, the adhesive for the foil uses an anilox roll with a 5.45 BCM, and the black ink uses a 1.9 BCM apex anilox roll.

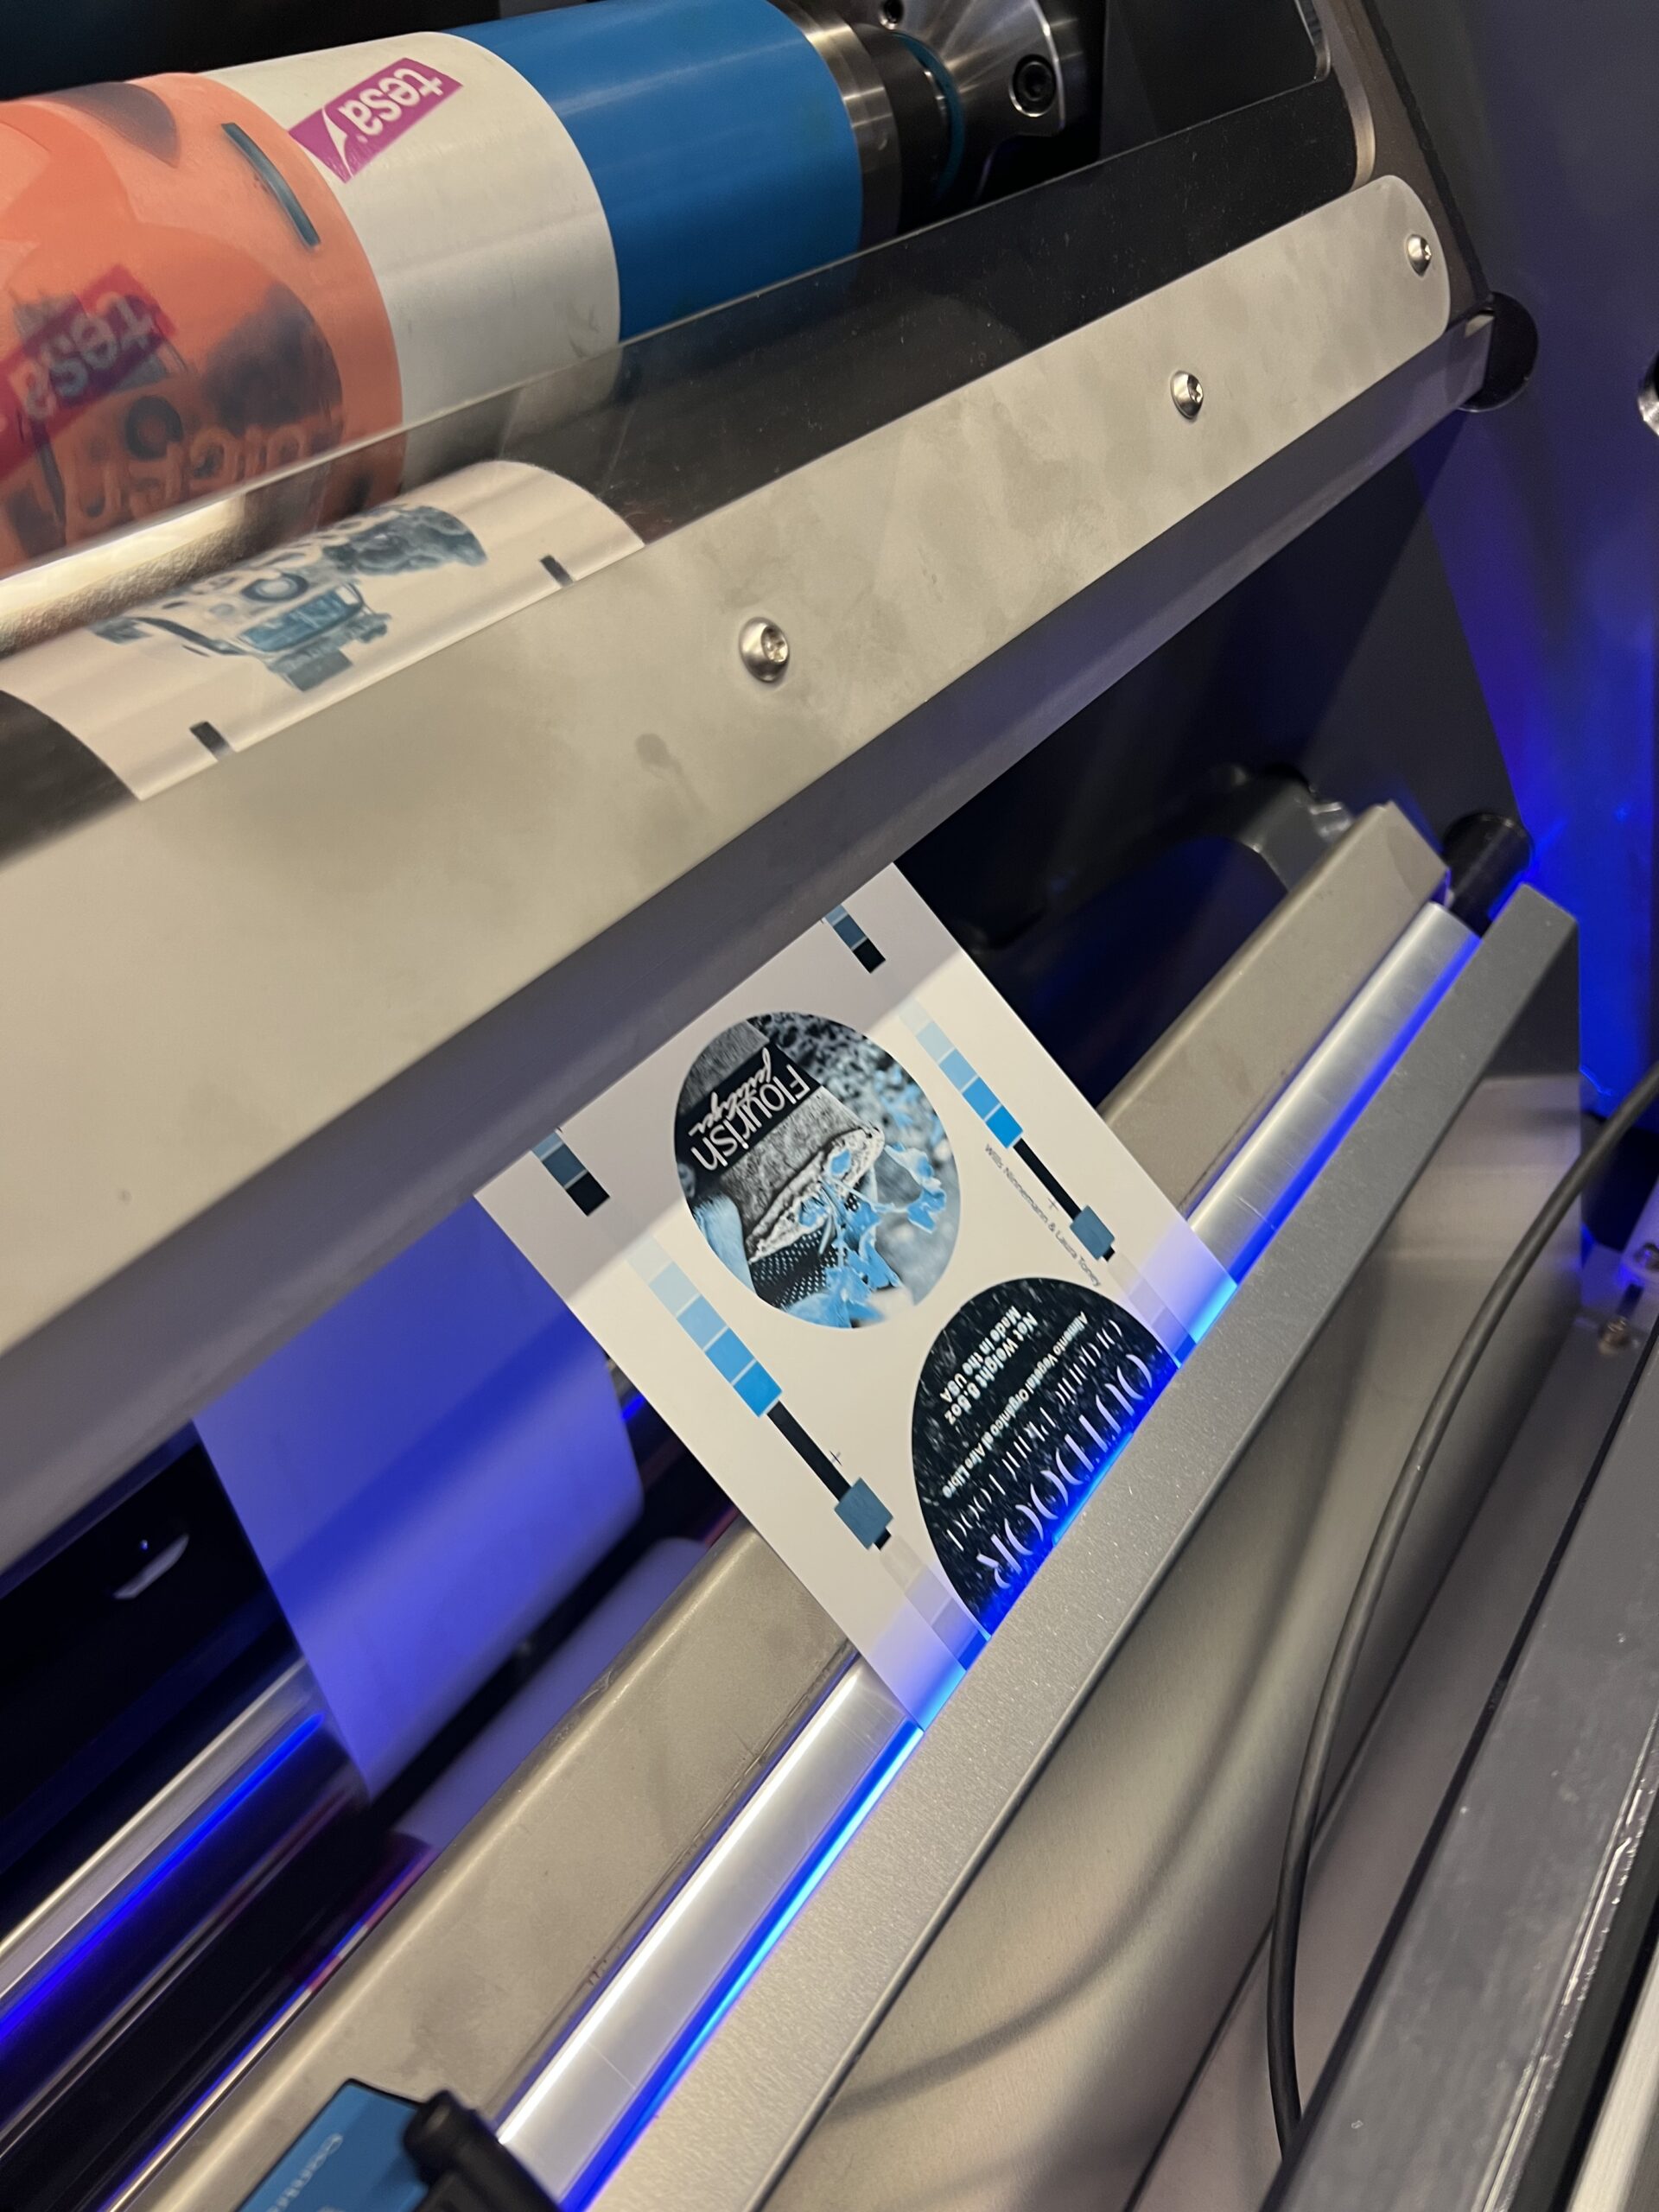
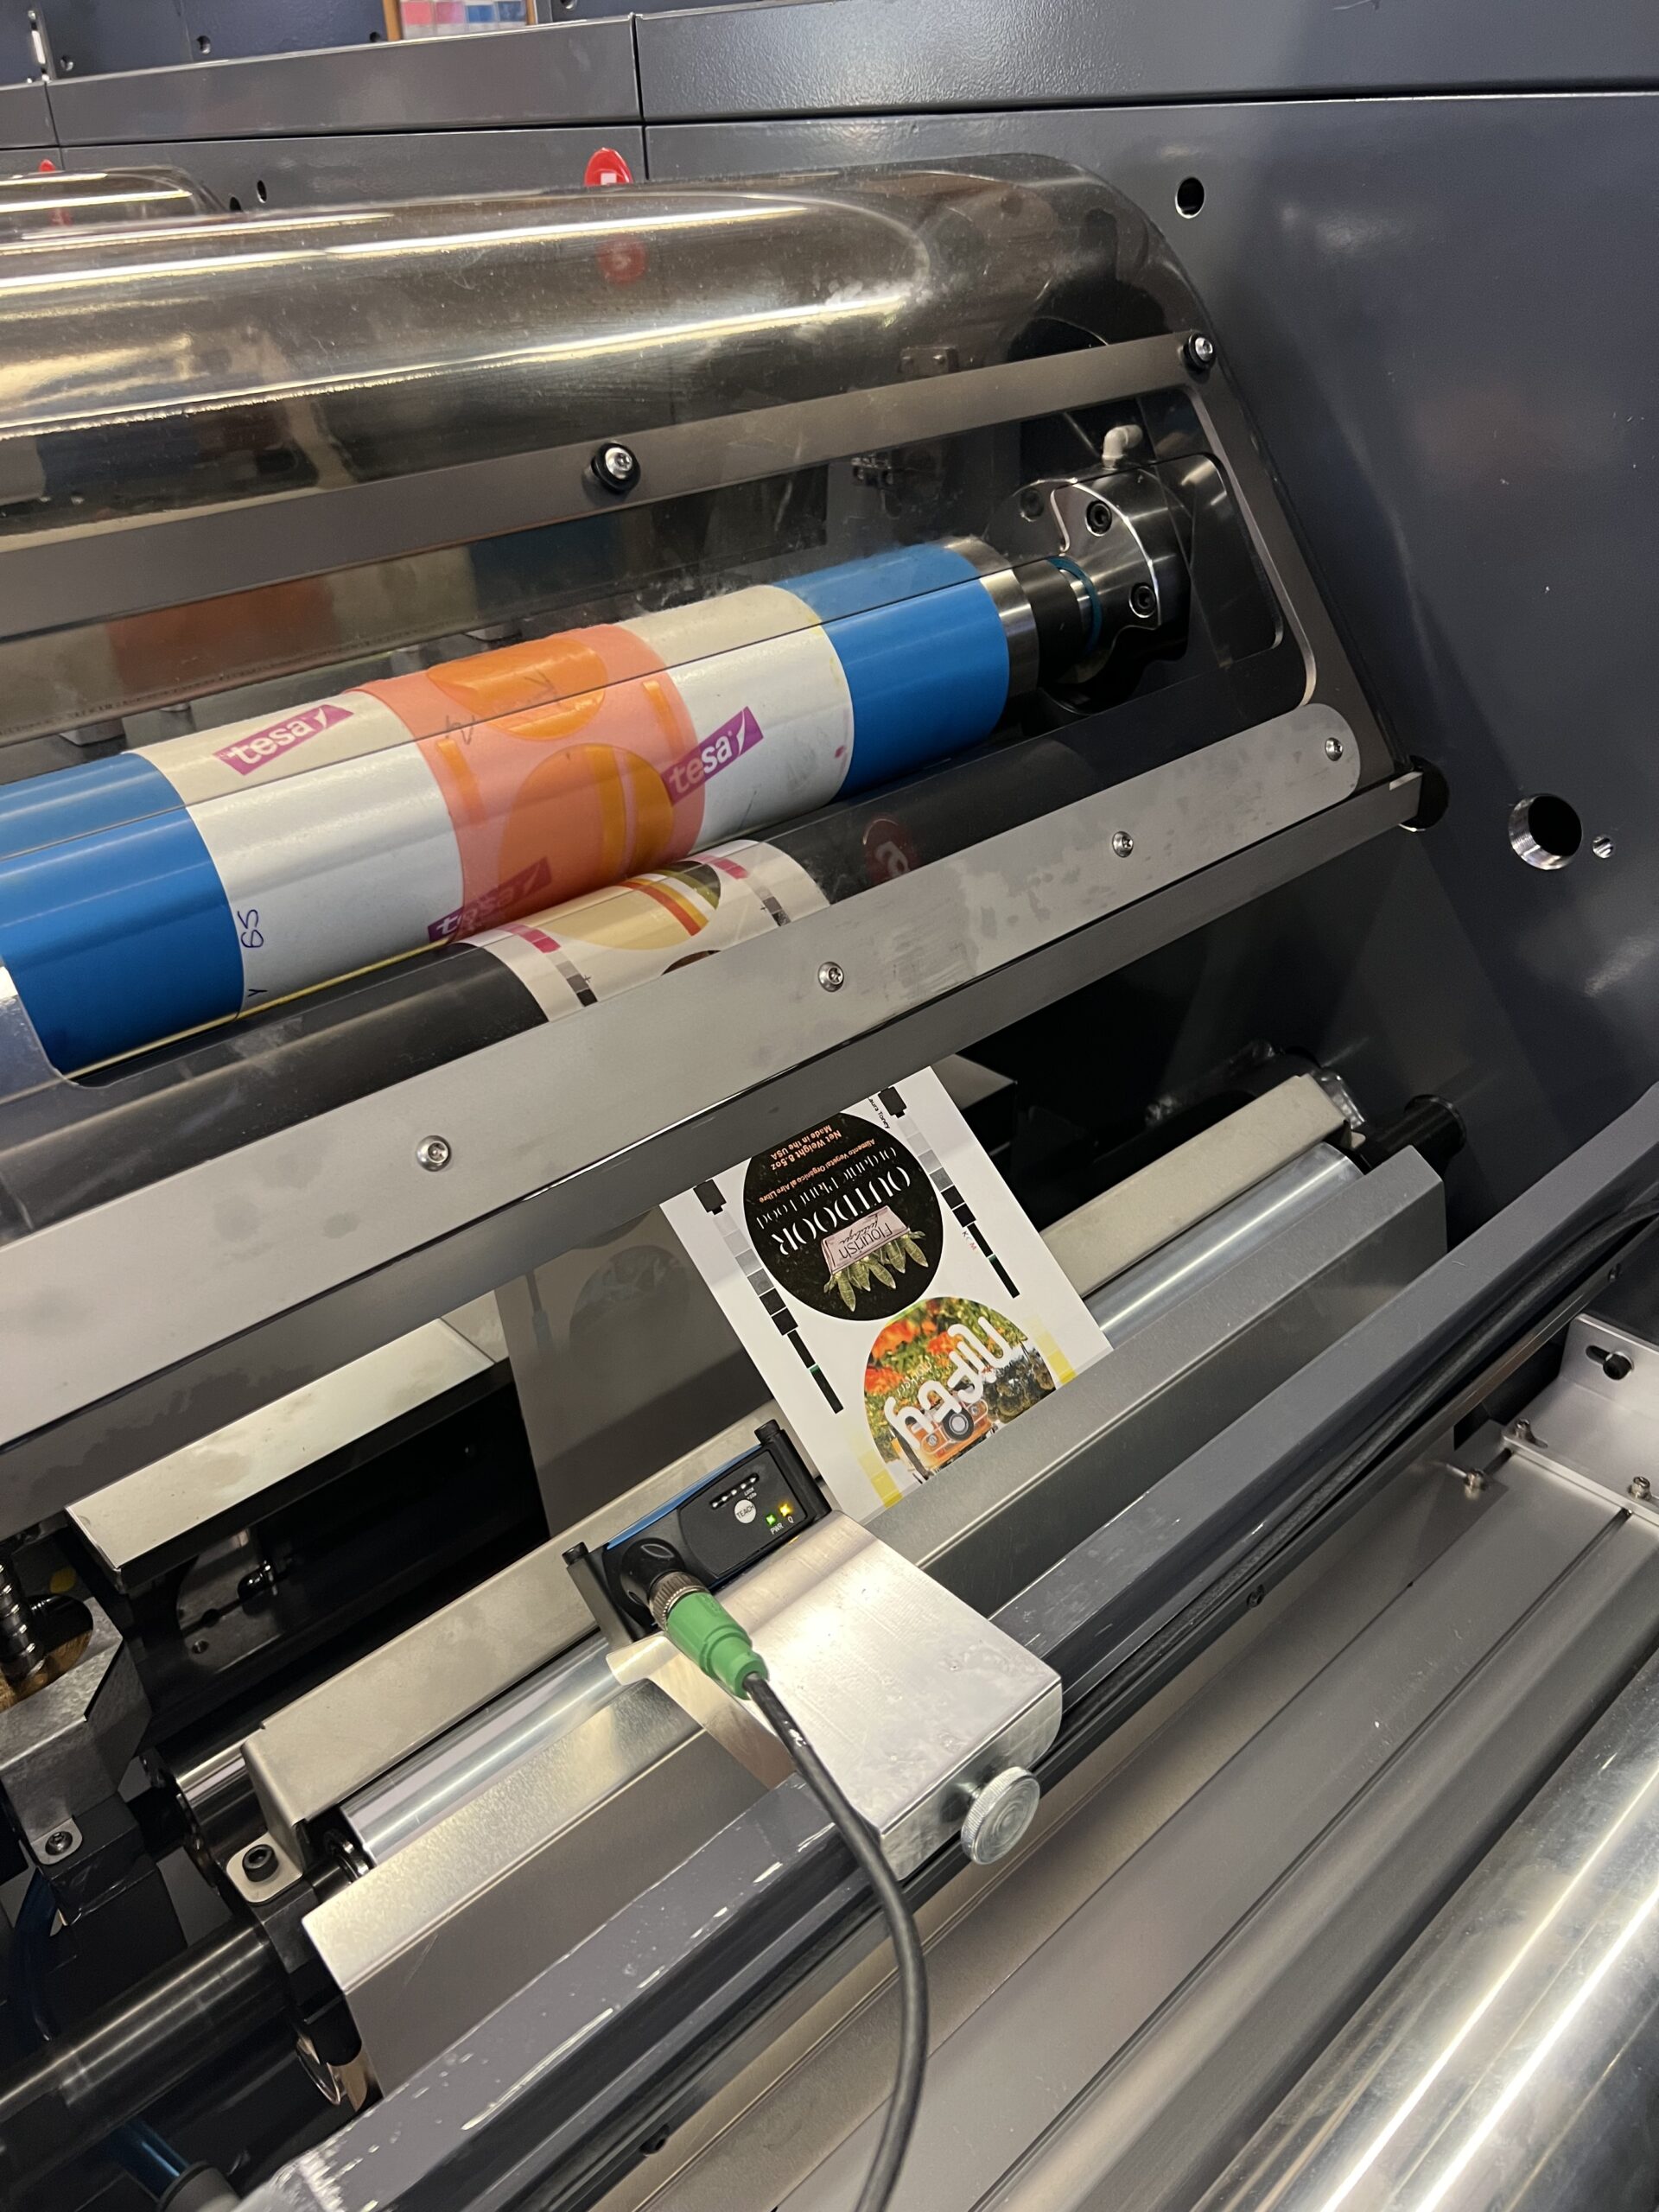
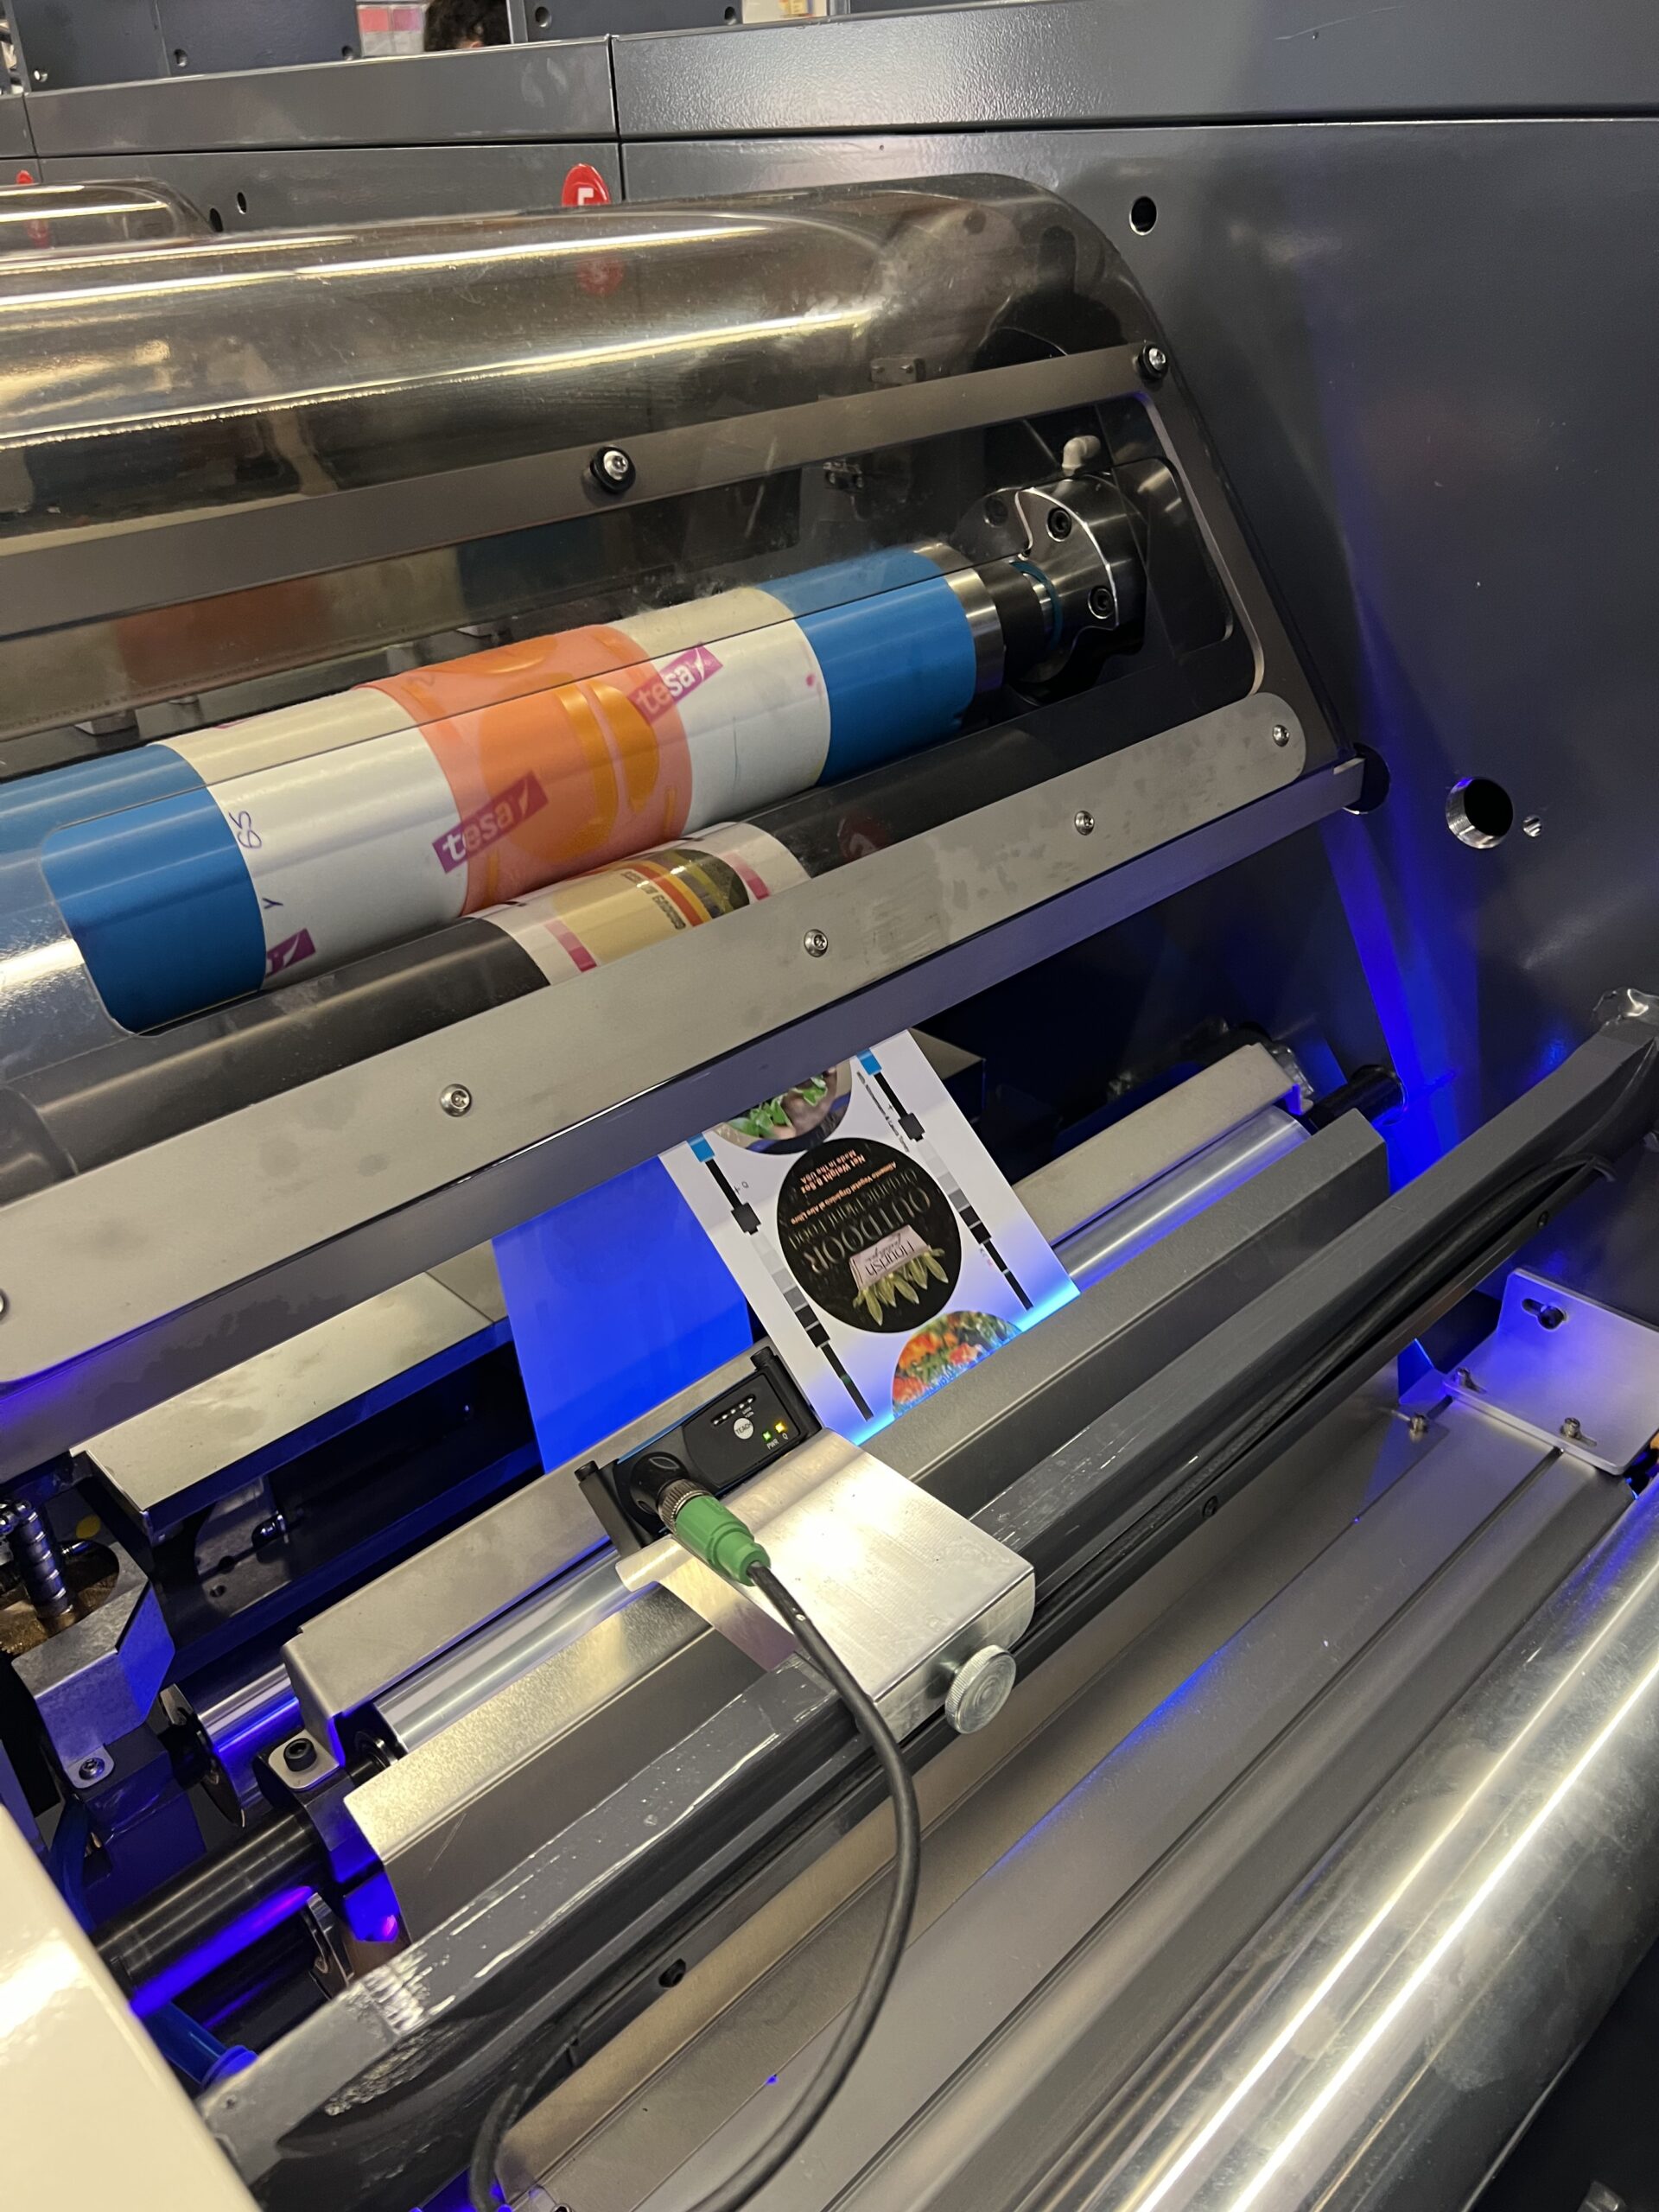
Now that the plates, substrates, and inks are all situated, it is time to set up each color’s section in the press. To do this, turn on the air on the machine, and then quickly shove each blue mounted plate cylinder onto the metal plate cylinder of the Nilpeter. After all 5 (CMYK and CF) blue cylinders are mounted onto the Nilpeter close the plastic chamber covers of the machine.

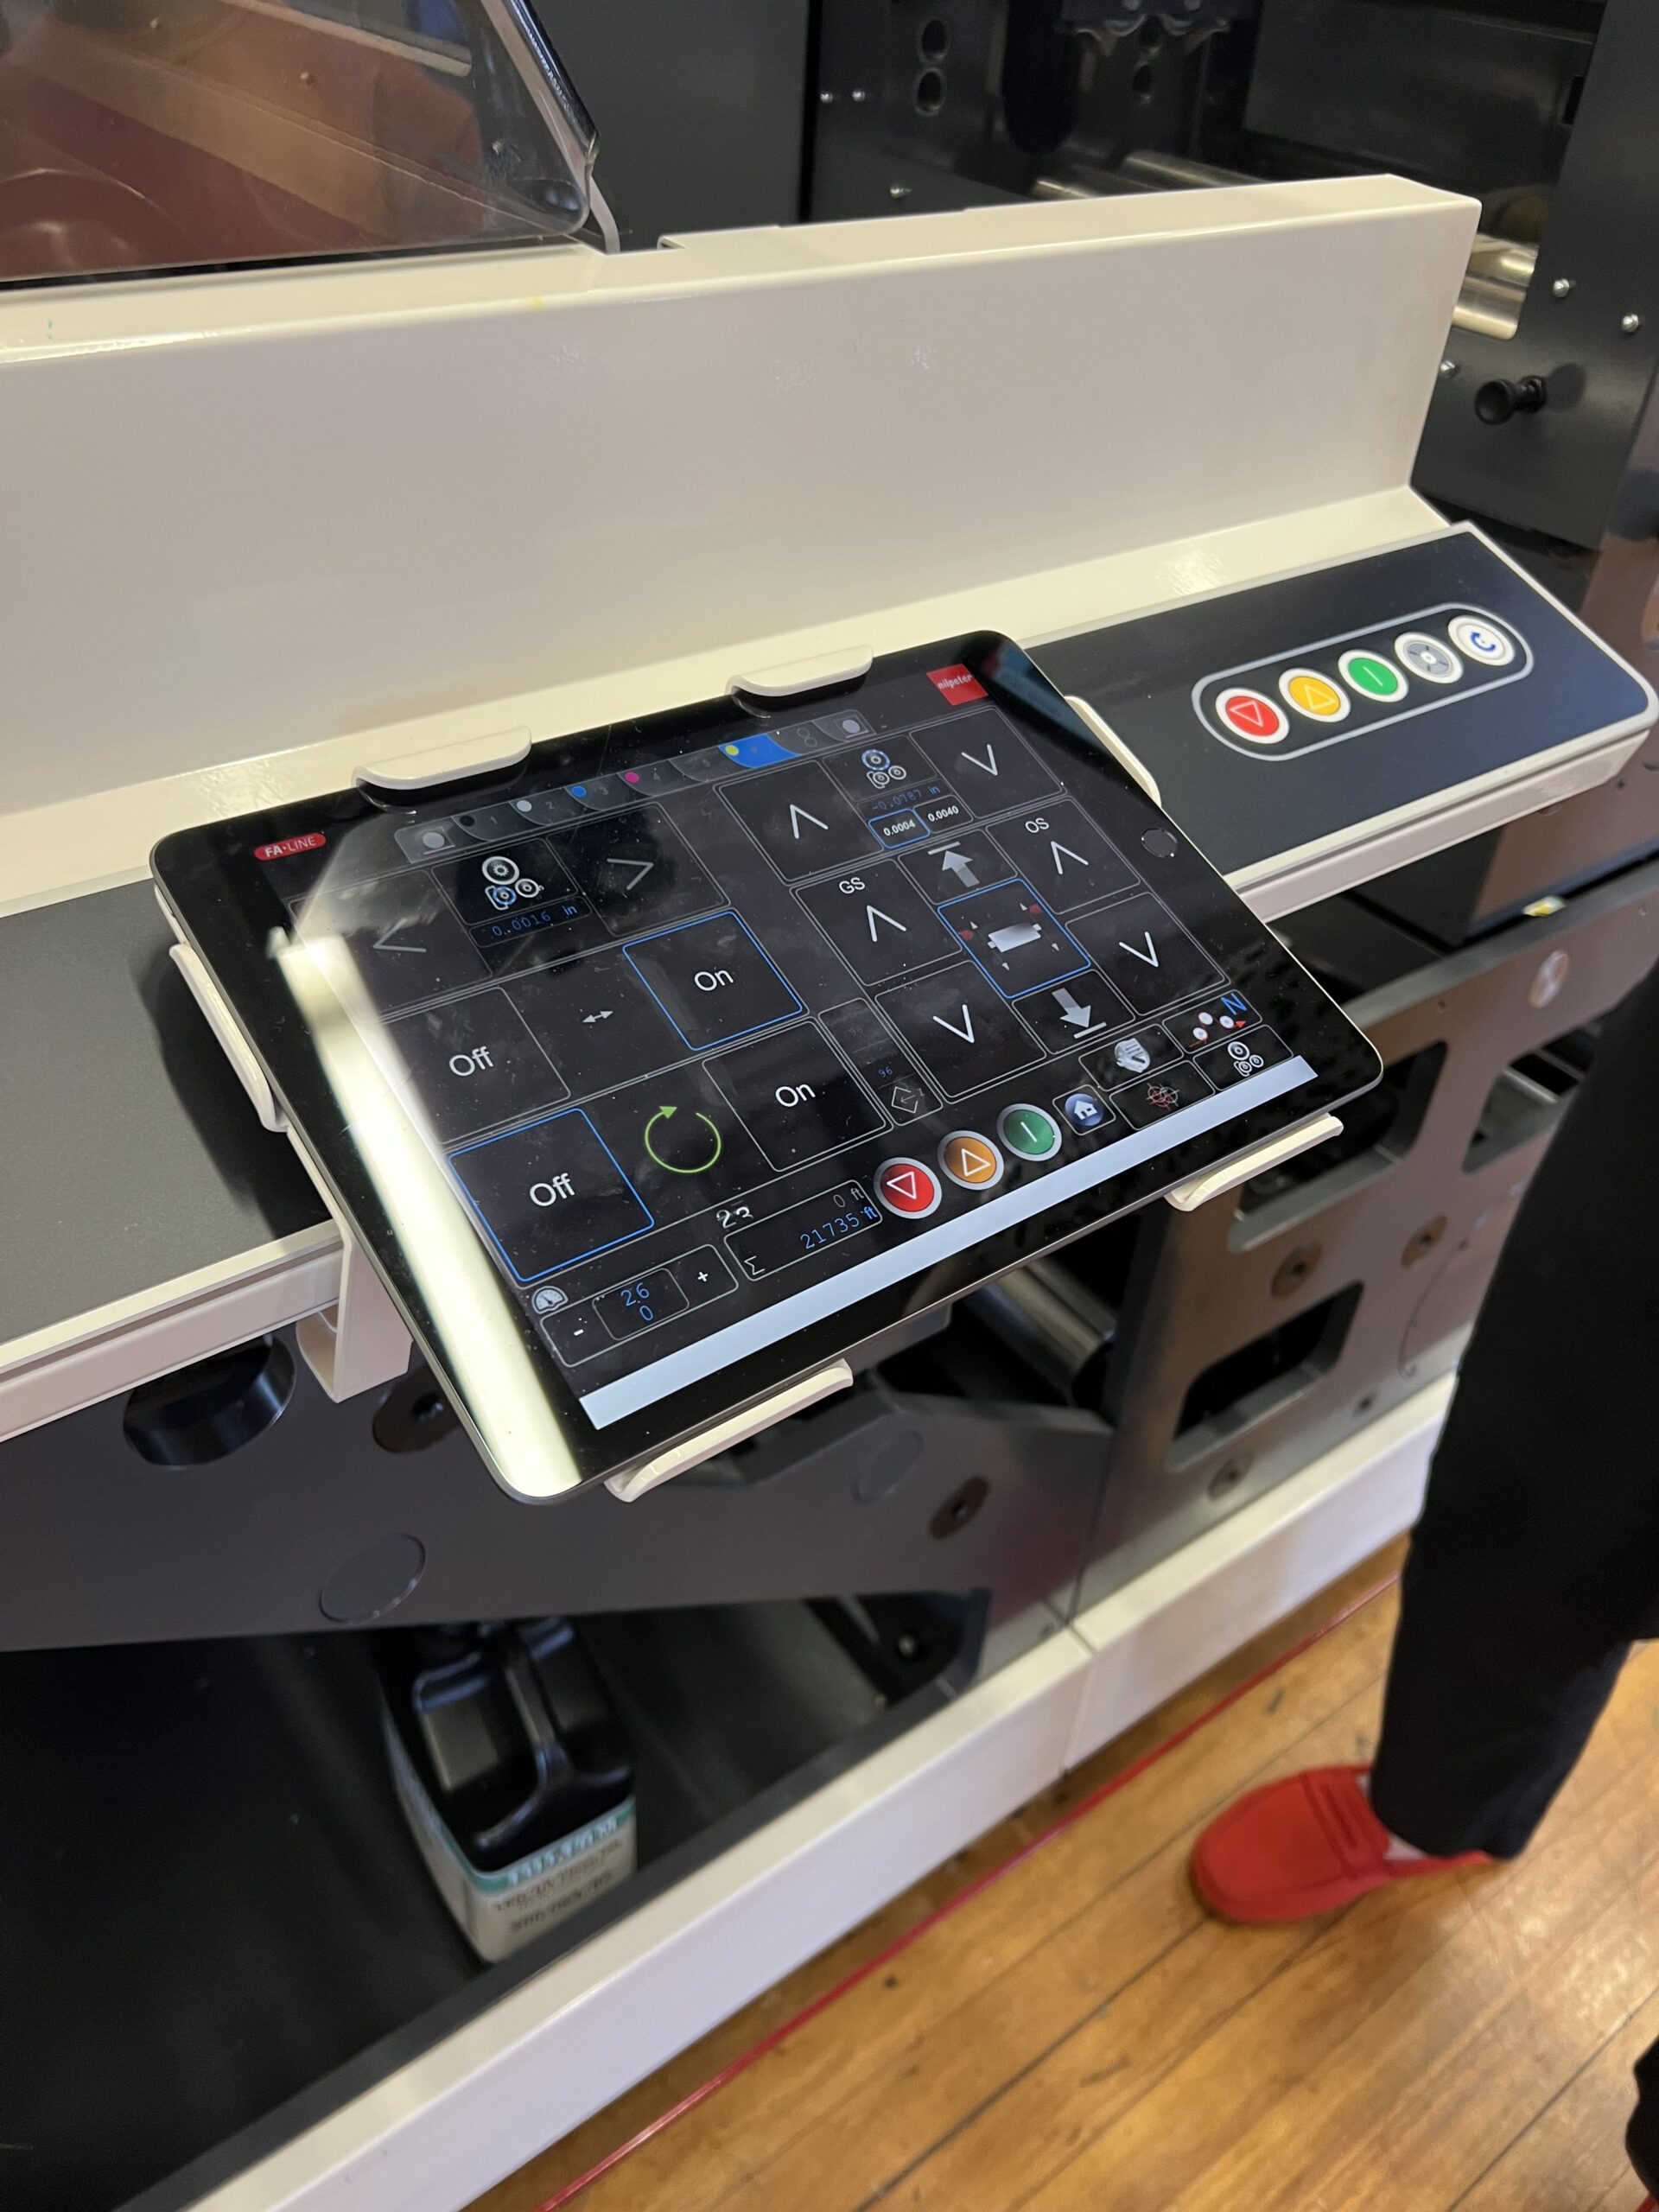
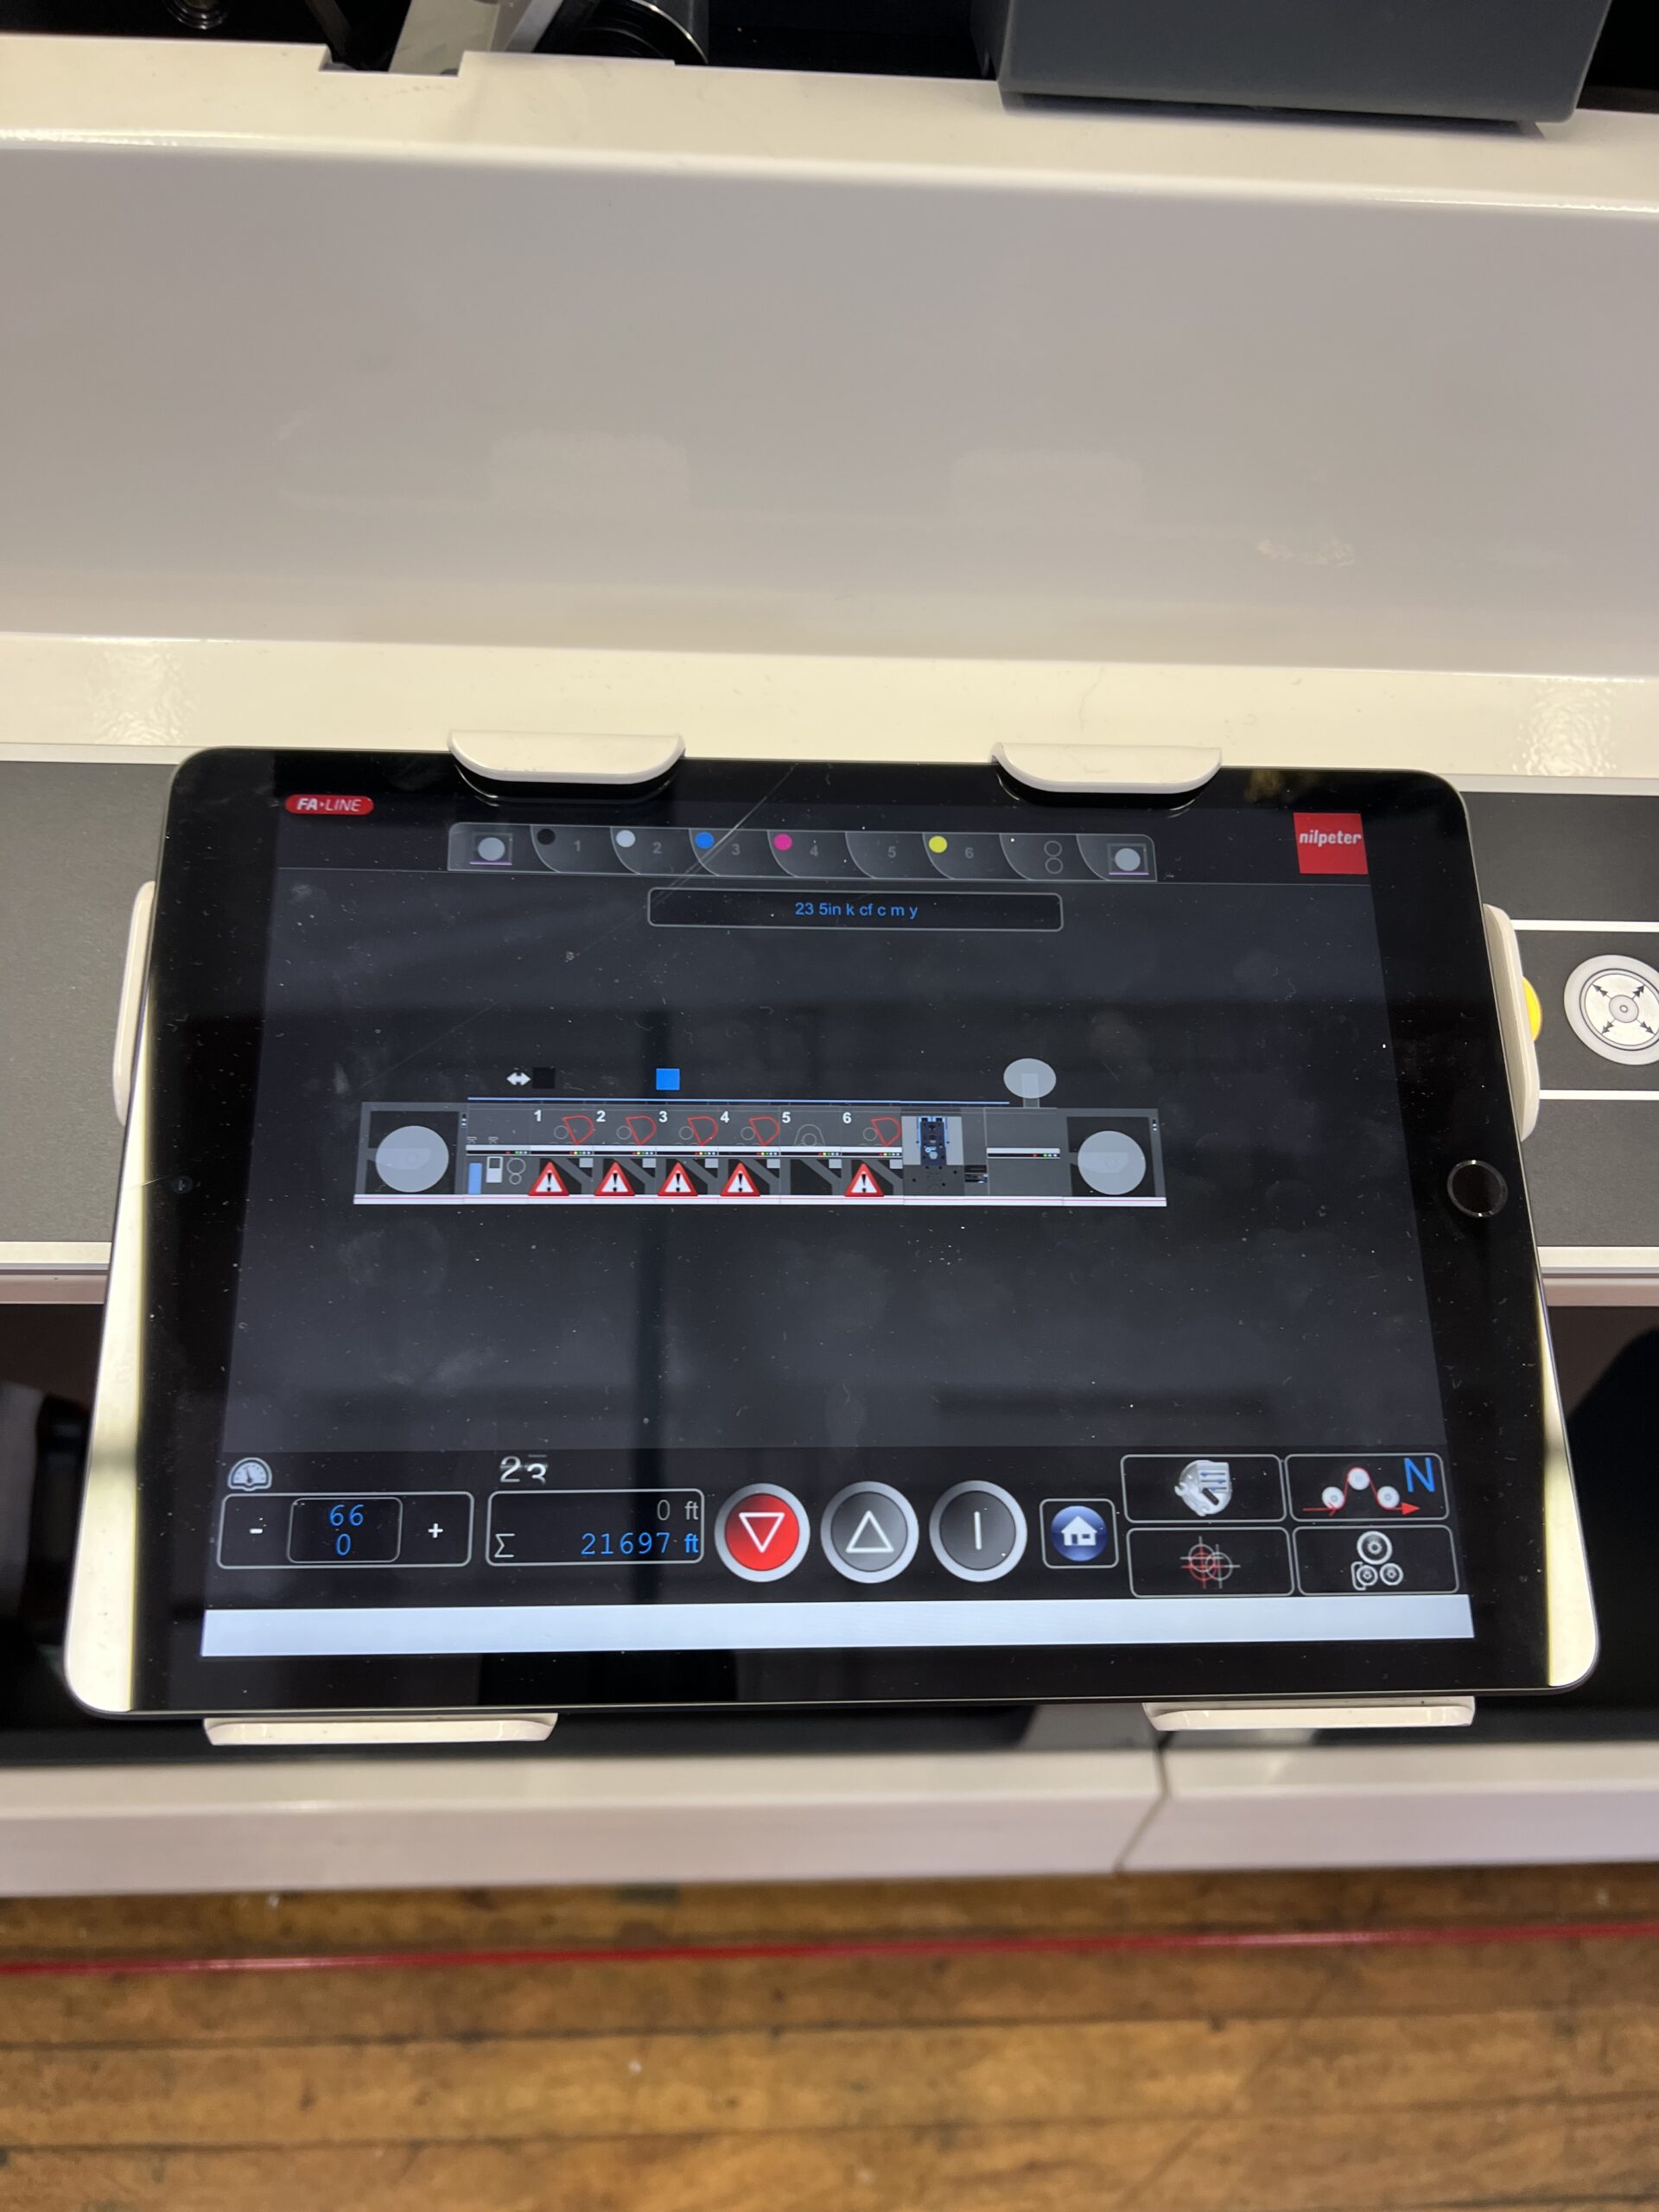
After this, the iPad mounted on the Nilpeter is really the only thing you touch from here on out. This machine is very easy to use because of this, the iPad is used to change the registration of the plates, as well as the impression of the plate. The impression of the plate was altered so that there was just the right amount of ink being picked up. This is important to do in small increments so that you do not use too much ink.

After each plate was picking up the right amount of ink, it was time to fix the registration. The registration of the plate can be moved in small increments or baby increments as we called them in lab. The registration of our plates was pretty simple, each color required some slight movement, but I do credit our mounting to how smooth the registration went.

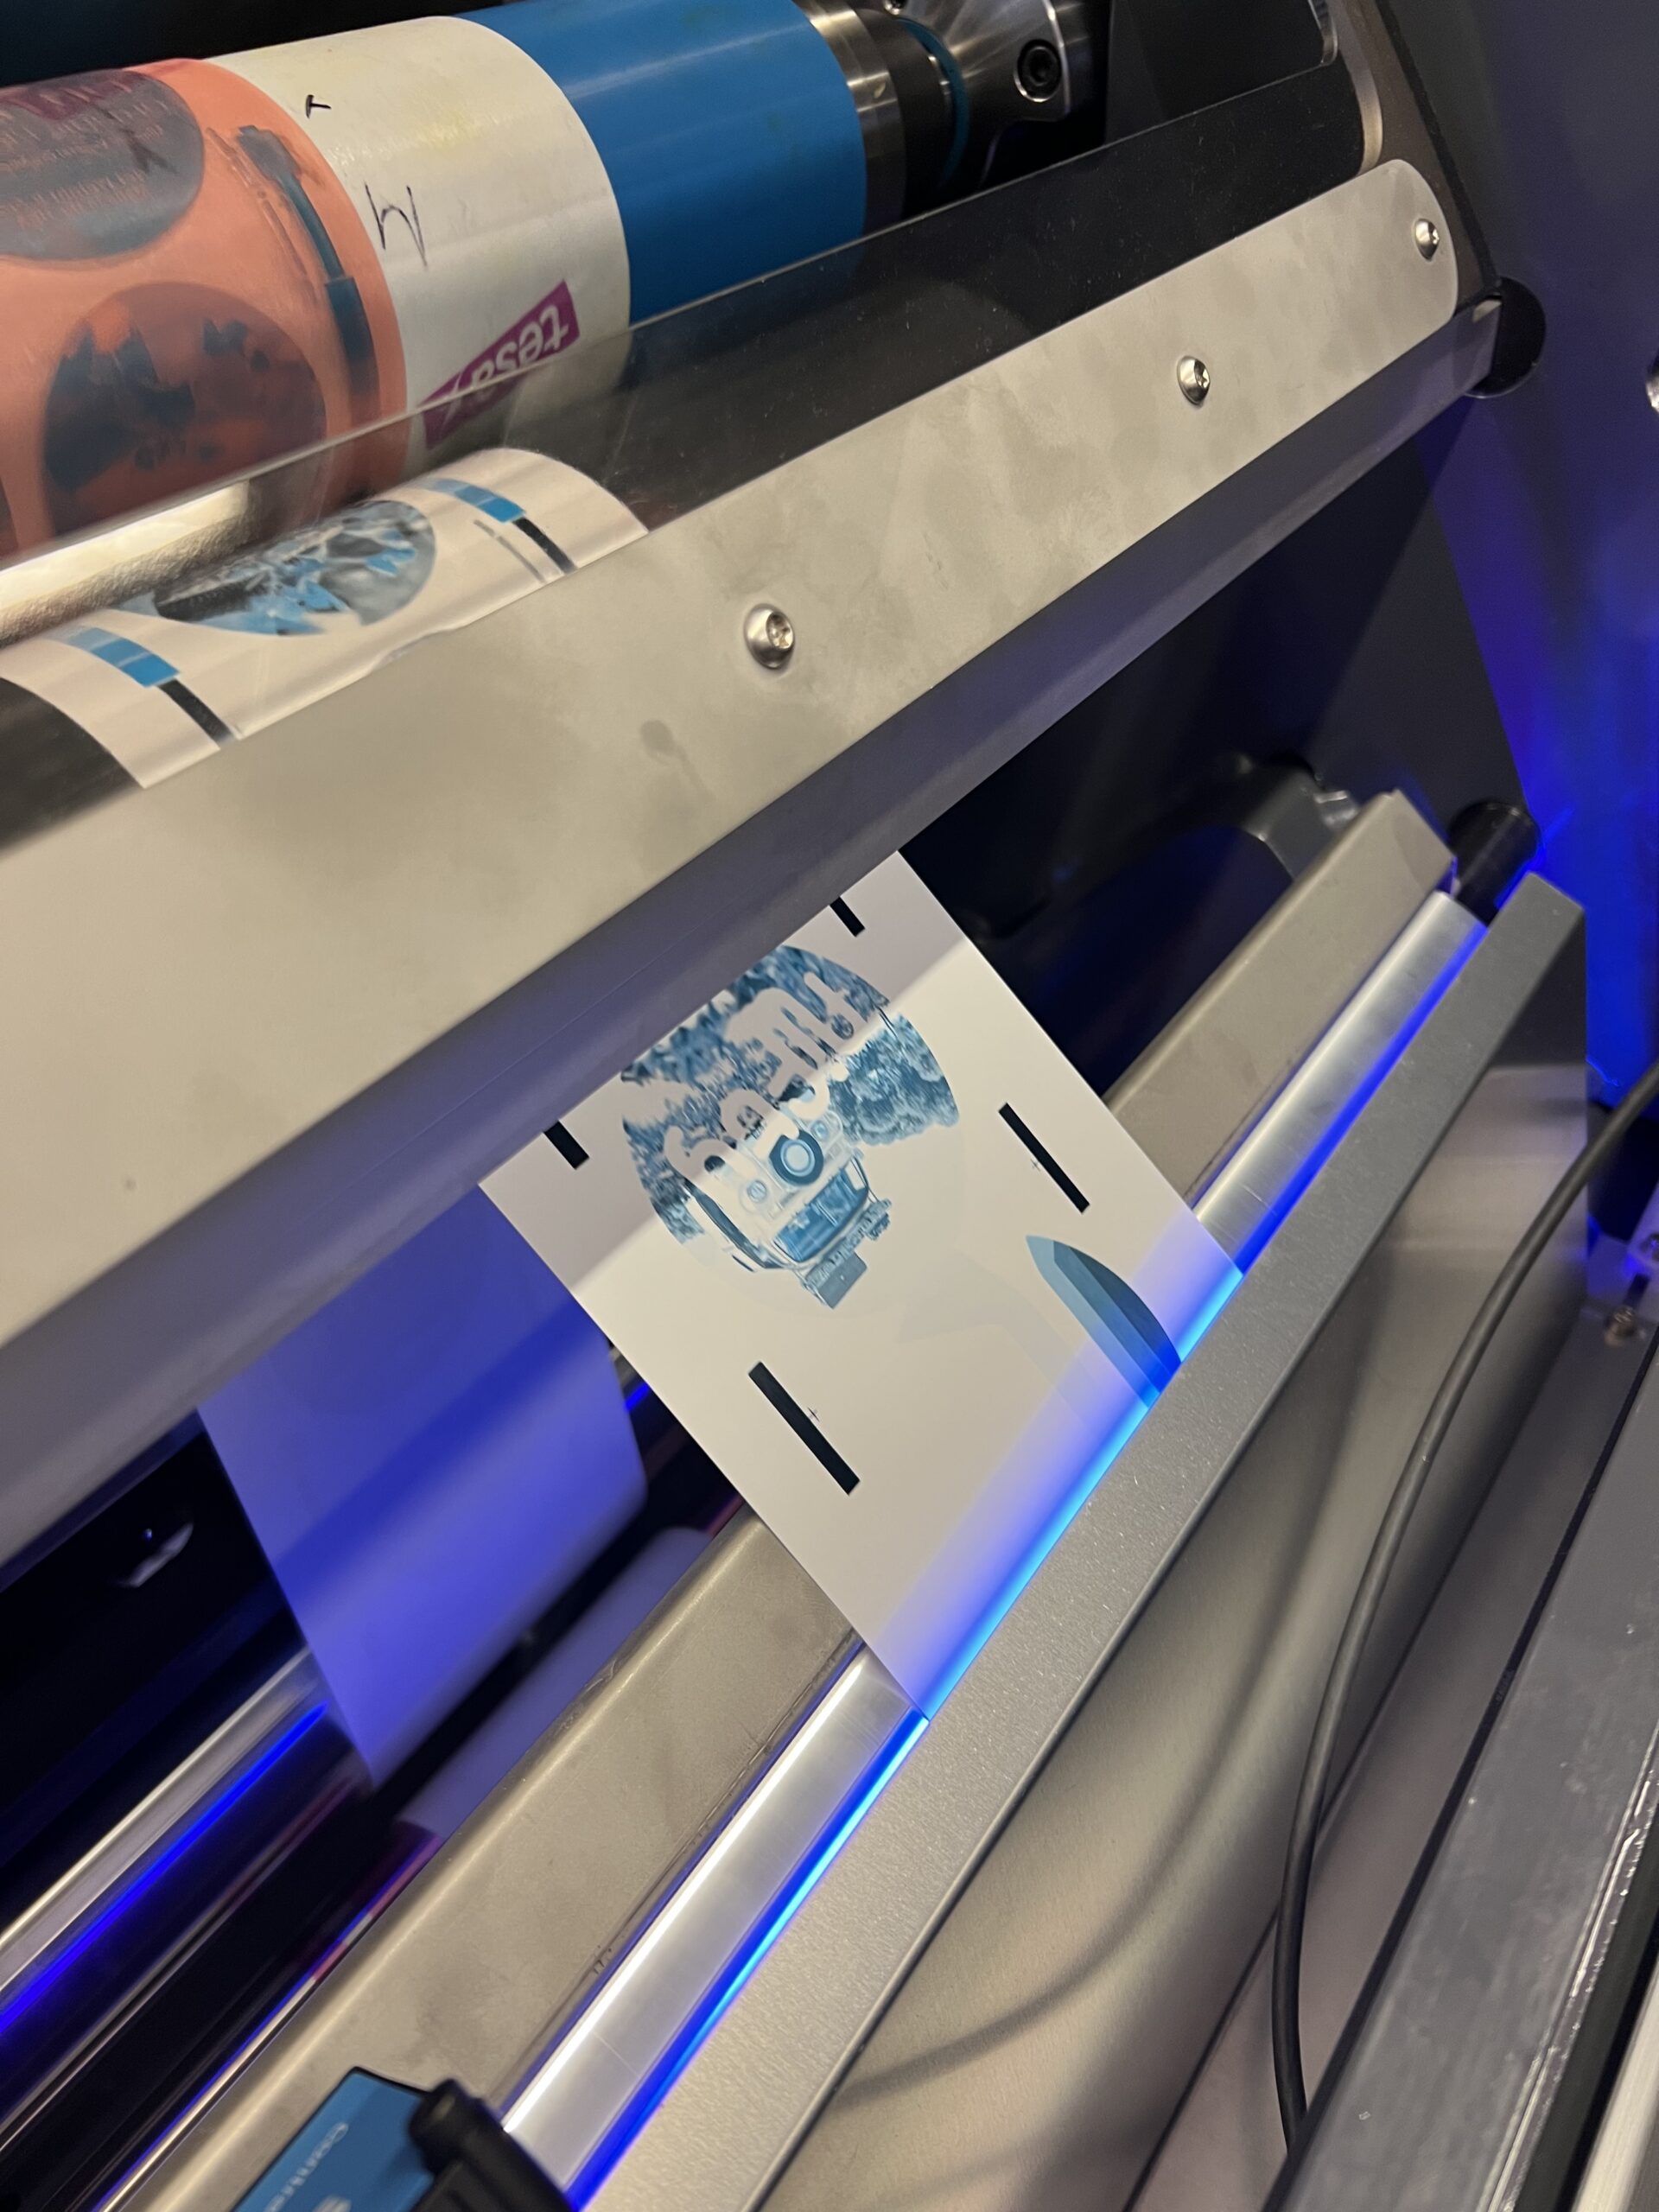
After this, the foil substrate was inserted into the Nilpeter. The foil is wrapped from the very top of the machine to under the main level of the machine, and Mrs. Fox had to do this loading part for us, it was quite complicated. After the foil is loaded into the machine we began registering it as well. This was the hardest layer to register because foil is tricky to work with. We had to keep adjusting the speed of the press in order to get the foil to stick properly, but then the faster it went the harder it was to see if it was in registration. This is where it was helpful to use the monitor on the press that takes pictures of the printed pieces in order to see the registration up close. It took a moment, but eventually we got the foil into place according to plan.


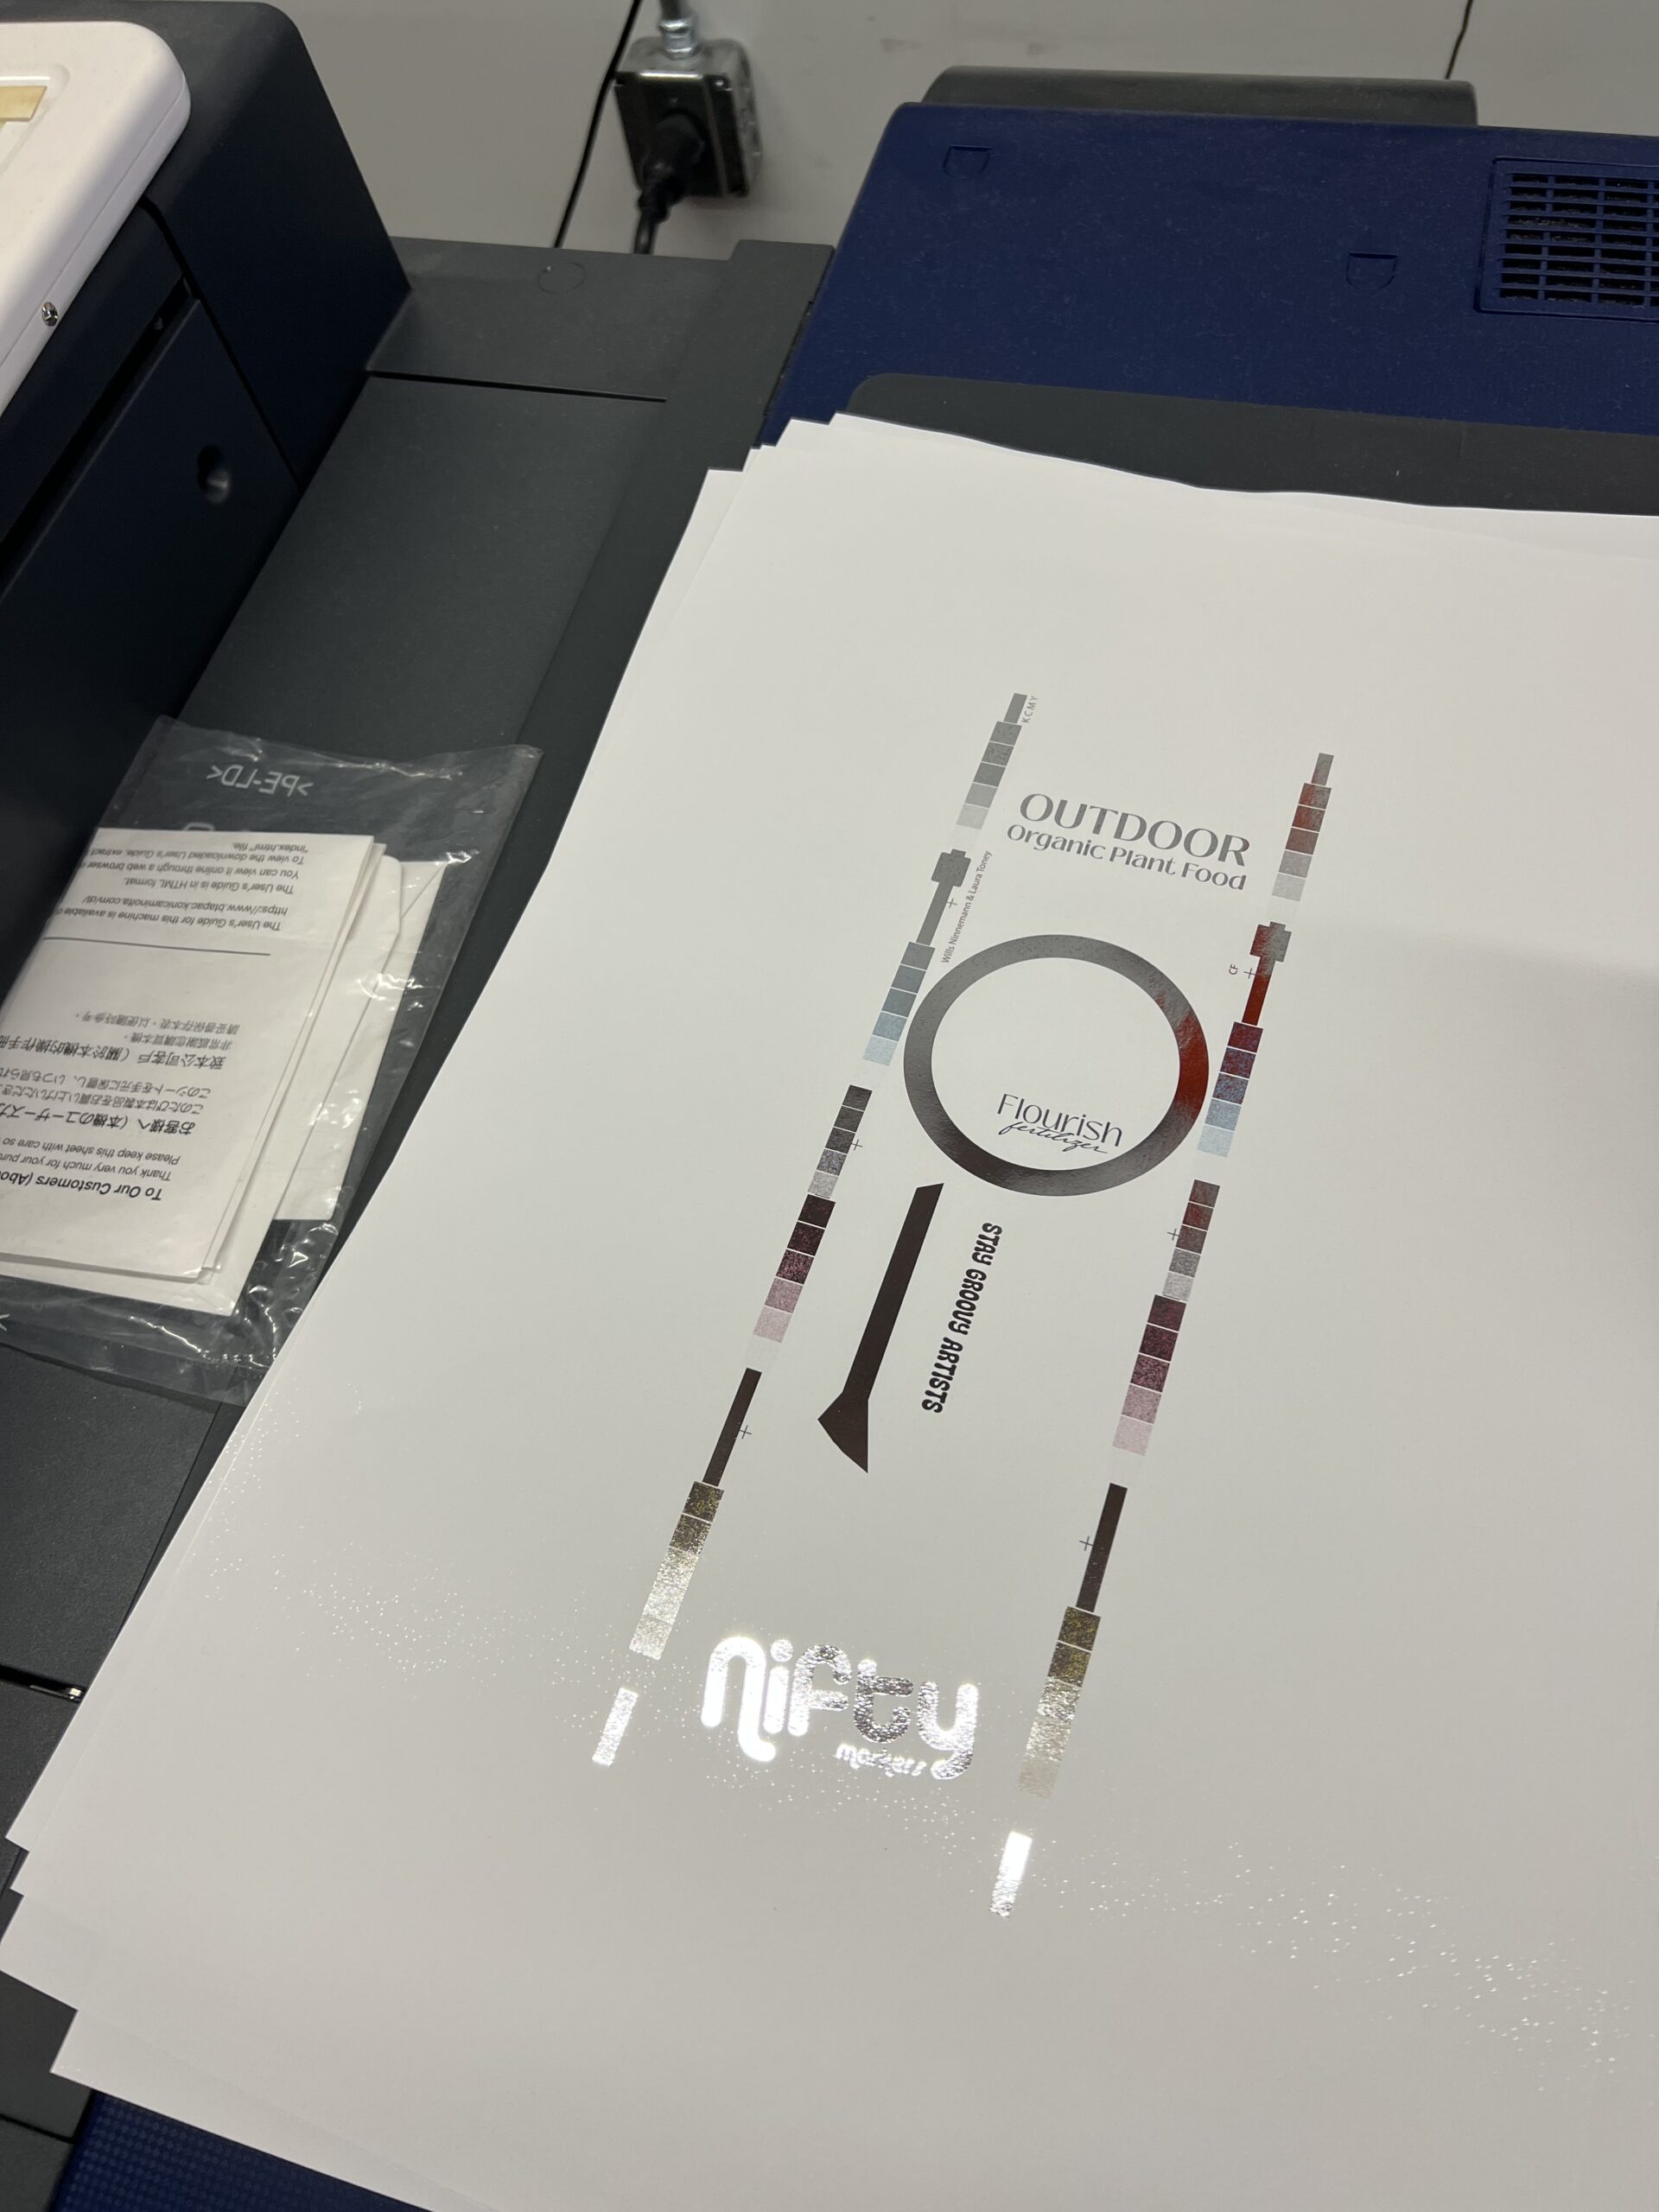
After each of the CMYK inks, as well as the adhesive and foil were in correct registration and impression, we were able to run the Nilpeter press at a quicker speed to produce our sample stickers. Usually there would be the circle die cut as an inline finishing component of the labels to cut them into individual circles. There was an issue in the lab and therefore that finishing option wasn’t available at the time. Instead, the stickers were collected and would be die cut at a later date. The stickers turned out great! I think the parts that made our stickers very successful was our solid smart designs in combination with the precision in our plate mounting! I am very excited with how these turned out!

The Final Product
This here shows final sample taken from the Comco press. My three color label was extremely successful through and through. I think if I could have changed anything from the process I would have been more familiar with the preflight process in ArtPro+, since that area I needed a lot of assistance in. Other than that, I think that I was well educated and well equipped to be successful in this assignment and that showed in the final product for sure.


Hit “play” on the videos below to see the process on press!

Use the left and right arrows to scroll through some images of the process!